• Welcome to Overclockers Forums! Join us to reply in threads, receive reduced ads, and to customize your site experience!

Project: Metal Slug

Overclockers is supported by our readers. When you click a link to make a purchase, we may earn a commission. Learn More.
Captain Slug said:
Well, we all have our crappy days and ways of dealing with them. Mine was to bake a cake, because my poison is sugar (and lots of it).
0048.jpg
I'm going to hazard a guess that this is the first project log to include a matching themed cake...

Slug you should post a tutorial on how to make that cake :drool:

LOL

Great project by the way :thup:
 
Currently working on setting up the water-cooling loop and testing it for the first time.
RedDragonXXX said:
Slug you should post a tutorial on how to make that cake :drool:
Step One: Follow cake mix directions Mixing by hand using a rubber spatula will produce the best texture.
Step Two: Put freshly baked cake(s) in freezer for 3 hours covered in wax paper. This will seal in all the moisture and harden the cake and allow you to ice the cake MUCH more easily later.
Step Three: Melt one and one-half or two tubs of icing in the microwave until they are the consistency of whipped cream.
Step Four: Remove the frozen cakes from freezer and remove them from their pans.
Step Five: Using a butter knife or icing knife ice the top of the bottom layer cake, stack the next layer onto that icing layer, then ice the outside of the cake from the center outwards.
 
You forgot the most important step.... puting the cake in your throat hole and moving your mouth in an up and down motion!
 
Maviryk said:
You forgot the most important step.... puting the cake in your throat hole and moving your mouth in an up and down motion!

Someone has watched little nicky a bit much. lol.

I can't cook, but i make a mean browney!!
 
Hmm, that maze4 looks familiar. :) Glad to see it being put to good use. I am really interested to see how this one turns out. Great job as always Captain. On a side note. The H box in the illustration on the first post was for the high powered rifle thingy in Metal Slug wasn't it?
 
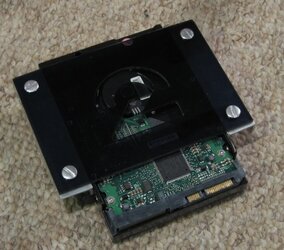
Borrowing a HDD bracket from an old project.
0056.jpg
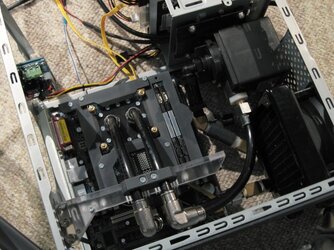
Loop attempt number one. Had a small leak inbetween the GPU block and radiator because the length I cut was too short.
0057.jpg
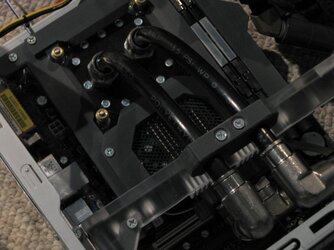
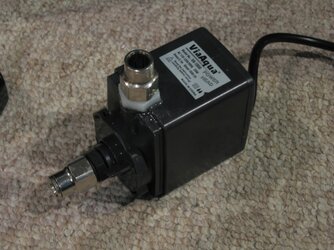
Loop attempt number two. Had a small leak on the pump outlet NPT adapter. Worked on correcting it. Also small leak on lower barb on radiator because I didn't tighten it enough.
0058.jpg
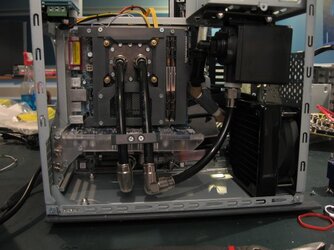
Loop attempt number three. Still have pump outlet leak so after dinner I'm going to go to Home Depot and get some RTV Sealant.
0059.jpg
I'm VERY please with where everything is on the loop. Leaks in both the filling orientation and the standing position haven't touched any of the computer hardware. It has also been easy to bleed and refill (which can be attested to by the fact that I've done it three times in 4 hours). Once I get this last leak fixed I should be ready to send off all the steel parts to be powder-coated.
Sephis said:
The H box in the illustration on the first post was for the high powered rifle thingy in Metal Slug wasn't it?
Heavy Machine Gun actually.
 
Leak-tested the pump in the bathroom sink. The epoxy sealant did its job.
I was going to do other stuff today but my arms hurt and I keep dropping things so it will have to wait until Monday
 
Last edited:
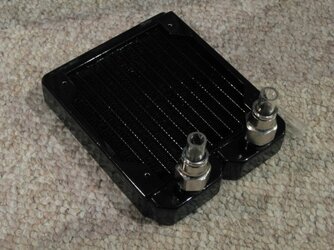
Did quite a bit of tinkering with the loop Saturday night (despite my hands being crampy lumps of meat) and discovered a better location for the Tee. I also swippy-swapped the locations of the radiator and its fan so that I can use the instant-tube fittings on the radiator. No more brass elbows :clap:

The radiator with the fittings installed. Those short lengths of polyester tube that I cut and smoothed will allow me to use 1/2" ID PVC tubing for two connections that are a little too fiddly to make with polyethylene tubing.
0060.jpg
And here's the pump all fixed. The epoxy sealant on the outlet worked perfectly. And I made a threading adapter for the outlet using a left-over 1/2" barb to 1/2" NPT so that I can use an instant-tube fitting there as well.
0061.jpg
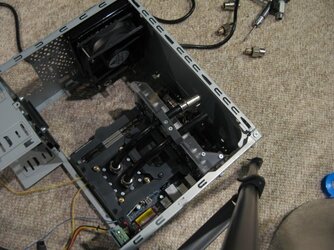
And here's the bigger change. The Tee will now be going into this corner of the case. Connected to two swivel fittings it will go inbetween the CPU block and the pump inlet.
0062.jpg
This will allow me to more easily fill the loop and tip in several directions while the loop is bleeding. I can fill the loop with the case up-side-down and drain it when it's right-side-up. It will also make the loop a good deal cleaner so I can have the case entirely devoid of visible brass parts.
Just have to wait for more parts to come in the mail...
 
No, I'm using a PVC 1/4" NPT Female Tee with two swivel fittings and the drain valve. The swivels will allow me to orient the drain valve in whatever direction I want so that I can keep the filling cup upright while bleeding, then tip it out to empty it after closing off the valve.
 
Remade the power cord because I wasn't happy with the huge 14awg yellow appliance cord. So instead I braided 3 14awg wires and covered them with heatshrink.
0063.jpg
 
laserkitty said:
You made your own power cord. Dang. Just...dang.
It's not hard to make your own power cord and I've done it before for other projects.
If you want to make your own you need a NEMA 5-15P connector (the 3-prong to go into your wall outlet), and an IEC 320 C13 power plug (to go in your PSU). Then use 14awg wire or a multi-conductor cable.
You can get NEMA 5-15P connectors from almost any store that carries electrical supplies, even Home Depot has them. IEC 320 C13 power plug will have to be ordered from electronics supply companies like Mouser or Digikey.
You will also need a multimeter so that you can be sure you're made your new cable so that it's wired identically to a standard PSU cable.
 
Last edited:
Back