• Welcome to Overclockers Forums! Join us to reply in threads, receive reduced ads, and to customize your site experience!

Wood case for garden

Overclockers is supported by our readers. When you click a link to make a purchase, we may earn a commission. Learn More.

mackerel

Member
Joined
Mar 7, 2008
My airflow question in the other thread seem to have got some interest and I can now reveal my plans as major parts have arrived.

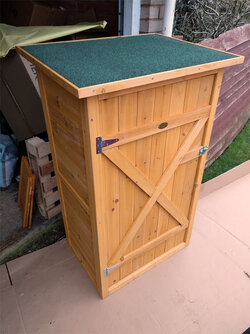
IMG_20180227_122014.jpg

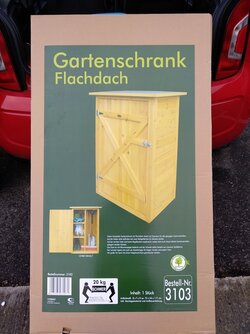
This is the "case", or will be once it is suitably modified. Yes, it's a wooden outdoor storage thing. The aim of this is to have somewhere to put some of my compute resource where I can dump the heat without burning up my house. Reviews of this seem mixed, so my first stage will be to assemble it and evaluate it for its strength and water resistance. I'll add a seal around the door as necessary. I will raise it so it wont sit directly on the ground.

I do have white outdoor paint already on hand from past house decorating which will improve water resistance, and may help to reflect sunlight also.

I have thoughts on getting power to it already, although networking is more open for now.

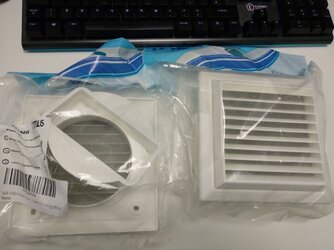
IMG_20180227_122339.jpg

And these are the vents I've got. The aperture is about 100mm across, and you can see a coarse mesh filter in there. I will add a finer filter elsewhere on the intakes only. I will reuse existing 120 or 140mm fans, will decide once I get a chance to see how it fits in practice. As not indoors I can likely run them flat out.

I estimate the above could be about a weekends worth of work between other things, so not planning on getting a system in there immediately.
 
Sub'd. I've considered building an outdoor radiator box for year round fun. Interested to see how she turns out.
 
If I lived in the northeast/west I'd consider an outdoor Rad setup. Where I live, however, it would kill my system in the summer :(
 
Subbed fer shur, dude. Are you putting just the radiators in there or your whole rig(s)? I would think the cooler months would be a problem with condensation. Concentrating heat in a sealed wooden shack in the winter is what Scandinavians call a "sauna". :D
 
But cool damp air on heat producing parts is the recipe for moisture. Drawing said air over those parts will turn it in to a swamp. In their own sealed section, with a dehumidifier of sorts, while leaving the rads out in the cold section, is the only solution I see. Disclaimer: My inability to see other options doesn't negate the possibility at all. My back is out again and muscle relaxers don't help the thought process. LOL
 
But cool damp air on heat producing parts is the recipe for moisture. Drawing said air over those parts will turn it in to a swamp. In their own sealed section, with a dehumidifier of sorts, while leaving the rads out in the cold section, is the only solution I see. Disclaimer: My inability to see other options doesn't negate the possibility at all. My back is out again and muscle relaxers don't help the thought process. LOL

Other way around. Warm moist air hitting a cooler surface will condense out. Here, I'll have cool air which when heated will become hot dry air regardless of original moisture content. As long as the kit is running, it'll be above ambient and not a concern.
 
Other way around. Warm moist air hitting a cooler surface will condense out. Here, I'll have cool air which when heated will become hot dry air regardless of original moisture content. As long as the kit is running, it'll be above ambient and not a concern.

I thought temp differential and humidity would be the culprit regardless. I thought making the air drier (extracting the water) would leave condensate on the components. I'm gonna fall back on this...
My back is out again and muscle relaxers don't help the thought process. LOL
 
You could also go Geothermal and bury the Rad/Heat Exchanger deep enough under ground that you're below the frost line. Then just let conduction do the job. I think the "ambient" temp here in Memphis below the frost line (~35") is between 60° - 62°F year round. Only thing you'd need to do then is insulate the supply/return lines as they rise up from the heat exchanger to your house.
 
Why not install PC inside and run cables?

I think that's the plan. Only things I would note here is make sure your graphics card has the horsepower to push a signal x feet to display(s), and an active USB cable to the USB hub. Past 5 or 6 feet the USB signals will degrade. I just had to return a 16 ft. HDMI cable because it wouldn't get the 1080p signal to the monitor.
 
I considered ground cooling in the past, but for the purposes of this project, everything will be air cooled for simplicity and flexibility.

As it will be compute nodes, there are no plans to have a display on any of this. It will run headless.
 
just extend the top overhang a good bit and that will keep the rain out.
The problem will be rodents and insects.
 
woodc1.jpg

Step 1 complete - assembling the thing as supplied. Looks pretty much like the picture on the box. It was as simple as screwing it together. Holes were pre-drilled on some pieces, and self tapped into the other part.

The lid came as a single pre-assembled piece, and overhangs all the sides by a couple inches or so. The wood has been treated with some kind of preservative, and is quite pungent. Now assembled I'll leave it in my garage until the next step, and maybe the smell will die down a bit. I'm also wondering if that treatment will give me trouble if I want to paint over it?


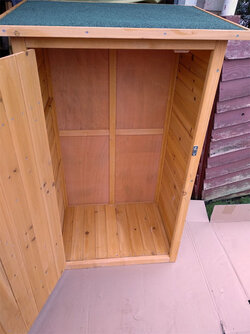
woodc2.jpg

I didn't fit the supplied inner shelves as I intend to put in my own layout later, once I decided what that will be. There is a good amount of space in there. It could use a little more strength as it flexes a bit in a left-right direction as pictured. Hopefully once I put in shelves that'll make it more rigid.


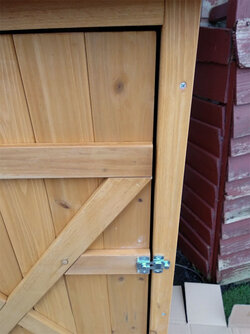
woodc3.jpg

Overall it isn't as bad as it could be, but it is nothing special for the price. The front door was always going to be interesting. The hinge side is tight up to the side, but the other 3 sides of the door have quite a gap. I'm thinking of putting in an extra piece of wood inside such that the door can seal to that when closed.
 
woodc4.jpg

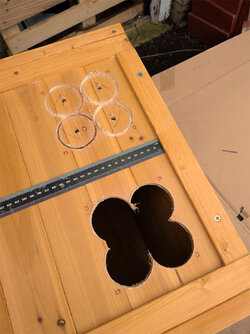
Drilling the vent holes... I'm using a cordless drill with a hole cutter. Suffice to say, the battery didn't last long. I only did the first set and marked out the 2nd.


woodc5.jpg


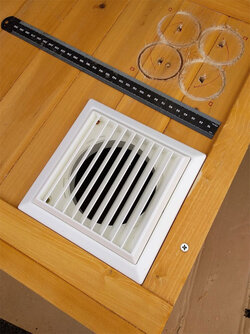
After filing out the remaining wood a bit, here's a test fitment. The vents also have a mesh filter which is not fitted for now.


woodc6.jpg

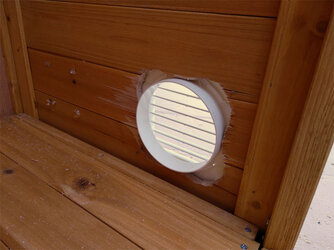
And the view from the inside.


I got the drill battery pack on charge now and maybe will do a 2nd set today. Maybe I should get a 2nd pack. The location I'm working at isn't near power.
 
Back