• Welcome to Overclockers Forums! Join us to reply in threads, receive reduced ads, and to customize your site experience!

Woody! Project

Overclockers is supported by our readers. When you click a link to make a purchase, we may earn a commission. Learn More.

Dukeman

Member
Joined
Jul 7, 2004
Location
Rocky Mountian High
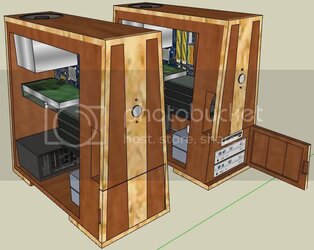
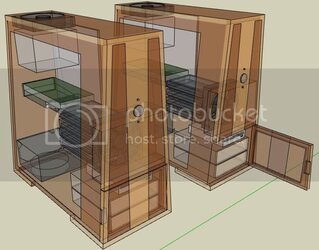
I like my Antec SLK3000B but it is a bit on the utilitarian side so I've decided to build a wood PC case over the fall. I've been playing with SketchUp and have finally settled on this (of course the wife has veto power on the design as it will be in the kitchen). What do you think?

Wood will be Cherry or something stained in a nice (not too red) cherry stain with a light veneer accent. Possibly maple or a light burreled? walnut.
woodpc2.jpg

Air flow will be from the bottom and out for the PSU. The graphics card will have an AC NV Silencer, the drives will get cooling from the side ducts which will also be the main air intake. The top fan will expel hot air from the HSF.
woodpc1.jpg
 
That will be tight. It will look like an ordinary kitchen decoration but have alot more power than your ordinary microwave, lol. What kind of wood do you plan to use. I will definately keep an eye on this, good luck.
 
I like the door for the optical drives.

It would be even cooler if you got some slot loaded ones and just cut slots in the wood though.

If you keep your door the same way, I would suggest painting the drive bezels in a way to make them look like wood. I'm not quite sure how its done, but my dad did it to a metal door and it looks pretty real. I think it has something to do with dabbing on different wood colored paints. Whatever, either you know what I'm talking about or you don't.

If you are interested i can post a picture tomorrow...
 
Actually I was thinking of getting some of the vinyl veneer use on low cost furniture and use that to mask the drive bezels. The faux finish is also an option.
 
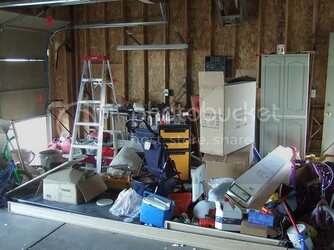
Been slow to move on this. I've been playing with the design and have changed out the door to a simpler design. I've also been planning the material involved and cleaning my garage, which had been declared a federal disaster area.

The materials will be:
- 4x4' sheet of 1/2" Birch veneered plywood A2 cabinet quality
- 2x2' sheet of 1/4" Birch veneered plywood A2 cabinet quality
- Maple veneer sheet
- Lian-Li removable motherboard tray assembly
- 2x Chrome 120 MM fans
- Chrome cable sleeving or loom
- A bunch of while LEDs for interior lighting and to make it float on light

Before I can get started I need to get a table saw and a few other tools I don't currently have. Once I have those in place (and the garage spic and span) I'll begin work with lots of pics.
 
Now I Can Begin

Well, this thread is resurected because I can actually start. The project was delayed because I couldn't find a space big enough to work in in the garage.

garagebefore.jpg

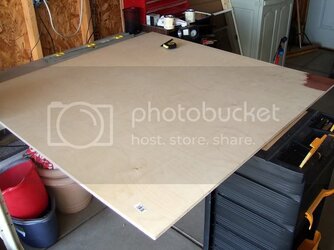
Now its clean and I've started work. I bought a 4'x4' sheet of birch plywood and some water based stain. One corner is stained as a test of the rosewood stain, just couldn't wait!

wdy_prj001.jpg

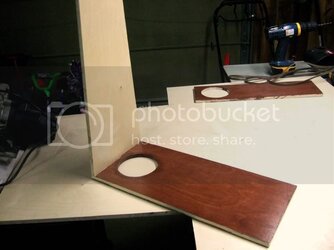
I started with the bottom piece which will provide a vent for the psu. I use CD's to trace a circles for cutting holes for 120mm fans.

wdy_prj007.jpg

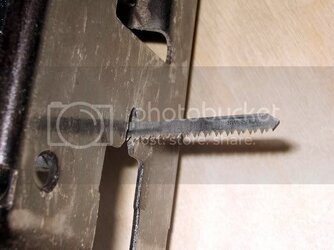
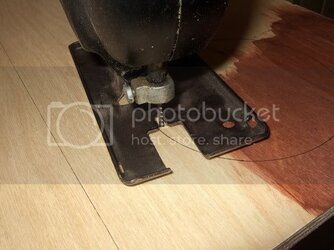
Plywood will splinter easily unless you use a fine tooth blade. This blade is fine toothed and about half the width of normal blades so it can turn much easier.

wdy_prj002.jpg

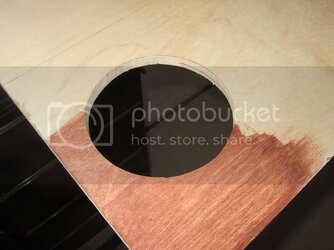
wdy_prj003.jpg

The end result is nicely round and only needs a little filing and sanding to finish it off.

wdy_prj004.jpg
 
I'm using a water based stain because from what I've read online water based stains work best with birch. The prestain conditioner is supposed to even out the stain color but I didn't find that it made much of a difference.
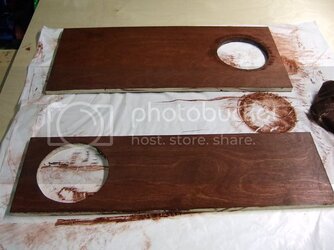
wdy_prj005.jpg

Here I decided to stain the top and bottom plates. The dark, streaky area around the vent hole on the upper piece is because the stain ran down the sides of vent hole and then was wicked under the wood by the plastic sheet. I didn't know this until it had dried. Good thing that is the bottom of the case.

wdy_prj008.jpg

Here I've attached the back plate to the bottom plate. I originally was going to use a Lian-LI removable motherboard tray, but now I'm thinking about just scavenging a back panel for PCI cards and building a motherboard tray out of wood.

wdy_prj012.jpg
 
looks great normally i dont really like wooden cases but this looks fantastic, and why are you guys all so great at sketchup! :( i can make a box
 
Thanks.

For Sketchup use the tutorials and import models you may need from online. I drew the box, but the components came from online models.
 
I'm doing it a little at a time each night. This was a few nights of work in my last post. However, response on the forums tends to fuel my work :burn:

Plus even though I've had HL2 since it came out, I just started playing CS:S and it's proving to be addictive. Hard to break away sometimes and work on the case.
 
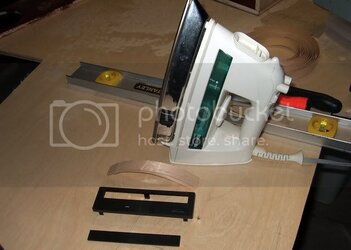
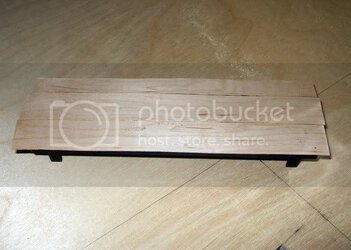
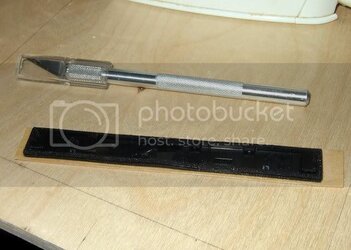
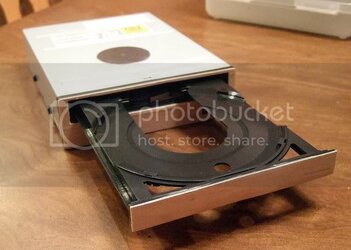
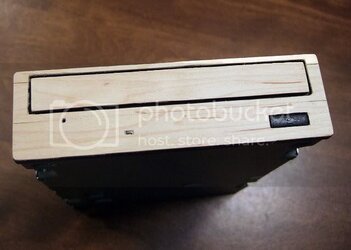
I decided to try to reface the Optical drives with iron-on birch veneer trim. Once it was attached I trimmed it using an Exact-o knive. Trimming takes some time as you can't just cut through the veneer in one cut. When ironing the veneer on only keep the iron on the wood for about 5 seconds. Longer than this may soften the plastic and warp it. I held it too long and the part that covers the sliding tray warped. It was real fun putting back on.:-/

wdy_prj015.jpg
wdy_prj017.jpg
wdy_prj016.jpg
wdy_prj018.jpg

Still need to get some wood putty to fill the gaps and I will use polyurethane to finish it natural.
wdy_prj019.jpg
 
Last edited:
Well its nice to see that I am not the only one daring enough to make a wooden case (Project custom wood case II- Danger Den). Sketchup really is so wonderful and time saving (not to mention mistake saving). I like the veneer for the drives, provided that it stays on in the long run. I don't know how you are planning on joining your corners, but using mortise and tenon joints, if you have access to a plunge router, really make for very strong joints. That is what I used on my case.

How are you going to cover up the plywood edges so that they don't show? It is because of this and routing the edges to make them curved that I used solid wood on mine.

And the one other question that comes to mind is how you plan on routing your wiring. I can tell you from having made two cases that not planning wiring routing when you are designing the case will result in a mess. On the case I just finished and am currently moving into, I really planned out how I was going to route and hide wiring and it really has paid off.

Keep up the good work and keep posting pics!
 
Thanks. You case looks very nice and I like the tricks of the scroll saw cut fan grill and using plexy for mounting the back pieces.

The glue on the veneer is really sticky so I don't think it will be a problem. I'm just using glue and brads since it isn't going to lan parties to join the wood. I plan on trying to minimize exposed edges of the plywood and then using the birch veneer to cover the edges. I hope to use most of the exposed/veneered edges as decoration by leaving them natural. But i think I will stain the drive veneer dark since I don't like the black and natural contrast.

I have a basic idea of wire routing in my head. I've rerouted wires in so many cases that I think it will come together nicely. Thanks for the heads up though.
 
Last edited:
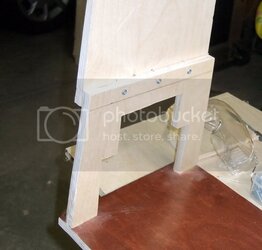
On your corners, instead of just using brad nails, particularly on the bottom where it doesn't show, you could use drywall screws coming up from the bottom into the sides instead. That along with glue should be sturdy.

As for the veneer, I just didn't know how well it would stick to plastic as it normally is used to veneer over wood. I like the way it looks on your drive.

Its good to hear you have thought about the wiring. I am using a modular Antec PSU in this new case and I must say that the modular wiring is wonderful. It really cuts down on the unneccesary spaghetti of unused wiring. Hopefully I can get the watercooling installed and get it back up and running this weekend.
 
More Pics!

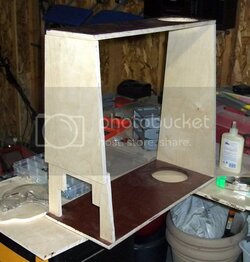
Well I cut the front pieces and put them together. The lower piece will be the bezel for the drives and is receded to allow a door to be installed. The upper piece will pretty much stay the same. The next steps will be to shape the front so it is perfect for fitting the drives and front door.
wdy_prj020.jpg
wdy_prj021.jpg
 
Back