• Welcome to Overclockers Forums! Join us to reply in threads, receive reduced ads, and to customize your site experience!

DeepCool gammax 400 air cooler... what the duck

Overclockers is supported by our readers. When you click a link to make a purchase, we may earn a commission. Learn More.

whalejuice

Registered
Joined
Dec 16, 2015
started a new build today over the past few months i have slowly been snagging deals to build a micro atx media/gaming/what ever rig
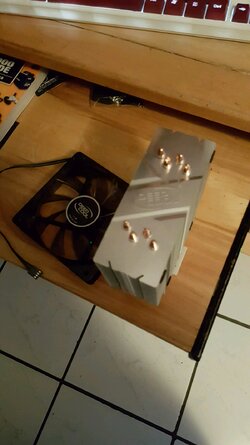
got a pretty sweet deal on what seems a decent cooler. the gammax400 comes with a single fan and extra mounting clips for an additional fan for push pull.
since i am only using an 95w athlon i figured a single fan should be plenty (pc specs below) apon further inspection of the cooler i could not help but notice
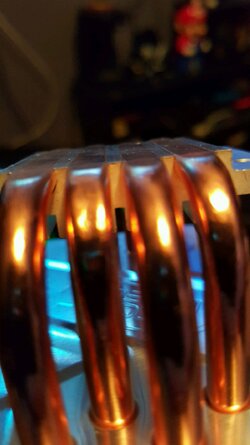
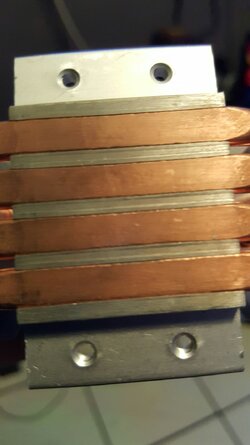
the absolute **** quality of the base plate that comes incontact with the cpu heat spreader. the copper heat pipes are worked into the base and the surface of
the plate with the pipes is very un-even, rough, and not aligned properly. but as that may be i figured no company would be that blind and produce or let somthing
go into production like that so i gave it ago i used artic silver thermal paste as i do on all my builds. fired up the comp into bios and what a shocker cpu is at 61c !!
made me laugh at first as i shut it down. i took the cooler off to inspect the paste and see how it spread and the paste was having trouble spreading past the gaps
between the pipes and aluminum base. i dont know if this is a common problem with deepcool products. but for the meantime i threw the **** stocker heatsink that
Amd provides(even used the pre applied thermal paste) fired the comp back into bios and the cpu is siting at a cool 31c. which once again gave me a good laugh

pc specs!!!
amd athlon 95w 860k
asus fm2 motherboard
thermaltake v21 case
asus r7 370 strix
evga 500w psu
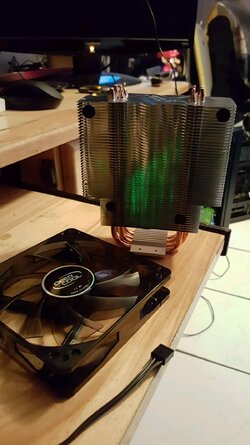
 
Are you sure your mount was solid? I don't see anything wrong with it from your pictures.
 
Yes sir :) tried it 3 time just incase. And yes it is hard to see in the photos but the copper pipes actually sit higher then aluminum so when the cooler is flat down they actually don't even touch the heat spreader. And the gaps between the pipe actually stop the paste from spreading
 
And yes it is hard to see in the photos but the copper pipes actually sit higher then aluminum so when the cooler is flat down they actually don't even touch the heat spreader. And the gaps between the pipe actually stop the paste from spreading
I see no difference between this and the CM 212 in construction quality.
What I do for the direct contact bases like that is 'butter' the entire contact surface of the HS with TIM to fill all the gaps. I have no issues. It takes much more TIM for those bases than a normal HS. The dot method isn't enough.

I agree with Mr.Scott, although I don't normally use a HS with a base like that,
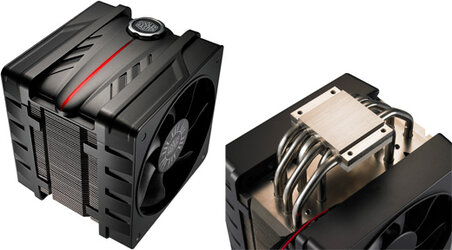
I use this:
cooler-master-v6gt-il.jpg
 
In my 3 attempts I did try the old drywall spackle technique and it was more effective then letting the pressure of the cooler spread the paste. But even then the cpu would still rise up to about 55-58c at idle. I have a plan for the cooler later when I have time I figure it's a paper weight atm. I'm going to measure the gaps with a straight edge and feeler gauges. And then I will level and Polish the base. I'll try to take more photos better showing the issues I'm referring too.
 
I have a plan for the cooler later when I have time I figure it's a paper weight atm. I'm going to measure the gaps with a straight edge and feeler gauges. And then I will level and Polish the base.
Lapping the base on an exposed heatpipe cooler is a bad idea. The copper heatpipes are very thin. If you lose the vacuum in them you can throw it away.
 
The pipes sit higher then the aluminum so when I'll be doing is removing material from the aluminum base to match the pipes as of right now the pipes don't even make contact with the heat spreader.
 
The pipes sit higher then the aluminum so when I'll be doing is removing material from the aluminum base to match the pipes as of right now the pipes don't even make contact with the heat spreader.
That's not what I see in your pic. I see the copper making first contact.
 
It appears that way ses but it is the opposite I assure you. If you would like when I get home I shall take another photo with a straight edge and show a light gap between the pipes and edge.
 
And regardless of what it looks like or not the fact of the matter is this cooler is definitely wonky. You should not have to fill gaps in the base. Use extra thermal compound. Spread it "like butter". To make up for poor quality control from the manufacturer. But if anyone else has any shade tree ideas for let me know:)
 
Nothing else we can tell you that will make a bit of a difference in mounting that sink. Your best bet would be to return it and get a different sink.
 
And regardless of what it looks like or not the fact of the matter is this cooler is definitely wonky. You should not have to fill gaps in the base. Use extra thermal compound. Spread it "like butter". To make up for poor quality control from the manufacturer.
Manufacturer means nothing. ALL of the direct contact heatpipe coolers are like that. I've reviewed quite a few so I'm not unfamiliar.
Matter of fact, CM TELLS you in the mounting instructions to fill all the gaps, wipe it off, re-paste and mount as you normally would.
 
I have the stocker on now it's doing fine. But I'm keeping the cooler. Like I said I'm going to see if I can "fix" it ahaha :) if all else fails I don't care about losing the cooler it will be fun and might even learn somthing.
 
Here's my plan. I'm going to heat the base and solder the joints. Gaps. And pits between the pipes and plate. And then I'm going to work my way through fine grits of water stones until the base and plate and polished. :D. Don't see why it shouldn't work I've done this sorta thing before at work. And I'm pretty Damm good with a pen torch:p
 
That's what I have heard. We shall see what happens I'll post some pics win or fail if anyone is interested in this sorta hackjobery
 
Yes sir :) tried it 3 time just incase. And yes it is hard to see in the photos but the copper pipes actually sit higher then aluminum so when the cooler is flat down they actually don't even touch the heat spreader. And the gaps between the pipe actually stop the paste from spreading

you can try to put a ruler on top of the base to get an image of how flat it actually is (a razor would be better)
something like this:
basep.jpg


I had something similar with your issue in the past (I think mine was a xigmatek S1284 or an achilles)
sanding the base solved the issue for me.
but yeah, be extra careful if you plan to do it on a HDT
 
Here's my plan. I'm going to heat the base and solder the joints. Gaps. And pits between the pipes and plate. And then I'm going to work my way through fine grits of water stones until the base and plate and polished. :D. Don't see why it shouldn't work I've done this sorta thing before at work. And I'm pretty Damm good with a pen torch:p

What is the thermal conductivity of solder? I would think adding it to the base would be a bad idea.

If I were you I would just return the cooler or rma it. Trying to Frankenstein some old part you find in your parts bin can be fun, but this is brand new and at best your will probably end up at below average performance.
 
Back