• Welcome to Overclockers Forums! Join us to reply in threads, receive reduced ads, and to customize your site experience!

super-ambitious first-time custom loop; need advice

Overclockers is supported by our readers. When you click a link to make a purchase, we may earn a commission. Learn More.

netspyder

Registered
Joined
Sep 30, 2018
Hi all! I'm planning to build myself a computer desk, with all of the parts mounted under glass inside it. After the aftermarket arctic gpu closed loop cooler developed a bubble in the pump and toasted my r290, I decided it was time to take matters into my own hands and build my own custom loop. Then a coworker mentioned that folks have built this kind of thing, and sent me some youtube links... I mean, I like my define r5 and all, but no tower seems like a way better solution. Plus, they look really cool.

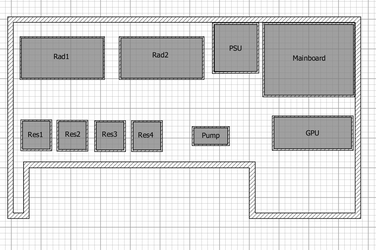
Anyway, I spent the better part of September researching what's needed, parts, power, and other juicy tidbits to put it all together, and I've hit a small snag. I can't seem to find reservoirs to fit what i want to do. I was planning to do a "silo" approach with short vertical tube reservoirs, but the widest I've found is 80mm from koolance, and those would still be too tall for me to remote a fill tube outside the 'case'. Here's a mock-up of the component layout. The desk will be 22"x46" when finished.
draft 1.png
Rads will be 140x280, pump will be dual d5's mounted to a single top, and i already have blocks for the cpu/mosfets and gpu.

So, I'm looking for (maybe) 120mm wide reservoirs, and I need to know if the pump should be 'gravity-fed'. Can I put a fill tube anywhere in the loop, or should it feed directly into the res? It just seems to me that mounting the res horizontally would make draining the system an ordeal.
 
I don’t think you need that many reservoirs or radiators. Maybe you might consider one of each for the cpu and gpu but from what I understand that isn’t a strict requirement.

Also your placements of the gear is off. The PSU will most likely end up on the bottom left of your diagram and your main board will be on the top left with your gpu somewhere in between. The reason for this is so you get your connectors on the back. Your radiators can go in the front taking up the typical intake position or be front facing. You can put fans on the top for exhaust and probably put the second radiator up there.

Have you got an idea of what parts you want for your machine yet?
 
i've read that one 280 rad won't be 'enough' to cool both the gpu and cpu, hence the two rads. as for the reservoirs, i mostly wanted to fill the space. the top will be tempered glass, so there'll be no cutting fans into it. i plan to use 1x4's for the walls of it, so that only gives me ... 90mm or so of height on the inside, so i won't be able to stand the rads up on their sides; i'll have to vent them out the bottom. i agree that i might need to shuffle the components though... hey, can i put the rads apart from each other.. like res -> pump -> rad -> cpu -> gpu ->rad -> res, or would that make the second rad kinda useless?

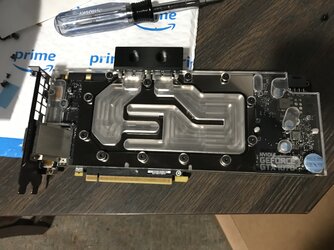
i'm going to use my current rig for the parts for this build -- the cooling alone will cost me a grand or so, which isn't going to leave much for new goodies. this one's only a year or two old, and it'll play any new game i throw at it still. i picked up a full cover cooler for my gpu and an ek monoblock for my mainboard, so i'm excited about seeing those in action. if i have anything left over, i might just pick up a ram block as well.
 
thanks for the links to those! do you know if the barrowch can be mounted on its side? looks like it has plenty of access holes...
 
yw, no it doesnt have any mounting holes on the side. it has a bazillion on the back. im sure there are ways to make a mounting bracket that would allow it to mount sideways tho.
 
As a retired master carpenter I've seen many of these desk computer projects on the internet, but never desired to actually build one, as the long term upkeep of it is just IMO not worth the endeavor.

Plus unfortunately there's always the learn as you go factor that comes into play, meaning you learn what you should have done in the build, but didn't.

Which is: The learn the hard way aspect of any project you undertake, no matter how well you plan it out.

Good luck to you! SS
 
Last edited:
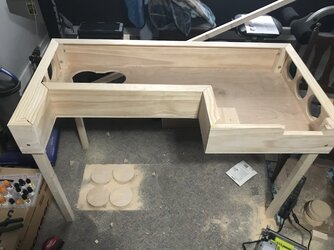
it's a beautiful thing; when all the holes line up on the first try. IMG_0337.jpg
 
well, moving along...my home office has become a workshop, but it's taking shape. IMG_0495.jpg
 
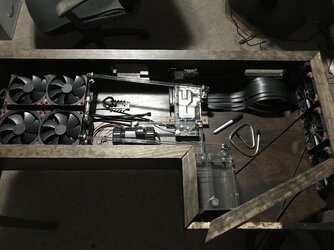
well, my father would be proud... it seems i'm carrying on his 'wood butcher' legacy. nonetheless, it's moving forward, and i'm pleased with it so far. i'm ready for the bits from my current rig -- can't take those until march though. here's what it looks like this evening... i'd prefer more symmetry with the piping, but i'm afraid i'll run out of fittings. i do have plenty of pipe if i decide to change it up. IMG_0519.jpg IMG_0518.jpg
 
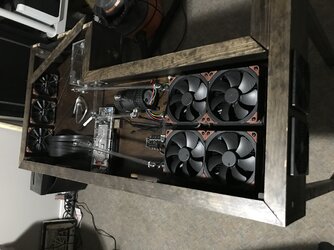
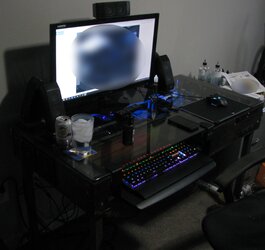
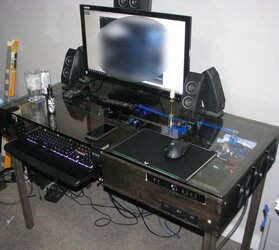
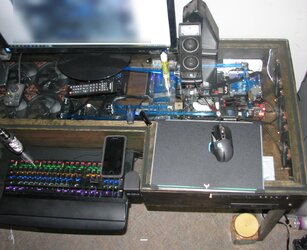
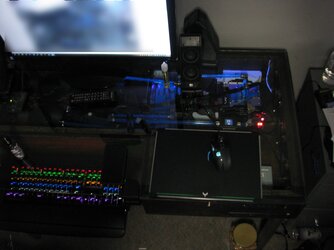
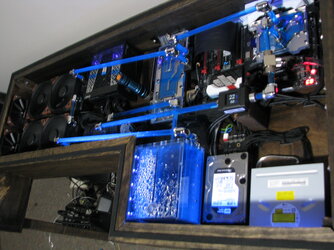
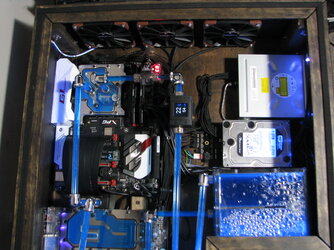
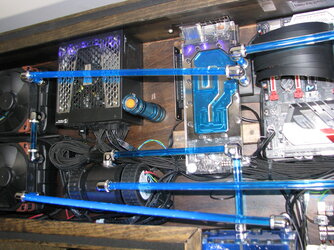
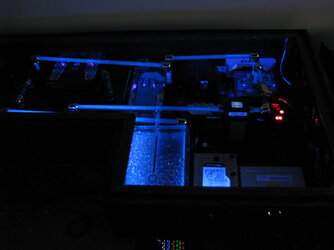
FINALLY nearing completion -- i'm just still waiting on cablemod to send me the ridiculous length cables i need for sata, cpu, and atx power to make it somewhat 'pretty-fied'. here's some pics of my build... IMG_5290.JPG IMG_5294.JPG IMG_5295.JPG IMG_5297.JPG
 
That's dope as hell! Now to start tipping it to bleed the air out hahahahahahahaha
 
so, at this point i have some spare parts, if anyone is interested in them. all i ask is that you pay the shipping on them. here's what i have laying around...
xfx radeon r9 290 4gb card (R9-290A-EDFD) with an nzxt bracket and corsair h55 aio (original cooler gone some... 3 years ago)
corsair h115i aio cooler (fans make a bit of noise from time to time)
fractal design define R5 blackout (missing the front panel -- had to scavenge that for the front i/o on this build)
 
just dropping these last few pics here -- finally done completely with this (took cablemod forever to get me these). IMG_5299.JPG IMG_5300.JPG IMG_5302.JPG IMG_5305.JPG
 
Back