• Welcome to Overclockers Forums! Join us to reply in threads, receive reduced ads, and to customize your site experience!

the COLDBANGER project (my pretty custom case)!

Overclockers is supported by our readers. When you click a link to make a purchase, we may earn a commission. Learn More.
New additions!! SLI!!!

Hey all. Long time since I've posted here. Box is still running good as new, and stable as ever! (Just a little dustier now)!

Just finished ordering all the parts to add SLI to this baby! Took me a while to find an additional water block as Koolance does not stock them any more (should have just bought two from the begging, but oh well), was getting nervous I wouldn't find one there for a while.

Got a matching GPU and some extra tubing, wiring, connectors, etc on the way right now. Should have all the parts here within the next few days I'm hoping!

Am going to get started on the sanding of the GPU block to match the existing since I already have that in hand.

I was originally going to use any winnings from CPU mag to do this in the future, but it seems holding my breath on them is not working ;( there must be a tough competition out there for them I guess. I did hear back from them this summer that I was in the running, but haven't seen anything yet. We'll see I guess.

Eventually, to complete the ensemble, I'll add two additional 3D monitors to go with my current one and put them all on a nice monitor stand http://www.cotytech.com/content-pro...987/triple_monitor_desk_mount_triple_arm.html

I'm also going to be building a new desk this spring to add the finishing touch. It will be a corner desk to fit into my new office. Should be pretty slick once all done.

Doing this mostly for more screen real estate (which I could use every inch of for work). It will add a nice effect for gaming I presume as well.

I'll post pics as I have them (as always).

STAY TUNED!!

:)
 
VERY VERY VERY VERY NICE BUILD! can't wait to see the SLi when complete. Some of the first pics of the finished wood reminded me of when I built a guitar. I want to build a custom case, but I don't know if I have the patience for it.
 
Lots of patience and lots of CDO (the correct order the letters should be in for the otherwise-more-commonly referred to term "OCD"), are the main ingredients for a case build from scratch to work.

;)

I'll be posting new pics once I'm fully done with the upgrades. Upgrading the motherboard to the FTW version, trying to get 8gb of RAM to boot w my current overclock and I gotta drill a new hole in my shelf to accommodate the power wiring for my second GTX 460.

After this is all done, I'm going to be cleaning it really well and having professional pics taken of it to then re-submit to computer power user mag.

The mobo should be here any day.

I'll post updates as I have them!
 
Last edited:
Just read the whole thread. I absolutely love the look of the motherboard, it looks like a monster with those orange pipes sprouting out of it, the attention to detail and making sure *everything* conforms to the theme/colours really does pay off. I strangely like the anti-kink coils as well, they definitely add to it rather than take away.

Looking forward to the upgrade pics.
 
Hello everyone!

Sorry for the long delays here. I ended up needing to swap out motherboard due to a bad wiring job on my part and ruining my PCIE-x8 slot ;( (which makes SLI not wanna work).

In the swap out, I ended up going with the upgraded version of the same board too (the FTW edition).

Have the new SLI setup running strong and have swapped out the LEDs in the GPU blocks to purple (UV). Not sure I like it better than orange though personally.

I'm having some professional pics done of it here on Thursday so will have pics up later Thursday or Friday for sure!

Stay tuned!
 
Last edited:
Hello again everyone! It has been WAAAAY too long since I've been around and updated this.

At this point, since my last time posting, I've done several things to update my build and workspace.

I have just finished a re-build, clean-up, parts-adding/replacing extravaganza and have pics and updates to share!

Stay tuned, I'm compiling everything now, etc!!

UPDATES!!!
 
The latest!!

Here we go!

Sorry I never posted pics of my 460 SLI setup. There wasn't a whole lot of difference, however, besides I had another card ;) The 'before' pics below show that era a little though :)

After using 2D/3D surround for a while now, my 460s really started showing their age, plus I was getting really tired of the high temps they were pushing through my loop. I was idling in the mid 30s and at load would reach high 60s (cpu). :mad:

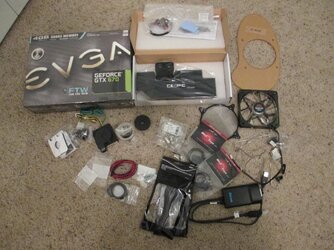
I decided to pull off my 460s and replace them with a single 670 (4gb) which will push the three monitors for 2D/3D surround as well as a accessory (which I have, but to reduce load on the 670, I have a 210 card in there dedicated to the accessory display).

Anyway, on to the pics...!!

1.jpg

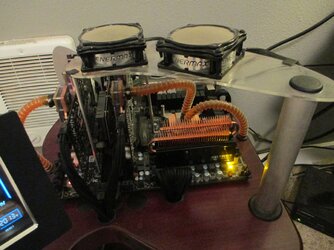
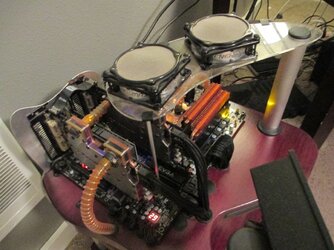
Beforehand... when everything was still dusty :( as you can see, it was due for a little TLC


2.jpg

Another view of the same, dusty mess.


3.jpg

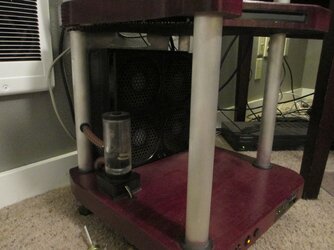
The dusty bottom featuring my res which was leaking by that time (micro cracks around the fittings).


4.jpg

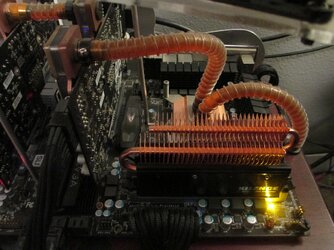
Burned out LEDs, more dust, and lots of loop restriction :(


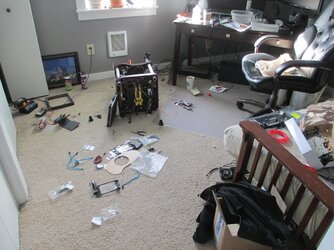
5.jpg

Looks like work, eh? ;) No? Have you tried working on a coldbanger? This ain't your every day 'case' that you just pop the side panel off and go ;)


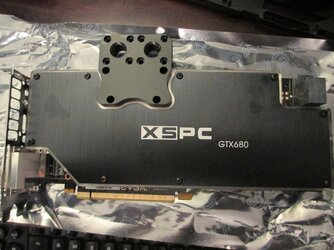
8.jpg

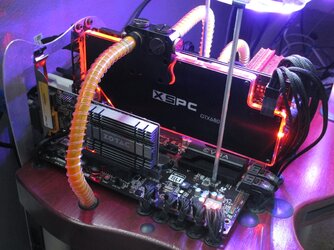
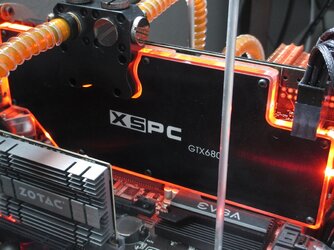
This is actually a 670, but the 4gb reference design is a 680 layout so the 680 block it is.


9.jpg

Refer to comment above about the work... it has begun...


10.jpg

All cleaned up (I'm really happy with how well the wood finish polished out), put back together and up and running again!


13.jpg

Agree that this block looks amazing in orange? :D


14.jpg

This fan came with a speed knob and button to change the LED modes/colors. I, of course, could not resist installing them into the corner pipe here and throwing a larger knob on to match the build :attn:


15.jpg

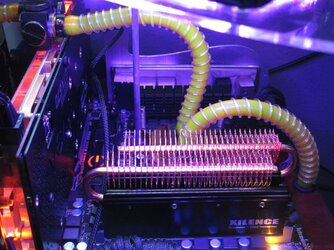
Nice and shiny again (with mobo LED replaced too).


16.jpg

The whole package.


17.jpg

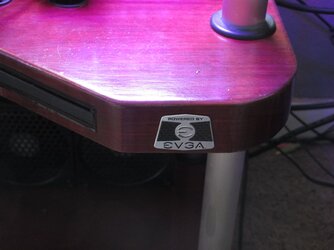
The SICK badge that came with the GPU that matches the build perfectly (added bonus) :)


18.jpg

Yeah, I still can't stop looking at it yet.


19.jpg

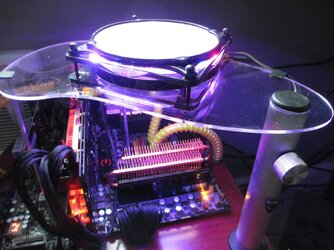
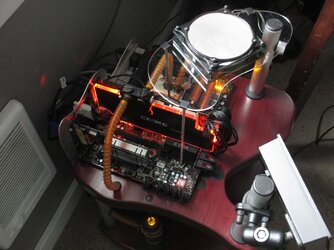
Top-down with fan LEDs off.


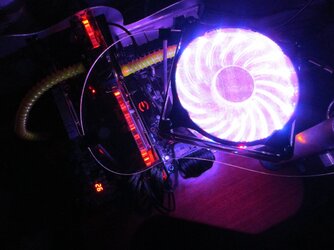
20.jpg

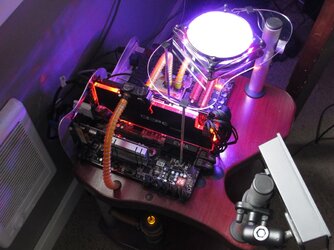
Top-down with fan LEDs on (in purple mode).


21.jpg

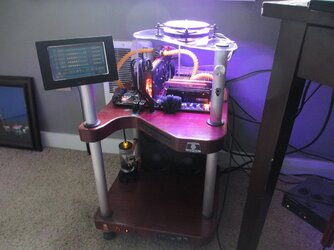
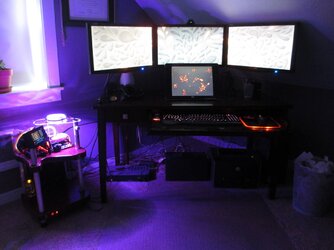
My office currently with monitors lifted up on a mount.


23.jpg

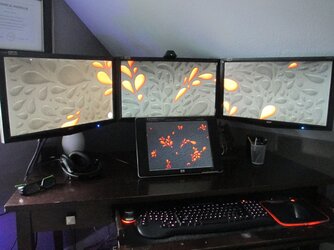
Monitors, during the day... yes, I plan on replacing this horrible 15" HP monitor w/ built-in speakers, lol!


24.jpg

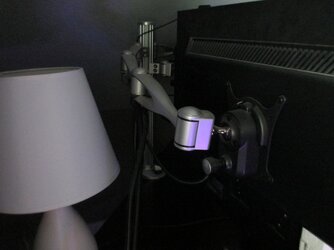
The mount I've had for a while (CotyTech).


25.jpg

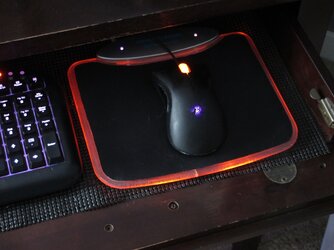
Finally replaced my blue mousepad... still haven't been able to answer myself as to why I had a blue pad before, which matched nothing on my build, lol.


26.jpg

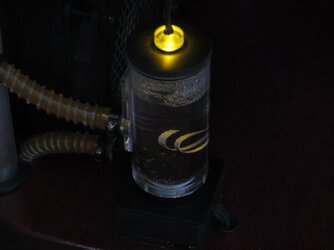
And, last but not least, the res light... yes, it really does look that yellow, which I'm not super happy about, so I'll probably replace that bulb with a UV/Purp bulb.


I have to say, I'm completely blown away by this 670. I do have it moderately overclocked (I'd be ashamed to be posting here if it wasn't), but my 460s were overclocked too and this 670 alone blows my 460s out of the water/across the pond. Benches I've taken so far (before and after) are showing roughly double the performance of the dual 460s. To put it in perspective, I have Skyrim maxed out (no mods) running at 6030x1080 with a solid 60+ fps in open world, not dropping below 45 during heavy battle scenes.

THE BEST PART? My temps are AMAZING again! I now feel like I'm actually water-cooled again. Idling in low 20s, and at full load have yet to see it hit 50 (i5-760 at 4.2, and this gpu OC'd about 15%). :clap:

All in all, I now love my build/setup again :) :comp:

Lastly, I apologize for sucking at keeping this updated, thanks again for all of your support, and I'll be around more often :)
 
That is a very creative build; it looks as if it were pulled directly out of some fancy New York art museum.

Why are your monitors positioned so high though, are you a giant? j/k

I was thinking maybe to balance out the bottom shelf more, you could perhaps chain say four reservoirs together in a straight line, along with using your color theme in alternating lights for each individual reservoir? And if not that at least replace that small reservoir with a jumbo one, otherwise, at least to me, the scale seems to be off a bit.

Also, I love how you applied the orange throughout the theme and that wood is so awesome!

* Another suggestion for future revisions: On your PCI slot-plates, instead of bending them upward, place an angle-iron along the top portion of the cutout of the rear-side of that curvy back piece that would be positioned slightly higher than the tops of the PCI slot-plates that way they can be secured out of view, probably using a nut, washer and bolt or wing-nut combo, for example. That will make that curvy back piece look much cleaner from the front, though you will probably have to remake it again due to the bolt holds along the top from the present configuration.

Although, this suggestion might require that entire back piece to be removed prior to being able to pull out (or insert) your cards though, because the PCI slot-plates would be trapped or blocked otherwise.
 
Last edited:
Thanks! The monitors are that high because I don't have the ceiling clearance to put my accessory display above the three, they don't look 'too' high when seeing them in person though, haha.

I can see your point about the res, I was looking at other designs of them when buying new parts this time around, but landed on this pre-fit res for the MCP-35X again. I'd have to find a way to make the chaining look cool, but it would add more restriction and mean drilling more holes in my shelves, plus, as you can imagine, there's a lot going on inside those shelves so more tubing down there may not fit too well ;)

Good tip about the backplate, bending the brackets is a bit of a pain, but it works, none-the-less!

Either way, yes- this build isn't something you want to be constantly adding/removing parts from. While it follows the same general concept of a benching station layout, it's not quite that 'benchy' (if that's a word) ;)
 
I was looking at images of cooling products this morning and came up with another possible idea, though I am not sure how well this would work, I think it could. Instead of reservoirs, use varying sized water tanks, mounting them horizontally across the shelf at an angle, e.g., 45 degrees from front to back: 80, 150, 250, 150, 80 (or whichever will fill best, 400 is the longest available water tank that I have found). Bitspower even has water tanks that use red, smoke/black, and blue instead of clear. Then just cross-link the tubing from one onto the next and perhaps use two pumps placed to the rear of the shelf.


Display of various water tanks:
http://www.heatsinkfactory.com/water-cooling-reservoirs.html

Dressed up dual pump example:
http://www.sidewindercomputers.com/swexflmcdu121.html

And a fancy single pump example:
http://www.sidewindercomputers.com/lad5wprbimod.html
 
Voted for ya. I think you have a good shot if just a fraction of the members who posted here bother to login to vote. :) Everyone can vote for it once per day also, so remember to go back and vote for it yourself again tomorrow too.

I think we can make a winner out of this guy.
 
Excellent build man! Congrats :D

I like the colour scheme and lighting effect in your computer room.
Are you using any kind of monitor back lighting? If not you should try it, you can have a few rgb led strips that change color according to the picture on screen to protect your eyes while gaming at night. Plus it gives some wicked cool ambiance.
 
Back