-
Welcome to Overclockers Forums! Join us to reply in threads, receive reduced ads, and to customize your site experience!
You are using an out of date browser. It may not display this or other websites correctly.
You should upgrade or use an alternative browser.
You should upgrade or use an alternative browser.
FEATURED Vertical Benching Station
- Thread starter Navig
- Start date
- Joined
- Dec 7, 2003
- Thread Starter
- #43
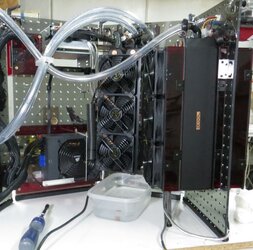
I have actually moved it about my shop. Surprisingly not difficult.
First I detach the wires to the fan controller. After draining the systems, I disconnect the easily accessed hoses behind the mother panel. That is all that connects the 2 radiator panels to the other 2 panels. Then I simply undo the screws of the hinges and I end up with 2 sets of 2 panels, which is easy to carry about, and even still stand on their own.
I tinkered with the idea of quick-disconnects for the hosing, which would save me a lot of hassle as I wouldn't have to drain the system to move it. But it looks to me that 3/4"OD quick disconnects would introduce too much flow restriction. Draining the systems is really not that difficult as I have added taps to the drain ports of the radiators.
- Joined
- Dec 7, 2003
- Thread Starter
- #45
Those do look less restrictive, but since bleeding the system (and as I will show, I have had to bleed the thing multiple times to track down a leak) is not a big deal, I didn't want to take the performance hit.
Time to start putting together all the wiring.
I needed to build a custom wire to provide 5v power to all my temperature probes.

Sleeved it out:

And here it is installed with some labels of other wires running around the back:

Red = 5v power to temp probes
Blue = wires to pumps
Purple circle = silver cables to all the fans
Fire the system up and make sure all my temp probes are functioning:

But I’ve got to get that cable mess cleaned up a bit:

I’ve found that cable organization, you’ve got to all different kinds of techniques to get clean results. I group cables that run together in visible areas and organize them in lines that make sense. I use multiple different types of cable clips. And I find ways to hide excess wire lengths in bundles.
Next I turned my attention to the PSU cabling.

I’ve got all kinds of data and power cables running between these 2 panels.
I also pre-wired up power and SATA cables for 6 hard drives. That way when I transfer over my main system components, I can just hook those bad boys right up.
I decided to try out a new product to organize these cables:
https://www.performance-pcs.com/catalogsearch/result/?q=techflex f6
Techflex F6.
And voila:

Worked pretty much as advertised. I cut with a stout pair of tin snips, then melted the ends with a mini-plumbers torch. Edges are not very pretty without a hot-knife, but it was fine for me as this is on the backside of this mod. Without a ht-knife, you could wrap the ends with some velcro strip.
Time to start putting together all the wiring.
I needed to build a custom wire to provide 5v power to all my temperature probes.
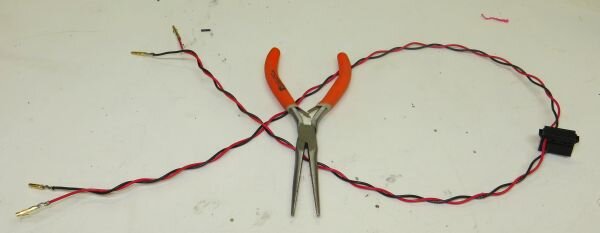
Sleeved it out:
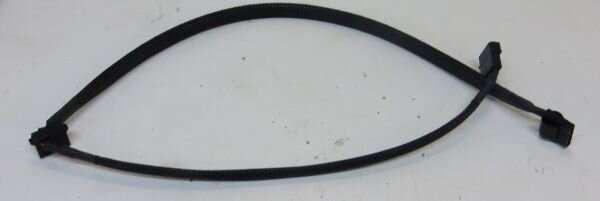
And here it is installed with some labels of other wires running around the back:
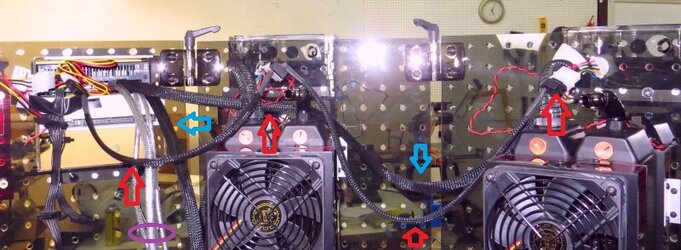
Red = 5v power to temp probes
Blue = wires to pumps
Purple circle = silver cables to all the fans
Fire the system up and make sure all my temp probes are functioning:
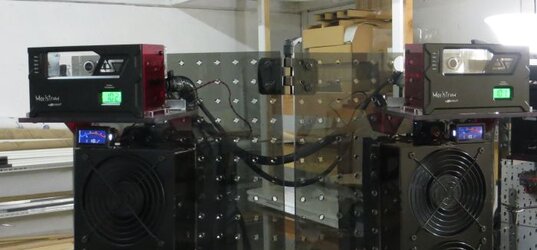
But I’ve got to get that cable mess cleaned up a bit:
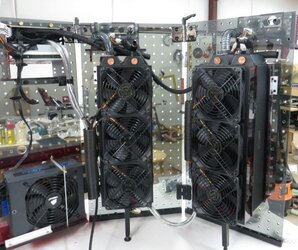
I’ve found that cable organization, you’ve got to all different kinds of techniques to get clean results. I group cables that run together in visible areas and organize them in lines that make sense. I use multiple different types of cable clips. And I find ways to hide excess wire lengths in bundles.
Next I turned my attention to the PSU cabling.
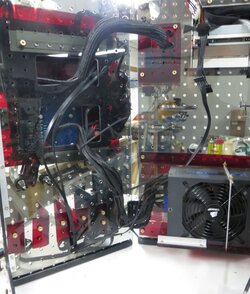
I’ve got all kinds of data and power cables running between these 2 panels.
I also pre-wired up power and SATA cables for 6 hard drives. That way when I transfer over my main system components, I can just hook those bad boys right up.
I decided to try out a new product to organize these cables:
https://www.performance-pcs.com/catalogsearch/result/?q=techflex f6
Techflex F6.
And voila:
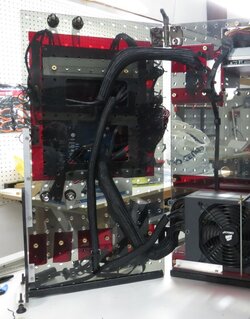
Worked pretty much as advertised. I cut with a stout pair of tin snips, then melted the ends with a mini-plumbers torch. Edges are not very pretty without a hot-knife, but it was fine for me as this is on the backside of this mod. Without a ht-knife, you could wrap the ends with some velcro strip.
Last edited:
- Joined
- Aug 19, 2012
I use something like this in the UK for cable management very effective and leaves a clean look. AJ. 

1, http://www.newegg.com/Product/Product.aspx?Item=N82E16899996101

1, http://www.newegg.com/Product/Product.aspx?Item=N82E16899996101
- Joined
- Dec 7, 2003
- Thread Starter
- #48
Clips I have used in this project!
https://www.performance-pcs.com/wir...twist-lock-mount-1-inch-black-tl-mt-1-bn.html
https://www.performance-pcs.com/wir...-saddle-1-4-in-cable-clip-black-c-c14-bn.html
https://www.performance-pcs.com/wir...p-adhesive-back-7-8cm-black-mdy-fsccc-78.html
https://www.performance-pcs.com/wir...s/cord-clips-1-4-x-1-4-black-cord-clip14.html
https://www.performance-pcs.com/wir...ustable-cable-clamp-black-64mm-mdy-cl-1b.html
https://www.performance-pcs.com/wir...dhesive-bottom-3-8in-black-adj-clamp-3-8.html
And I might be missing a few!
Last edited:
- Joined
- Dec 7, 2003
- Thread Starter
- #49
Next it was time to get to work on the watercooling tubing. I went with some simple ¾”OD ½”ID cleaflex tubing.
My first run was the most difficult--this tight bend from the pump to the radiator:

I had to use some anti-kink coils to prevent a little flattening of the tubing.
And double it up! One for the cpu unit and one for the gpu unit.

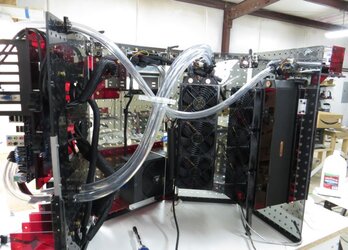
Next I started in on the longer tubing connecting the radiator panels to the motherboard panel.

And I paused here because I felt these long lengths of tubes needed some structural organization.
So I started fabricating a tube clip to cinch them together.
I started with a sheet of ¼” clear acrylic:

Drilled a bunch of holes with a ⅞” unibit.

Bisected and slotted the pieces:

So that I had 2 halves:

A lot sanding and smoothing, and here was my clip:

And here I installed the rest of the tubing runs, with the clip:


The front portions of tubing to the gpu and cpu were already run early on:

So now it was time to actually fill and bleed my loops.
.
My first run was the most difficult--this tight bend from the pump to the radiator:
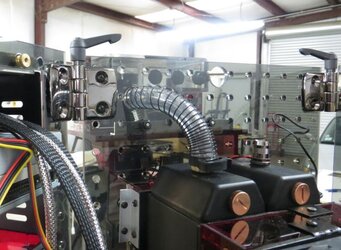
I had to use some anti-kink coils to prevent a little flattening of the tubing.
And double it up! One for the cpu unit and one for the gpu unit.
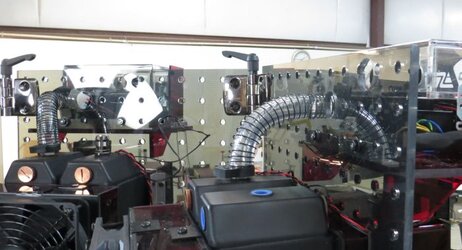
Next I started in on the longer tubing connecting the radiator panels to the motherboard panel.
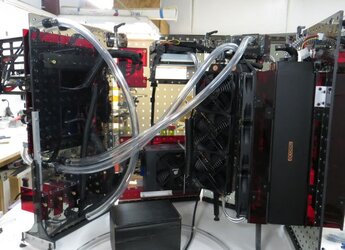
And I paused here because I felt these long lengths of tubes needed some structural organization.
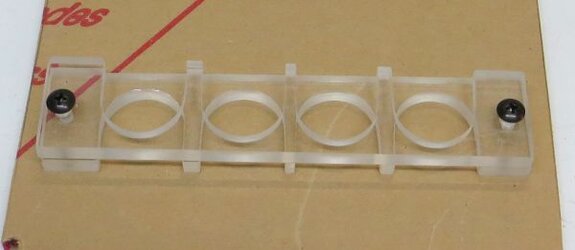
So I started fabricating a tube clip to cinch them together.
I started with a sheet of ¼” clear acrylic:

Drilled a bunch of holes with a ⅞” unibit.
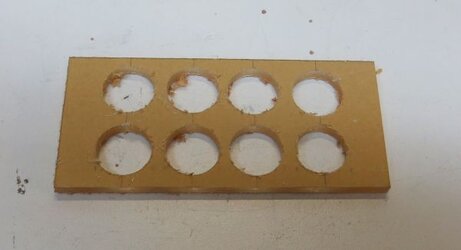
Bisected and slotted the pieces:
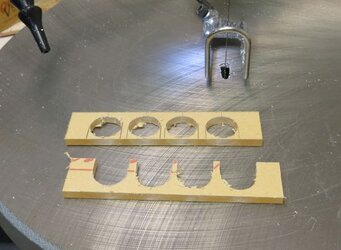
So that I had 2 halves:
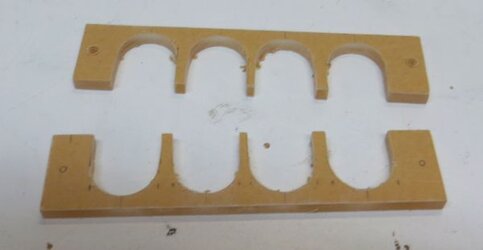
A lot sanding and smoothing, and here was my clip:
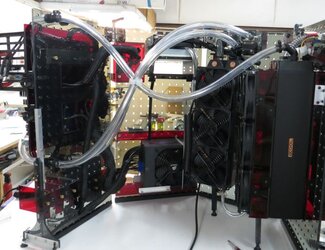
And here I installed the rest of the tubing runs, with the clip:
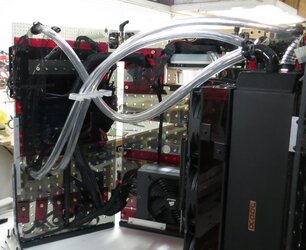
The front portions of tubing to the gpu and cpu were already run early on:
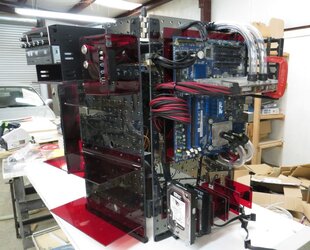
So now it was time to actually fill and bleed my loops.
.
Last edited:
- Joined
- Dec 7, 2003
- Thread Starter
- #52
At this point in the build, I suffered a few significant setbacks.
First, my fan controller burnt out, thanks to jab-tech replaced, then upgraded to the Lamptron touchscreen controller.
At the same time, I had to deal with a leak from one of my Swiftech Maelstroms.
After running loop for a while, I would get tiny tiny droplets, seemingly from this general location:

In fact, I managed to get an actual pic of the leak:

Given the location, I immediately suspected the seal between the pump and pump top, as this was the Maelstrom where I mounted my previously bought MCP35-x. But after rebuilding it several times and checking the O-ring, it persisted.
So I completely disassembled the Maelstrom, which turns out to be quite easy. After taking off the cap and scooping out the bubble sponge, there is a nut that compresses a nipple fitting that holds the pump top to the reservoir.
And this revealed the source of the leak:

If you look carefully, you can see that the black wire had strayed into the area between the pump top and reservoir (getting flattened) and opening enough gap to let a tiny bit of fluid past the O-ring. Easy fixed!
Flushed the system with distilled water.


First, my fan controller burnt out, thanks to jab-tech replaced, then upgraded to the Lamptron touchscreen controller.
At the same time, I had to deal with a leak from one of my Swiftech Maelstroms.
After running loop for a while, I would get tiny tiny droplets, seemingly from this general location:
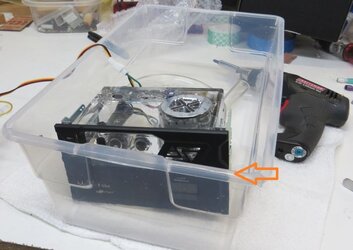
In fact, I managed to get an actual pic of the leak:
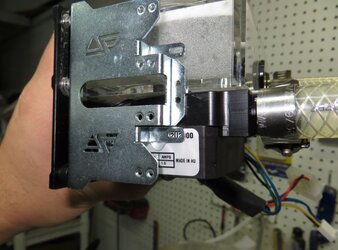
Given the location, I immediately suspected the seal between the pump and pump top, as this was the Maelstrom where I mounted my previously bought MCP35-x. But after rebuilding it several times and checking the O-ring, it persisted.
So I completely disassembled the Maelstrom, which turns out to be quite easy. After taking off the cap and scooping out the bubble sponge, there is a nut that compresses a nipple fitting that holds the pump top to the reservoir.
And this revealed the source of the leak:
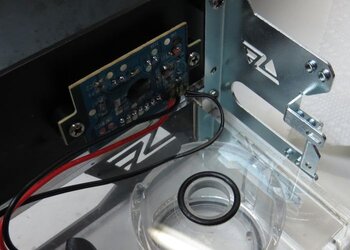
If you look carefully, you can see that the black wire had strayed into the area between the pump top and reservoir (getting flattened) and opening enough gap to let a tiny bit of fluid past the O-ring. Easy fixed!
Flushed the system with distilled water.
Last edited:
- Joined
- Dec 7, 2003
- Thread Starter
- #54
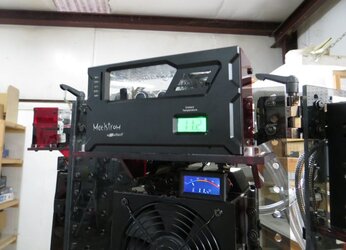
Well my system was go to go. Ready to change out the mock-up parts and make way for a real system.
But first I needed to move it across my shop to the corner where I take my photos. I’ve had a few questions about its portability, so here’s how I did it:

1) Disconnect all the wires from the fan controller (actually this step I was also changing the fan controller to the Lamptron touch screeen).
2) Drain and disconnect the tubes from behind the motherboard.
3) Undo the hinges between the radiator unit and the mobo/device panels.

It was pretty easy to move in these 2x2 panels.
After move:

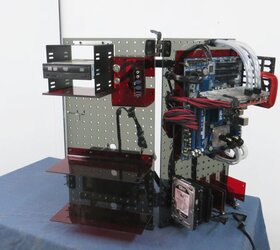
Re-hook up the hinges, wiring, and plumbing.

But first I needed to move it across my shop to the corner where I take my photos. I’ve had a few questions about its portability, so here’s how I did it:
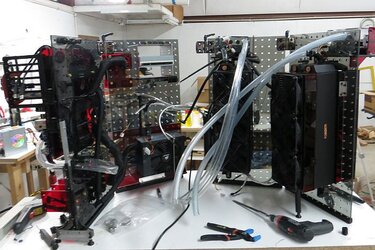
1) Disconnect all the wires from the fan controller (actually this step I was also changing the fan controller to the Lamptron touch screeen).
2) Drain and disconnect the tubes from behind the motherboard.
3) Undo the hinges between the radiator unit and the mobo/device panels.
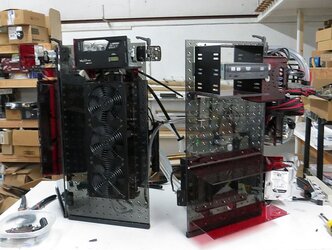
It was pretty easy to move in these 2x2 panels.
After move:
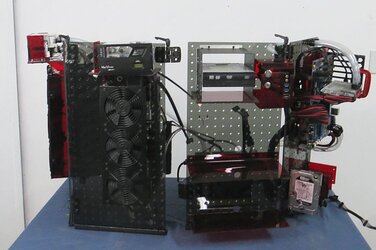
Re-hook up the hinges, wiring, and plumbing.
Last edited:
- Joined
- Jun 18, 2009
- Location
- BC, Canada
This is ingenuity at its best. I love the amount of thought and work you've put into this!
Looks great!
Looks great!
- Joined
- Dec 7, 2003
- Thread Starter
- #56
This has been my first watercooling system in a while (last was my Exoframe)
While I’m no expert seasoned watercooled expert, 2 little tips I’d like to share!
Tip #1
I cut all my tubing with--a standard Home-Depot pvc pipe cutter.

Not really designed for this application, so you have to maintain pressure on the jaw blades to ensure the ratcheting mechanism closes. But its cheap, most people have one laying around from DIY projects, and it makes super clean cuts:
Tip #2
I also had one of these tools around, for DIY house projects. It’s known as a strap wrench:

This allows you to tighten fittings without scratching them, say with a wrench.
It’s a little big for computer case fittings, but it still works great.
.
While I’m no expert seasoned watercooled expert, 2 little tips I’d like to share!
Tip #1
I cut all my tubing with--a standard Home-Depot pvc pipe cutter.
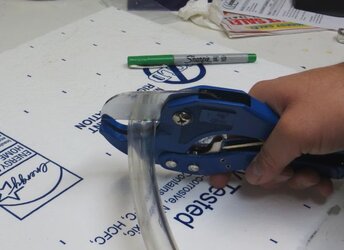
Not really designed for this application, so you have to maintain pressure on the jaw blades to ensure the ratcheting mechanism closes. But its cheap, most people have one laying around from DIY projects, and it makes super clean cuts:
Tip #2
I also had one of these tools around, for DIY house projects. It’s known as a strap wrench:
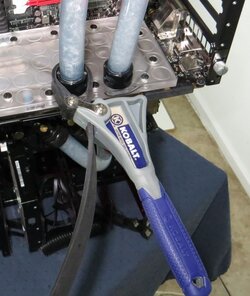
This allows you to tighten fittings without scratching them, say with a wrench.
It’s a little big for computer case fittings, but it still works great.
.
Last edited:
- Joined
- Dec 7, 2003
- Thread Starter
- #57
The last thing I fabricated was something that actually won’t show up much on the final pics for this system: dust filters.
Aesthetically, I don’t really want to be covering up my lovely radiators, but as this is going to be my main system, its got to have some dust protection.
I’m going with these DEMCifilters:
https://www.performance-pcs.com/fan...ilter-for-caselabs-120-3-flex-bay-df0440.html
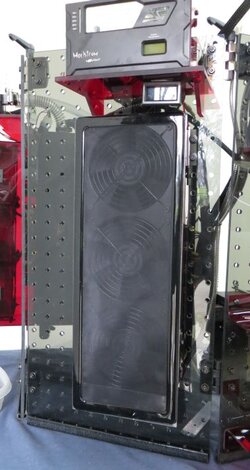
I’ve got the magnetic strips mounted to a plastic frame that is double-stick taped to the radiator fronts:

That way I can just reach over and take the filter off, clean it, and slap it back on.

Aesthetically, I don’t really want to be covering up my lovely radiators, but as this is going to be my main system, its got to have some dust protection.
I’m going with these DEMCifilters:
https://www.performance-pcs.com/fan...ilter-for-caselabs-120-3-flex-bay-df0440.html
I’ve got the magnetic strips mounted to a plastic frame that is double-stick taped to the radiator fronts:
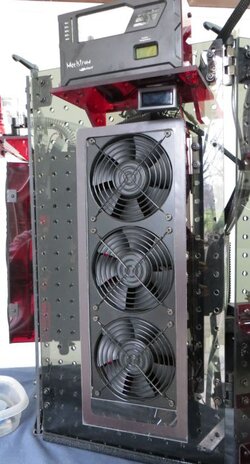
That way I can just reach over and take the filter off, clean it, and slap it back on.
Last edited:
- Joined
- Dec 7, 2003
- Thread Starter
- #60
Sorry for taking so darn long on this build. Altho simple in concept, essentially I had to "re-invent" the wheel for pretty much every component on this build.
Okay, time to start installing the real hardware!
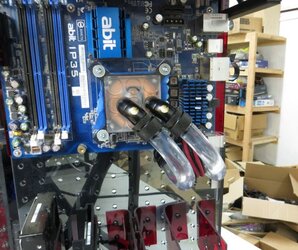
Got my mockup board (fully functioning IP35) off, and going with a Asus Maximus V, i3770k.

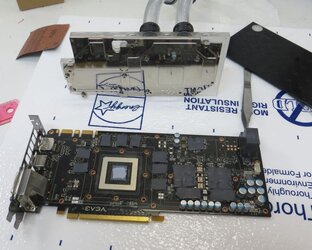
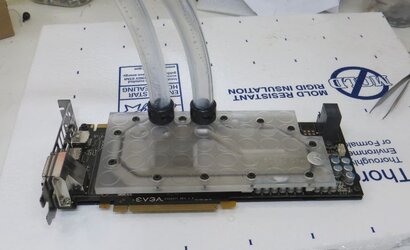
Actually, first I tackled the video card, evga GTX 680. We’re putting on an EK full coverage block with backplate.


Then transferred the cpu block, again EK (supremacy acrylic):

I'm using Phobya HeGrease as my TIM on both blocks.
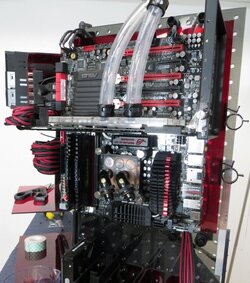
Put’er up on the rack:

Had to re-cut the tubing, but really only in these short runs from the bulkhead to the blocks:

Install some hard drives:

That’s the beauty of the modularity and openness of this system. LIterally went from mockup parts, to a fully installed, ready to power-up system in one hour.
And here I fired it up for the first time:

The system is over in this corner of my shop, where I got some nice plain walls. This is where I take all my nice hi-res, closeup pics of my completed builds. Ultimately, this one is destined to be in my office as my main system.
My “completed build pics” to come....
Okay, time to start installing the real hardware!
Got my mockup board (fully functioning IP35) off, and going with a Asus Maximus V, i3770k.

Actually, first I tackled the video card, evga GTX 680. We’re putting on an EK full coverage block with backplate.
Then transferred the cpu block, again EK (supremacy acrylic):
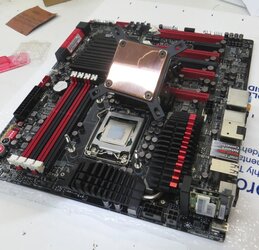
I'm using Phobya HeGrease as my TIM on both blocks.
Put’er up on the rack:
Had to re-cut the tubing, but really only in these short runs from the bulkhead to the blocks:
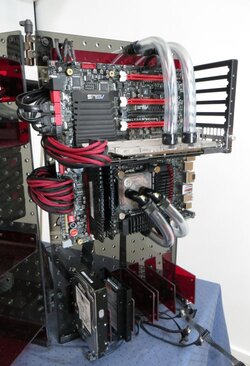
Install some hard drives:
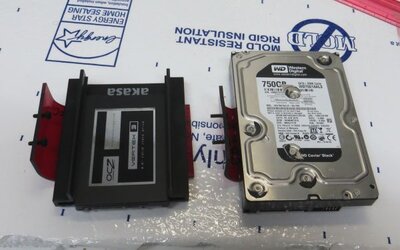
That’s the beauty of the modularity and openness of this system. LIterally went from mockup parts, to a fully installed, ready to power-up system in one hour.
And here I fired it up for the first time:
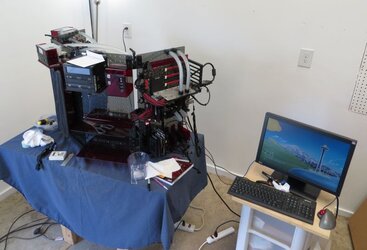
The system is over in this corner of my shop, where I got some nice plain walls. This is where I take all my nice hi-res, closeup pics of my completed builds. Ultimately, this one is destined to be in my office as my main system.
My “completed build pics” to come....
Last edited:
Similar threads
- Replies
- 0
- Views
- 706

