- Joined
- Dec 19, 2002
I am working on an all over AIO mod with my MSI Airboost 56. I just wanted to let everyone know a a couple of things about taking the card apart if you decide to. On my card just about all the screws had some form of lock tight on them which made it very difficult to remove them without stripping the heads because of their small size. I also found that the memory and gpu dies are all higher then the surrounding frame. With the stock heatsink its not a problem because the mounting screws bottom out for the correct pressure from the heatsink.
If you decide to use any other custom cooling it would be extremely possible to crack the dies with too much pressure. I will be mounting an H55 Corsair AIO on mine, but will add to the border height with a CPU protected shim or thin copper strips attached to the border with artic alumina adhesive. I also found that the intel cpu mounting bracket that comes with the H55 will work with the card. I drilled 4 holes in it at 64mm square spacing and cut the excess off on each arm. I intend on using the stock back plate and mounting bracket. I enlarged the holes slightly on the bracket and flattened the bracket in a vise to be flat so there is no tension from it anymore. I had 4 nuts with attached springs from an old heatsink that I will use to attach to bolts that are permanently attached with nuts to the flat mounting bracket.
I have a Kraken G10 with the H55 on an overclocked R9 290x that works fantastic so with this card the H55 should work fine with the cooling. I do realize there is the Morpheus 2 for this card but decided not to get it because all that heat gets dumped into the case. It also limits the height of the heatsinks that can be used on the mosfets and chokes. With my Lian Li case I have a custom side panel that the radiator sits behind, so all the heat comes out the side panel. Nothing is attached to the side panel, the radiator is mounted to a modified fan bracket that attaches to the back of the case, so the radiator is positioned behind the side panel.
The mosfet cooling will be a 2mm thick copper strip with 1mm thermals pads that will attach to the board with small nuts, bolts and Artic Alumina adhesive (good stuff). That copper strip will give me some height to clear the other components, on that copper strip I will attach much lighter aluminum heatsinks using artic silver adhesive. I have done this on my R9 290x and it worked great for cooling the back of the mosfets.
One thing else I learned from past mods I have done is cooling directly behind the gpu. I used artic alumina adhesive all over as smooth as possible over all the components to cover them on the back of the card behind the gpu. Once that was dry I attached a copper slug and heatsink to the area again using artic alumina adhesive. That also worked pretty well with pulling off the heat on the back of the card.
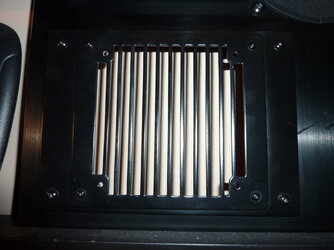
Not much else I can explain until everything is done and I find out the card still works and works better hopefully. When finished I will try to post some pictures.
I hope some of this information might be helpful to anyone thinking of modding their card.
If you decide to use any other custom cooling it would be extremely possible to crack the dies with too much pressure. I will be mounting an H55 Corsair AIO on mine, but will add to the border height with a CPU protected shim or thin copper strips attached to the border with artic alumina adhesive. I also found that the intel cpu mounting bracket that comes with the H55 will work with the card. I drilled 4 holes in it at 64mm square spacing and cut the excess off on each arm. I intend on using the stock back plate and mounting bracket. I enlarged the holes slightly on the bracket and flattened the bracket in a vise to be flat so there is no tension from it anymore. I had 4 nuts with attached springs from an old heatsink that I will use to attach to bolts that are permanently attached with nuts to the flat mounting bracket.
I have a Kraken G10 with the H55 on an overclocked R9 290x that works fantastic so with this card the H55 should work fine with the cooling. I do realize there is the Morpheus 2 for this card but decided not to get it because all that heat gets dumped into the case. It also limits the height of the heatsinks that can be used on the mosfets and chokes. With my Lian Li case I have a custom side panel that the radiator sits behind, so all the heat comes out the side panel. Nothing is attached to the side panel, the radiator is mounted to a modified fan bracket that attaches to the back of the case, so the radiator is positioned behind the side panel.
The mosfet cooling will be a 2mm thick copper strip with 1mm thermals pads that will attach to the board with small nuts, bolts and Artic Alumina adhesive (good stuff). That copper strip will give me some height to clear the other components, on that copper strip I will attach much lighter aluminum heatsinks using artic silver adhesive. I have done this on my R9 290x and it worked great for cooling the back of the mosfets.
One thing else I learned from past mods I have done is cooling directly behind the gpu. I used artic alumina adhesive all over as smooth as possible over all the components to cover them on the back of the card behind the gpu. Once that was dry I attached a copper slug and heatsink to the area again using artic alumina adhesive. That also worked pretty well with pulling off the heat on the back of the card.
Not much else I can explain until everything is done and I find out the card still works and works better hopefully. When finished I will try to post some pictures.
I hope some of this information might be helpful to anyone thinking of modding their card.