• Welcome to Overclockers Forums! Join us to reply in threads, receive reduced ads, and to customize your site experience!

My Watercooling/Case Mod Project (pics)

Overclockers is supported by our readers. When you click a link to make a purchase, we may earn a commission. Learn More.
Supra6 said:
i dont know if i'm just stupid or tired, but the rad on the top is pullin in? why not go with a double fan setup and have the exaust going out the back , not in the computer. and the shroud is on the wrong direction?

peace


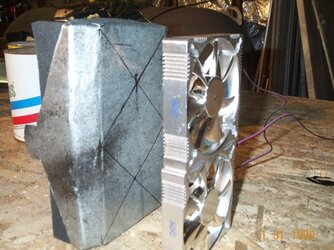
The rad in the top is an exhaust.

There will be two shrouds for each radiator, one sealing it to the case, and one for the fans.

Or atleast that's how I understood it.
 
good work guy gives me a tear of joy to see a hard core man doing that kind of work one question what does your wife/gf say about that ??
 
That tubing is from directron.com, and its really easy to bend like that. I do have the feeling it will harden up some day though.

sonicdrive.... I am just a high school student right now... dont have a gf, and definately dont have a wife.
 
Alrighty...guess I was jumping the gun a wee bit.

Looks great...the funny part being that that is exactly my case and dang near exactly my two radiators (I have 1 - '86 Chevette and 1 - '77 B-ville). Might just have to take a look into getting both into action ;)
 
Got some updates on my thought to be little project. This thing is taking me forever, now I just wanna get it done. :)

Got the window cut out on the side panel. I let sandman use the jigsaw to cut it out though. Its not a perfect cut, but cutting a straight line with a jigsaw cant be easy. I am thinking about putting some kind of trim around the window. Any suggestions on what to use would be appreciated.
 

Attachments

  • (1)Before Sanding Window.JPG
    (1)Before Sanding Window.JPG
    49.1 KB · Views: 774
This is the hole I cut for the top fan. Used a 4 and 1/2 in. holesaw. That thing was hard to handle. Thats why you see it dinged up in places. This should be good after the sanding.
 

Attachments

  • (3)Before Sanding Top.JPG
    (3)Before Sanding Top.JPG
    57.4 KB · Views: 762
The sheetmetal goddess has been helping me with this shroud. I hate sheetmetal. I could do this whole project except working with sheetmetal. We still have to use that 4 1/2 in. holesaw to cut 2 holes for the 120mm fans. I think the sheetmetal goddess has an exceptionally good shroud design.
 

Attachments

  • (4)Making of Shroud.JPG
    (4)Making of Shroud.JPG
    91.7 KB · Views: 744
As of right now, I only have 1 thing sanded. This ends the second stage. The next pictures I will post will be when I get everything painted.
 

Attachments

  • (5)After Sanding Window.JPG
    (5)After Sanding Window.JPG
    92 KB · Views: 737
Awesome dude, absolutely awesome :D

I'd host LANs too if I had the time and space. Instead I just host gameservers :attn:

Paint the tabletops dark and give them a thick laquer coat, it'll look sweeeeet!
 
I dont know about painting OSB. If some of it chips off it would look bad, but black tables would look good.

Right now I am working on building a wall, and insulating our "game night" area up. Its getting cold out, and I got our heater working, but we need some insulation so we dont use up all the propane. :)
 
I got a lot done last week, but I didnt have a computer to post the pics. This weekend, possibly this evening... I should have everything up and running.

Here is my window side sanded and put on the side of the case. I still have to fill in those holes, that will probably be next weekend. Also, I am still planning on auto trim around the edges, since they are quite straight.
 

Attachments

  • Sanded Window.JPG
    Sanded Window.JPG
    57.2 KB · Views: 407
Sandman had an old AT powersupply. I took the switch and the power input plug. I cant really think of another way to explain that :). Well, here the the hole for that plug that I am gonna wire up to my pump.
 

Attachments

  • Pump Plug.JPG
    Pump Plug.JPG
    58.3 KB · Views: 402
Heres the hole for the small radiator. The radiator will be just a little above the powersupply with the shroud holding it up. Once again, the genius of the sheet metal goddess. :)

Sorry about the glare.... not a good photographer.
 

Attachments

  • 1 Hole.JPG
    1 Hole.JPG
    70.9 KB · Views: 400
Last edited:
lookin real good man, keep up the good work... btw, those fans are great, very good cfm to noise ratio... although they do get relatively loud when you're running a lot of them, my friend has like 3 and it is somewhat loud...i'd just run them at like 7 volts or something... great lan setup, i wish i had the room to do that... good luck with your project, i can't wait to see this weekend's progress
 
Thanks, in the future I am thinking on getting a fan controller... then I can control the noise, and I can have my USB and Audio plugs on the front of my case.
 
Did you sand blast that or just like belt sander or somthing?

Also, I'd recut the hole in the front to the exact find dimensions of the rad and have the fans pull air into the case, not push into the rad. You can use calk or foam to seal around the rad.
 
Back