- Joined
- Apr 22, 2020
- Location
- Caprona
This project began when Intel made it known that their i9-9900KS chip was essentially pre-binned for overclocking excellence, guaranteed to be 5.0 GHz right out of the box. Press leaks and over-zealous overclockers were reporting running the chips at 5.1 and 5.2 GHz across all 8 cores and 16 threads. After all, the published TDP was a lowly 127 watts. Surely the CORSAIR H150i can handle such a heat load.
(Note: I independently confirmed at 5.0 GHz x 8 cores and 16 threads, the H150i does keep the temps at a respectable 98C max with the harshest of CPU tests running on my build with the fans running at 1500 RPMS, which is also remarkably quiet)
Cutting to the chase for the impatient: The chip was giving off way more heat when overclocked than the TDP rating suggests. The H150i was overcome at 5.1 GHz x 8 cores. A quadruple radiator was overcome at 5.2 GHz x 8 cores. The heat just gradually creeps up and thermal shutdown is the inevitable result.
Not to be discouraged, I decided to start over. Completely from scratch.
I was sick and tired of banging my knuckles inside even full tower cases, so the first thing to do was design my "dream case" for the finished product.

I should at least mention the "good part" here. I already prototped a new kind of heat removal system that should be capable of handling up to 350 watts of heat.
This is what the final prototype looks like.

This is a 3-stage cooling solution that will become known as a thermosyphon.
The key takeaways:
1. There is a large condenser with copper fins for much better heat removal than aluminum.
2. There is a copper CPU block through which the vaporized refrigerant flows, not water.
3. Air cools the water which cools the vapor in the condenser. The condenser turns the vapor back into a liquid, which cools the CPU block.
4. This is the "gravity" version of the thermosyphon where there is no pump in the vapor loop. That is why it is so tall. More on that later.
5. Later versions I added a vapor pump so I did not need the large gravity drop.
6. The fans are large 4000 RPM suckers in push-only mode.
Here is a video of it in action:
Below is the copper-finned condenser compared to the length of my arm.

It is also pretty thick too. The thermal conductivity of copper within the operating temperature here is about 392 watts per (meter x Kelvin), an unusual unit of measure at first glance, which is much better than Aluminum at 240. That means you would need an aluminum condenser 1.6 times as large to get the same heat removal as the copper. Silver is only slightly better at 420, but it is so much more expensive, it is not worth the tradeoff.
And shown below, the copper CPU cold plate.

OK, now on to the build. Skipping the boring measurements part, you figure out where you want stuff to go, either on the vertical case walls or the case bottom and top. I designed my own brass mounting brackets too. Like I said, I was "sick of" the way computer cases CONSTRAINED me, and since this was going to be a big system, including a built in monitor, a storage compartment for the keyboard and mouse, plus a storage compartment for the power cable(s), I was not going to limit myself in any way.
So once all of the dimensions are set, you order some custom aluminum pre-cut bars from your friendly local bar-cutter. Make sure they also sell the necessary fasteners and nice things like knurled rollers that you can just hand tighten instead of needing a screwdriver.

I should add here that I could not resist going to Lowe's and strolling through the "bathtub aisle" and picking up some matching brushed stainless steel towel racks to be used for the case handles at the top.

The first thing added once the frame was set was the CORSAIR power supply.

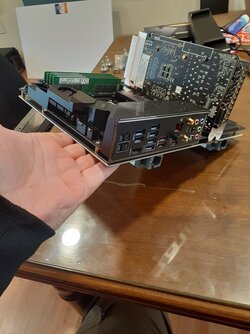
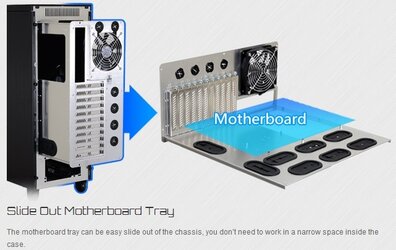
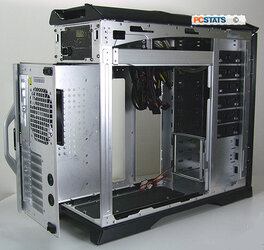
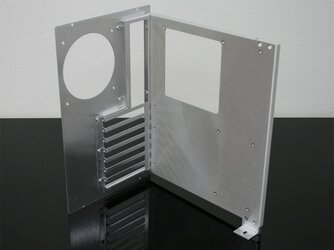
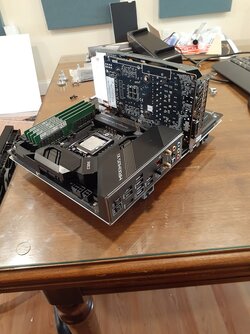
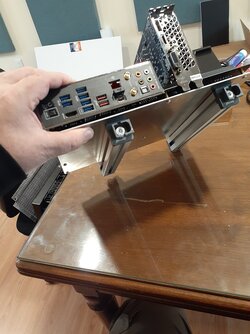
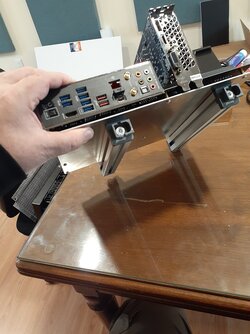
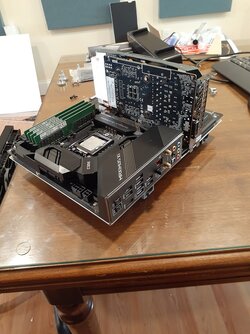
The next mini-side project concerns the motherboard. How many times have we had our "favorite case" all modded up, and the motherboard went south one day, or we could not resist upgrading to something better and faster? Right. For me, about a dozen times. So I decided I would build a SLIDING RAIL on the bottom of the motherboard bracket, so that I could just swing my computer case door open, detach the motherboard cables quickly, and slide the whole thing out! I would have my pre-built replacement motherboard + CPU + RAM etc already to "slide in" and take its place!

Other angles...


Fast forwarding a little bit, I added the "wireless antenna" to the exterior. But where to put this "shark fin?" I don't know why manufacturers do this. I mean, it's not cool or anything like that. Furthermore, it provides NO FUNCTION whatsoever.

You can also see the rather hastily-constructed grill for venting the condenser. And don't worry, I get rid of that shark fin, and re-route the wireless antenna inside one of the bars of extruded aluminum. The wireless hardware is completely hidden!
And time to show one of the most frustrating parts of the build. And it is kind of silly. But I wanted a unique "Power On" button. I literally looked at like 2 dozen different kinds. This one glows red when it is on, and, of course, powers the computer on when it is glowing red. It also "obeys" the software shutdown command issued by Windows, and likewise goes off and does not light when that happens. All "common sense" things we take for granted, BUT.... all of these behaviors require a specific wiring configuration, and the manufacturer makes it as clear as mud!

So here I am re-labeling everything, because the dang Chinese manual was of no help at all. And what was the reward after 4 hours of frustration?

There it is, something nobody will ever appreciate!
And, just in case you thought things were being "made pretty" at this point, the thing is actually as ugly as this now...

Power button dangling. Lots of empty space. No wire management. The CORSAIR H150i triple radiator mounted at the top of the case for the "first boot test" (before hooking up the thermosyphon). Those orange things are 3D printed mounting brackets for the internal monitor, which is coming soon. Notice the brass bracket on the rear wall on the bottom left. That can house up to 4 SSDs. Also custom made.

And shown above is a less ugly perspective. You can see those awesome towel rack handles I bought at Lowe's, lol. It is easy to identify the motherboard, video card, hard drive, etc. Everything looks about done, except for the small part about it not being able to boot without a monitor.
OK, now I am even bored with the post, so let me just show the first boot picture.

There it is. Built-in monitor. Speaker bar. Compartment on the left for sliding in the wireless keyboard and mouse. And running a bunch of prime stuff to test the heat removal with the H150i.
And here I will pause for now. More to come later. Including the science of measuring the efficiency of the heat removal system, no matter what kind of system you have.
(Note: I independently confirmed at 5.0 GHz x 8 cores and 16 threads, the H150i does keep the temps at a respectable 98C max with the harshest of CPU tests running on my build with the fans running at 1500 RPMS, which is also remarkably quiet)
Cutting to the chase for the impatient: The chip was giving off way more heat when overclocked than the TDP rating suggests. The H150i was overcome at 5.1 GHz x 8 cores. A quadruple radiator was overcome at 5.2 GHz x 8 cores. The heat just gradually creeps up and thermal shutdown is the inevitable result.
Not to be discouraged, I decided to start over. Completely from scratch.
I was sick and tired of banging my knuckles inside even full tower cases, so the first thing to do was design my "dream case" for the finished product.
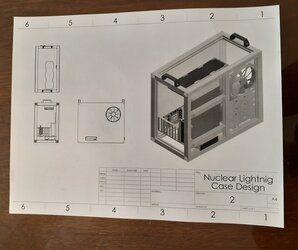
I should at least mention the "good part" here. I already prototped a new kind of heat removal system that should be capable of handling up to 350 watts of heat.
This is what the final prototype looks like.
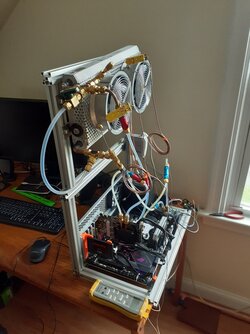
This is a 3-stage cooling solution that will become known as a thermosyphon.
The key takeaways:
1. There is a large condenser with copper fins for much better heat removal than aluminum.
2. There is a copper CPU block through which the vaporized refrigerant flows, not water.
3. Air cools the water which cools the vapor in the condenser. The condenser turns the vapor back into a liquid, which cools the CPU block.
4. This is the "gravity" version of the thermosyphon where there is no pump in the vapor loop. That is why it is so tall. More on that later.
5. Later versions I added a vapor pump so I did not need the large gravity drop.
6. The fans are large 4000 RPM suckers in push-only mode.
Here is a video of it in action:
Below is the copper-finned condenser compared to the length of my arm.
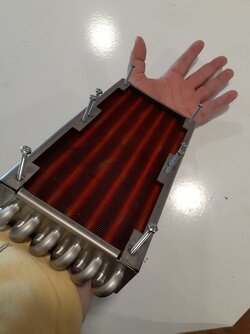
It is also pretty thick too. The thermal conductivity of copper within the operating temperature here is about 392 watts per (meter x Kelvin), an unusual unit of measure at first glance, which is much better than Aluminum at 240. That means you would need an aluminum condenser 1.6 times as large to get the same heat removal as the copper. Silver is only slightly better at 420, but it is so much more expensive, it is not worth the tradeoff.
And shown below, the copper CPU cold plate.
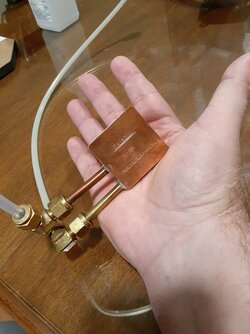
OK, now on to the build. Skipping the boring measurements part, you figure out where you want stuff to go, either on the vertical case walls or the case bottom and top. I designed my own brass mounting brackets too. Like I said, I was "sick of" the way computer cases CONSTRAINED me, and since this was going to be a big system, including a built in monitor, a storage compartment for the keyboard and mouse, plus a storage compartment for the power cable(s), I was not going to limit myself in any way.
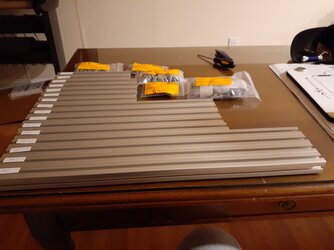
So once all of the dimensions are set, you order some custom aluminum pre-cut bars from your friendly local bar-cutter. Make sure they also sell the necessary fasteners and nice things like knurled rollers that you can just hand tighten instead of needing a screwdriver.
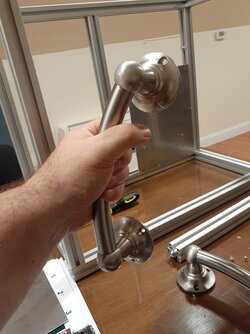
I should add here that I could not resist going to Lowe's and strolling through the "bathtub aisle" and picking up some matching brushed stainless steel towel racks to be used for the case handles at the top.
The first thing added once the frame was set was the CORSAIR power supply.
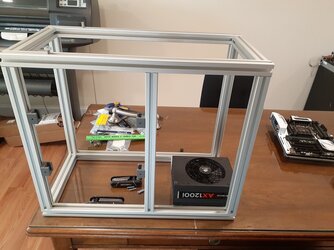
The next mini-side project concerns the motherboard. How many times have we had our "favorite case" all modded up, and the motherboard went south one day, or we could not resist upgrading to something better and faster? Right. For me, about a dozen times. So I decided I would build a SLIDING RAIL on the bottom of the motherboard bracket, so that I could just swing my computer case door open, detach the motherboard cables quickly, and slide the whole thing out! I would have my pre-built replacement motherboard + CPU + RAM etc already to "slide in" and take its place!
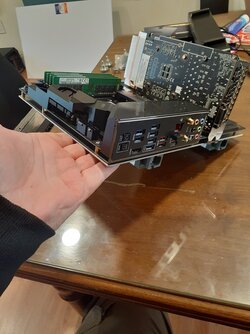
Other angles...
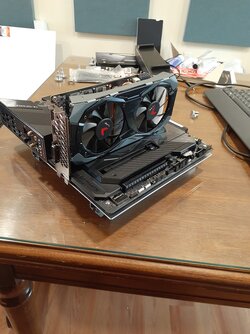
Fast forwarding a little bit, I added the "wireless antenna" to the exterior. But where to put this "shark fin?" I don't know why manufacturers do this. I mean, it's not cool or anything like that. Furthermore, it provides NO FUNCTION whatsoever.
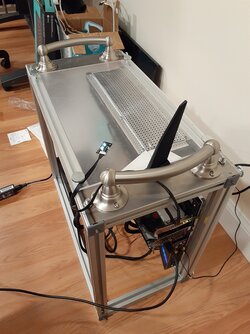
You can also see the rather hastily-constructed grill for venting the condenser. And don't worry, I get rid of that shark fin, and re-route the wireless antenna inside one of the bars of extruded aluminum. The wireless hardware is completely hidden!
And time to show one of the most frustrating parts of the build. And it is kind of silly. But I wanted a unique "Power On" button. I literally looked at like 2 dozen different kinds. This one glows red when it is on, and, of course, powers the computer on when it is glowing red. It also "obeys" the software shutdown command issued by Windows, and likewise goes off and does not light when that happens. All "common sense" things we take for granted, BUT.... all of these behaviors require a specific wiring configuration, and the manufacturer makes it as clear as mud!
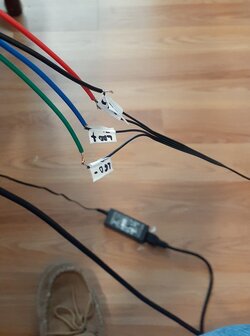
So here I am re-labeling everything, because the dang Chinese manual was of no help at all. And what was the reward after 4 hours of frustration?
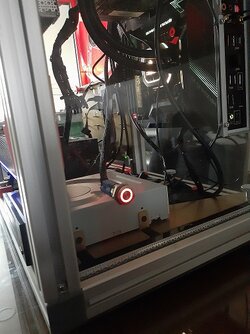
There it is, something nobody will ever appreciate!
And, just in case you thought things were being "made pretty" at this point, the thing is actually as ugly as this now...
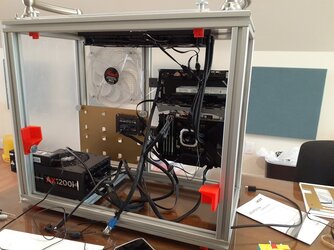
Power button dangling. Lots of empty space. No wire management. The CORSAIR H150i triple radiator mounted at the top of the case for the "first boot test" (before hooking up the thermosyphon). Those orange things are 3D printed mounting brackets for the internal monitor, which is coming soon. Notice the brass bracket on the rear wall on the bottom left. That can house up to 4 SSDs. Also custom made.
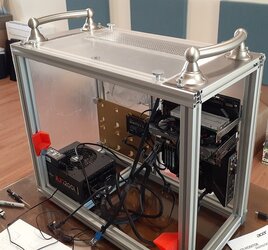
And shown above is a less ugly perspective. You can see those awesome towel rack handles I bought at Lowe's, lol. It is easy to identify the motherboard, video card, hard drive, etc. Everything looks about done, except for the small part about it not being able to boot without a monitor.
OK, now I am even bored with the post, so let me just show the first boot picture.
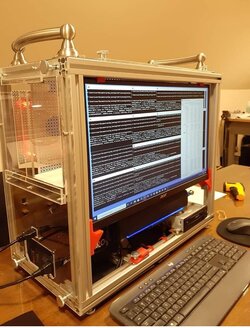
There it is. Built-in monitor. Speaker bar. Compartment on the left for sliding in the wireless keyboard and mouse. And running a bunch of prime stuff to test the heat removal with the H150i.
And here I will pause for now. More to come later. Including the science of measuring the efficiency of the heat removal system, no matter what kind of system you have.
Last edited:
