• Welcome to Overclockers Forums! Join us to reply in threads, receive reduced ads, and to customize your site experience!

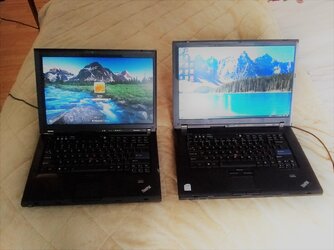
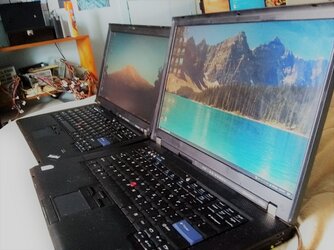
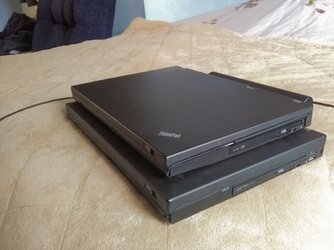
Retro Thinkpad T61p Build!

Overclockers is supported by our readers. When you click a link to make a purchase, we may earn a commission. Learn More.
Join me fellas -----------> Might have a little dirt on my boots by Jon Pardi

5:45PM UPDATE -
*Two operations going on here* = First, we are installing the X9000 CPU in the T61p (SSD install will happen later)
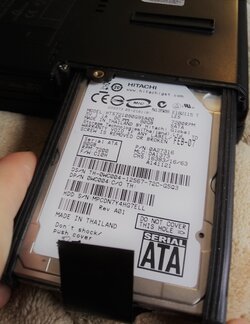
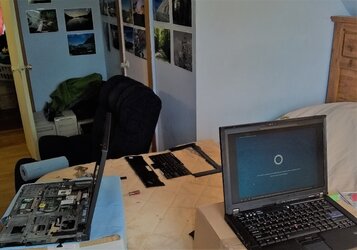
AND swapping the 80GB 7200 RPM Hard drive from the T61p into the T61 and running a dual boot 64 bit Win 10/ Win 7 OS configuration on the old laptop

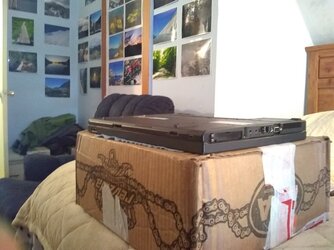
Swapping the 7200 RPM hard drive from the T61p into the T61:
IMG_20180413_144847502.jpg

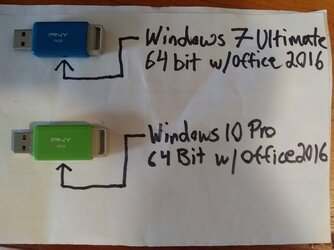
Windows Installation Media:
IMG_20180413_145919505.jpg
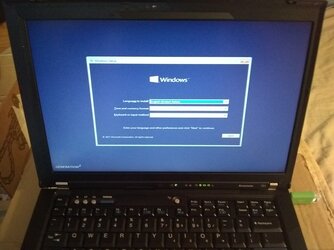
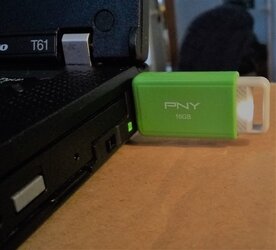
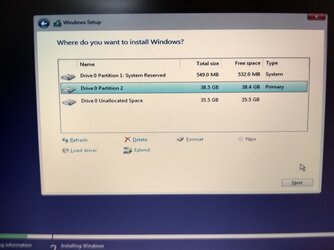
Windows 10 install on the T61:
IMG_20180413_150410257.jpg
IMG_20180413_150436261.jpg
Dual boot hard drive setup (gonna be a little tight on space - but I have a 500GB Network Attached Storage Device):
IMG_20180413_151209248_HDR.jpg
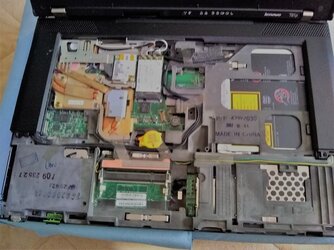
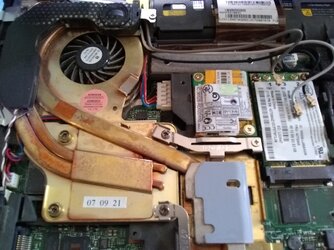
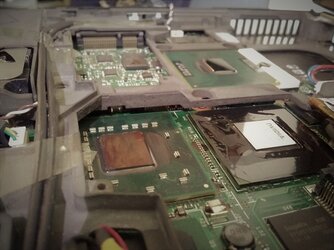
Disassembly begins on the T61p -----> Time to break the seal!
IMG_20180413_150453882.jpg
IMG_20180413_152745336.jpg
IMG_20180413_153108789.jpg
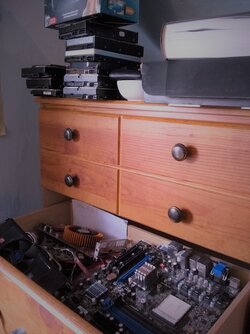
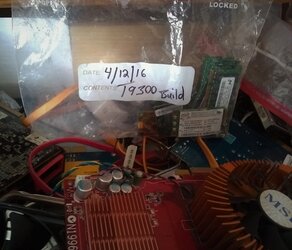
Pulling all my old T9300/T61 parts / memory / inventory from the "hardware drawer":
IMG_20180413_153013227.jpg
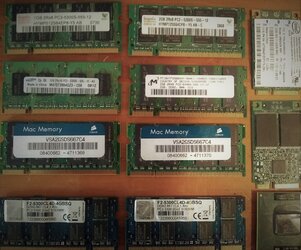
Found the goods! Including a 4GB Gskil CL4 (4-4-4-12) kit:
IMG_20180413_153058571.jpg
IMG_20180413_153549956.jpg
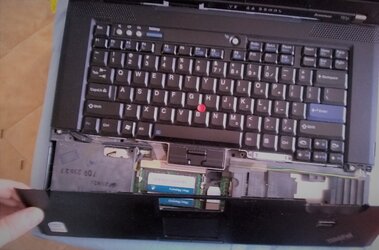
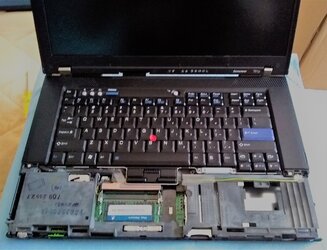
Keyboard and upper clip removed from the T61p:
IMG_20180413_154636498.jpg
Gonna give up the goods!:
IMG_20180413_155701685.jpg
IMG_20180413_160318674.jpg
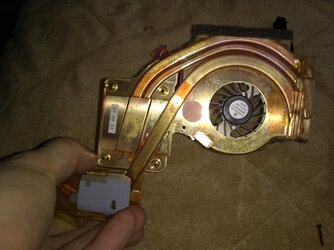
Heat pipe CPU cooler (will be cleaned up prior to re-installation):
IMG_20180413_160338171.jpg
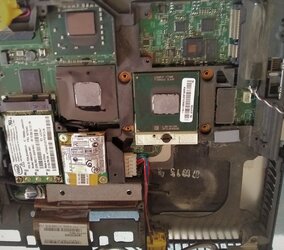
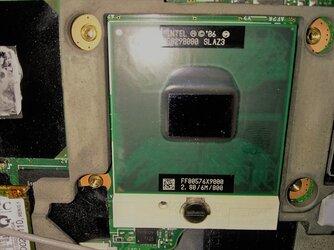
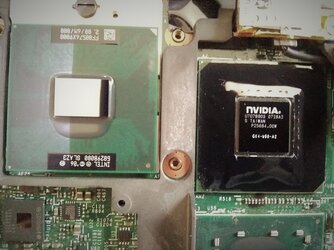
This is why we are all here. The beast, the X9000 is in!
IMG_20180413_160758017.jpg
Nvidia FX 570m 256MB Graphics chip:
IMG_20180413_161253927.jpg
IMG_20180413_161242536.jpg
Windows 10 setup completed on the old T61:
IMG_20180413_160557551.jpg

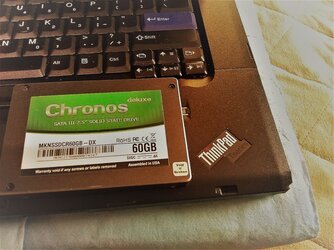
Thanks for hanging in there guys. We are over most of the major hurtles. Next, we will re-assemble the T61p with the new X9000 processor, install the 60GB Mushkin SSD and DVD burner. Then we will install Windows 10 x64 on the T61p and finish up the dual boot on the old t61 by installing Windows 7 x64 on the secondary partition. Once that's done, I can turn my full attention to the T61p and start overclocking the monster! Be prepared for some carnage! We are gonna be shredding benchmarks here pretty soon! :popcorn::attn:


Well, its off to the ping pong club for some serious hitting until midnight -- I will update in the AM.

Silas
 
Last edited:
I'm doing this with a severe need for two root canals so it's taken me a little while to get going this morning. These were supposed to be done last week, but through a mix up I have to wait until next week. In any event, we will start moving on this, just a little slow until the anti-bionics kick in and settle down the pain.

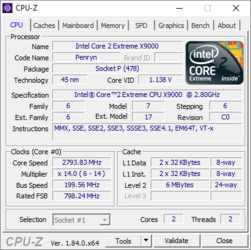
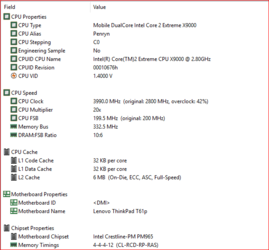
We are officially running the X9000! This is the first post from my new laptop.

Temps are looking good. This thing is sweet :)

Overclocking / undervolting to follow :clap:

x9000.PNG

Look at those temps son!
temps son.PNG

Update 4:00pm:
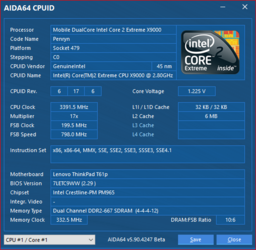
overclock.PNG
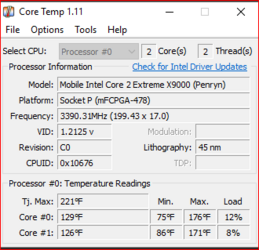
As you can see we are hitting 3.4Ghz like a dream. Mind you, I haven't even touched the fan settings yet. Just getting started ;)

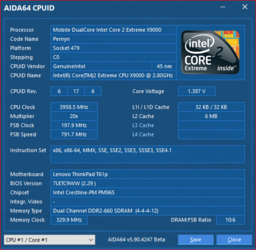
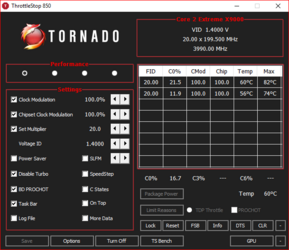
UPDATE 5:43PM - Hitting 4.0Ghz FLAWLESS!!
4.0Ghz.PNG
No... Could this be the first T61p to reach the 4.0Ghz mark?

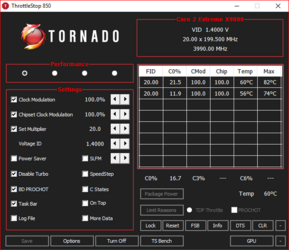
tornado.PNG
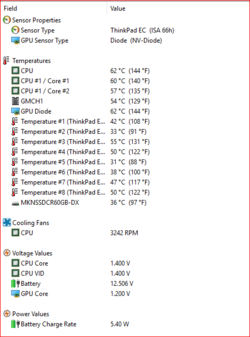
sensor.PNG
sick.PNG
We are winning folks!
1ijgu6.jpg
Haters be like:
untitled.png
 
Last edited:
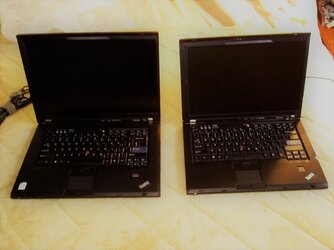
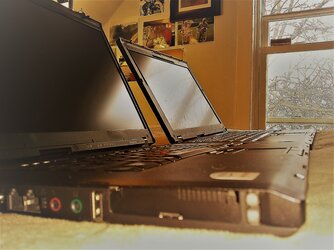
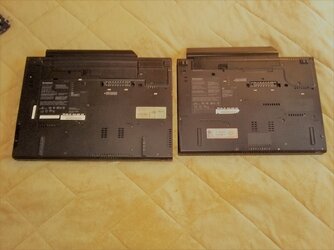
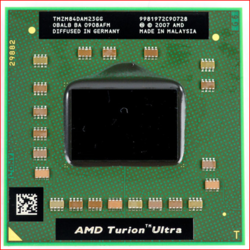
Hope you guys enjoyed this one as much as I did. One of my favorite laptop builds of all time -- hope to keep this one around for many years to come. And as fate would have it, I found my old ZM-84 chip, which will hopefully lead to another laptop project in the next few months, this time with an AMD based Toshiba Satellite. The ZM-84 is a dual core K8 based chip that runs at 2.3Ghz. This is essentially the pound for pound equivalent of the Core 2 Duo. No overclocking this time, but I can undervolt at the very least. Enjoy some parting shots!

IMG_20180413_120812187.jpg
IMG_20180413_120954495.jpg
IMG_20180413_121047388.jpg
IMG_20180417_143928932.jpg
IMG_20180417_144134381.jpg
IMG_20180417_144345834.jpg
IMG_20180414_130150137.jpg
ZM82.PNG
 
haha! why do you do this to me? Now I wanna mod all my thinkpads :D

..the poor things, they didn't do anything wrong :p

tp1.png
 
4GHz lol. Don't make em like they used to is a good thing goin on.... My tablet works great at stock but it would be nice to bump it a little. What's the software that puts the temp in your tray pray tell? Might want to get my boots dirty.
 
4GHz lol. Don't make em like they used to is a good thing goin on.... My tablet works great at stock but it would be nice to bump it a little. What's the software that puts the temp in your tray pray tell? Might want to get my boots dirty.

well I'm not sure, but I think it's speedfan, otherwise coretemp also does it, but it lists all the core temps in your tray so it can get a bit large
 
Coretemp and Realtemp both offer tray temps. Speedfan... wow.... I haven't used that in 10 years and it was nearly obsolete then...
 
TheNewCrash: Looks like we found another Lenovo fan! Hey that's quite the collection you've got there! Lets see what you can do in the horsepower department... they definitely need modding :)


Coretemp and Realtemp both offer tray temps. Speedfan... wow.... I haven't used that in 10 years and it was nearly obsolete then...

I use TPFanControl to manage the CPU fan, multiple options including smart mode and also manual settings for fine tuning RPM.
tpfancontrol3.PNG
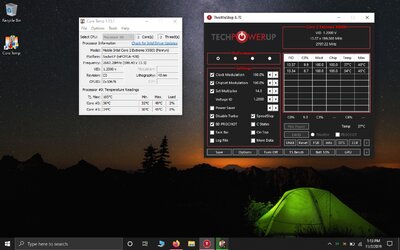
I use ThrottleStop to manage voltage and CPU clock. I have been experimenting with speedstep and CPU power options for fine tuning and mitigating heat.
tornado.PNG
For the taskbar notification area temp monitoring, nothing is better than core-temp. Gives you real-time data for clock speed, temperature, load, highly recommended --->
core2.PNG
Here is the main config for core-temp:
temp1.PNG
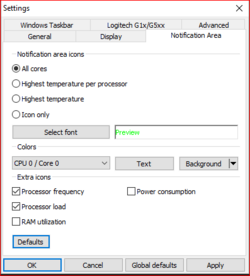
Settings for core-temp:
settings.PNG
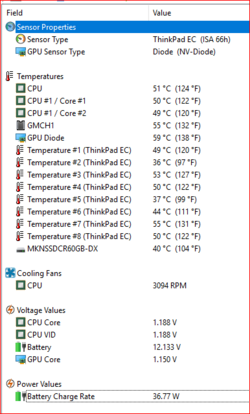
I also use AIDA64 from time to time for benchmarking and temp monitoring (not free):
temps.png
All of these programs are free and very useful. Especially if you are running a serious chip like the X9000.
 
Last edited:
LenovoT61beastmode.PNG

After some further tweaking I was able to hit 4.2Ghz with some success but its not 100% stable. As soon as CPU utilization goes above 10 % the temps spike no matter what fan profile I'm running. Even when it's set at 4500rpm I'm having difficulty removing the heat fast enough. This seems to parallel the Chernobyl disaster - when operators in the control room intentionally shut down all safety measures to perform a turbine run-down or bleed down to measure residual power output , they put the reactor in an unsafe configuration which lead to xenon poisoning and a positive void coefficient, priming the reactor to embark on a positive feedback loop, effectively boiling off the remaining coolant from within the reactor itself thus leading to two massive steam explosions, flipping the reactor's giant 2,000-ton concrete lid into the air like a coin. White-hot chunks of the nuclear core rained down on adjacent buildings, setting fires and peppering the ground outside, resulting in a nuclear-graphite fire burned for days and near total destruction of the reactor core resulting in massive releases of radioactive material into the environment.

For anyone that's interested here is a pretty good summary of the disaster itself -- credits to Wikipedia:
"The subsequent course of events was not registered by instruments; it is known only as a result of mathematical simulation. Apparently, the power spike caused an increase in fuel temperature and steam buildup, leading to a rapid increase in steam pressure. This caused the fuel cladding to fail, releasing the fuel elements into the coolant, and rupturing the channels in which these elements were located.
Then, according to some estimations, the reactor jumped to around 30,000 MW thermal, ten times the normal operational output. The last reading on the control panel was 33,000 MW. It was not possible to reconstruct the precise sequence of the processes that led to the destruction of the reactor and the power unit building, but a steam explosion, like the explosion of a steam boiler from excess vapor pressure, appears to have been the next event. There is a general understanding that it was explosive steam pressure from the damaged fuel channels escaping into the reactor's exterior cooling structure that caused the explosion that destroyed the reactor casing, tearing off and blasting the upper plate, to which the entire reactor assembly is fastened, through the roof of the reactor building. This is believed to be the first explosion that many heard. This explosion ruptured further fuel channels, as well as severing most of the coolant lines feeding the reactor chamber, and as a result the remaining coolant flashed to steam and escaped the reactor core. The total water loss in combination with a high positive void coefficient further increased the reactor's thermal power.
A second, more powerful explosion occurred about two or three seconds after the first; this explosion dispersed the damaged core and effectively terminated the nuclear chain reaction. This explosion also compromised more of the reactor containment vessel and ejected hot lumps of graphite moderator. The ejected graphite and the demolished channels still in the remains of the reactor vessel caught fire on exposure to air, greatly contributing to the spread of radioactive fallout and the contamination of outlying areas.
According to observers outside Unit 4, burning lumps of material and sparks shot into the air above the reactor. Some of them fell onto the roof of the machine hall and started a fire. About 25 percent of the red-hot graphite blocks and overheated material from the fuel channels was ejected. Parts of the graphite blocks and fuel channels were out of the reactor building. As a result of the damage to the building an airflow through the core was established by the high temperature of the core. The air ignited the hot graphite and started a graphite fire.
After the larger explosion, a number of employees at the power station went outside to get a clearer view of the extent of the damage. One such survivor, Alexander Yuvchenko, recounts that once he stopped outside and looked up towards the reactor hall, he saw a "very beautiful" LASER-like beam of light bluish light caused by the ionization of air that appeared to "flood up into infinity".
Let's hope my laptop isn't next ;)
 
Hello,

I also have a T61p [14" version] and an Intel X9000 CPU to play with.
I followed your guide and successfully overclocked to 3.4GHz [17.00 X 199.500MHz & VID 1.2125].

I tried [just for the heck of it] to go full throttle and tryout 4GHz but for some reason I can't set the multiplier above 17.0 or the VID above 1.2125... how did you set it to 20.0 & 1.4?
Also, something is unclear to me about thrittleshop's on/off switch. I would have thought that, when the application is only on monitoring mode [or turned off], the CPU parameters would return to the manufacturer's defaults, but they don't.
When I turn it off, for some reason, the profile settings remain the same [e.g 3.4Ghz].

Thanks
 
NICE! Good to see another Lenovo fan here. Especially with an X9000 and T61p!

I would start by posting some pictures here of your ThrottleStop settings. And we can go from there. No reason you shouldn't be able to hit 4.0Ghz once we get your TS settings dialed in. Also make some room in your freezer for the laptop. That's the best way to play at 4.0Ghz because it will help keep your temps under control and use strictly for benching. I would also recommend downloading TPFanControl. This is almost a requirement once you get over 3.0ghz. I use the manual setting at "64" to get 4600RPM on the CPU fan.
 
Hello storm-chaser, THX for your thread, actually I registered only because of that as I'm not overlocker ;-)
I'm upgrading my girlfriend's old R61 (14'', T8200) and came here to check why Hynix 2X2GB PC2-6400S DDR2-800MHZ CL6 1.8V memory modules do not fit into R61 (BIOS is not starting), while they do fit in the same age HP Compaq nc series. To be on the lucky side, old Kingston modules I bought for our HP Compaq back in 2012 out of amazon.com run in R61 ( www.amazon.com/gp/product/B0038QOA0E ), so I simply exchanged them between Lenovo and HP Compaq.
With R61 upgrade I modded BIOS to Middleton SATA II and put fresh new Samsung 860 EVO 500GB SSD. R61 still running with genuine XP 32 pro, but after some hardware set-up time I'd like to upgrade XP to virtual XP running under Win 7 with step by step transition to Win 7 or Win 10.
2x 4GB of ram in R61 is tempting, but these PC2 / DDR2 get expensive.
The other end of overlocking: our R61 runs at core temperature 29°Celsius when idle so I'd like to keep it as a room cooler ;-)

Middleton BIOS is key for maximum performance. And as you have done, is best when paired with an SSD drive. Windows 10 is a very straight forward upgrade. Just like installing any other operating system for that matter. Should be able to find all the required drivers as well (most if not all of them can be downloaded from Windows Update)
 
I think its time for an update, seeing as a good bit of time has elapsed since the build was completed, over a year in fact.

-Laptop is still going strong: no overheating problems or thermal issues
-X9000 CPU typically runs at 3.4Ghz and for emergency power I can bump it up to 3.6Ghz
-I set ThrottleStop to run on windows 10 start up, making for a stealthy overclock
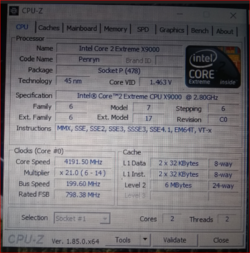
-X9000 CPU is running strong and I have managed 4.2Ghz @ 1.5v for CPU-Z validation
-While this configuration works great, this laptop is no longer my go-to machine due to HD video streaming problems
 
Well my main laptop died on me today, so its time to switch back to the T61p as my go to laptop.
Today I've put in a higher capacity SSD and performed a fresh install of windows 10.
still using the exact same configuration from the original build, ie Throttlestop and TPFancontrol, and I have it overclocked to 3.4Ghz
-One problem is that the FX570m is not up to the challenge of HD video streaming, so that's the only issue that still needs to be addressed.
 
Hi Stormchaser, I am having issues on my T61 getting my x9000 to multiply past 14 and voltage only goes to 1.2.
I dont believe the t61p and t61 have diffenrences besides the graphics card so shouldnt I be able to reach the same speeds as you?
<img src="https://i.ibb.co/xCQx696/Untitled.jpg" alt="Untitled" border="0">

- - - Auto-Merged Double Post - - -

Sorry first image didnt work?
Untitled.jpg
 
Back