• Welcome to Overclockers Forums! Join us to reply in threads, receive reduced ads, and to customize your site experience!

PROJECT LOG Sneaky's Back!!! ==> Mean Green Gaming Machine

Overclockers is supported by our readers. When you click a link to make a purchase, we may earn a commission. Learn More.
I love that paint. :drool:

That's it, I'm learning how to powder coat! :D
I haven't actually powder coated myself, but it's not a very difficult process.

The first thing you need to do is find an oven large enough to bake your powder coated items at 400ºF. The second is to make sure you have a very even coat of powder over your piece... it's electrically charged particles of powder clinging to a grounded piece of metal, so if you over spray the powder, it just builds up and will become a big drip or smear when you bake it.

You can buy a cheap entry-level powder coating gun/kit from the Eastwood Co. online, then buy whatever powders you want to from various distributors (can buy as little as 1lb at one time, up to 100's of lbs). After that you just need to get yourself a cheap electric oven from a used appliance dealer or pick one up from the curb, yank out all the racks in there, and make something to hang parts from inside the oven. This'll work just fine for small parts, but it will take practice to coat things right and bake them right. For this reason you want to have an oven with a properly calibrated and operating temperature control, and an accurate egg timer. -- And DO NOT USE YOUR HOME OVEN. Once you bake powder in that one oven, you don't want to be baking food in it afterwords.

For anything bigger than what fits inside an oven, I would stick to having a professional metal-finishing company doing it for you, simply based on the skill it takes to evenly coat larger pieces, and the equipment/size of oven needed to bake those pieces once coated.

Another important thing to take into consideration is metal prep - usually a shop will sand-or-bead blast your pieces before powdercoating because you absolutely cannot have ANY oils on the surface of the metal, otherwise the powder will not stick or will bubble in that area once baked.

Hope that helps.
 
Hey... does anyone know where I can find a full-cover waterblock for my Asus Rampage III? When I bought the board and i7 920 3 years ago it was brand new and everyone including EK, Danger Den, and BitsPower had full-cover blocks for it. -- But now I can't find a single retailer online that has one of these blocks for sale nor anyone selling one used.

Does anyone have one of these lying around the house? Or know where I might be able to purchase one?

and Thank You Silver_Pharaoh, I think so too :)
 
I haven't actually powder coated myself, but it's not a very difficult process.

The first thing you need to do is find an oven large enough to bake your powder coated items at 400ºF. The second is to make sure you have a very even coat of powder over your piece... it's electrically charged particles of powder clinging to a grounded piece of metal, so if you over spray the powder, it just builds up and will become a big drip or smear when you bake it.

You can buy a cheap entry-level powder coating gun/kit from the Eastwood Co. online, then buy whatever powders you want to from various distributors (can buy as little as 1lb at one time, up to 100's of lbs). After that you just need to get yourself a cheap electric oven from a used appliance dealer or pick one up from the curb, yank out all the racks in there, and make something to hang parts from inside the oven. This'll work just fine for small parts, but it will take practice to coat things right and bake them right. For this reason you want to have an oven with a properly calibrated and operating temperature control, and an accurate egg timer. -- And DO NOT USE YOUR HOME OVEN. Once you bake powder in that one oven, you don't want to be baking food in it afterwords.

For anything bigger than what fits inside an oven, I would stick to having a professional metal-finishing company doing it for you, simply based on the skill it takes to evenly coat larger pieces, and the equipment/size of oven needed to bake those pieces once coated.

Another important thing to take into consideration is metal prep - usually a shop will sand-or-bead blast your pieces before powdercoating because you absolutely cannot have ANY oils on the surface of the metal, otherwise the powder will not stick or will bubble in that area once baked.

Hope that helps.

Thanks for the info Sneaky. I work in a body shop and co-own a smaller restoration shop, so I am familiar with prep and painting. I didn't know how powder coating worked though. Definitely didn't know about baking it, though I'm sure that makes it tough and durable. Would a paint booth with integrated heat lamps work for baking larger things? Just curious, I probably wouldn't coat anything too large anyway.
 
Thanks for the info Sneaky. I work in a body shop and co-own a smaller restoration shop, so I am familiar with prep and painting. I didn't know how powder coating worked though. Definitely didn't know about baking it, though I'm sure that makes it tough and durable. Would a paint booth with integrated heat lamps work for baking larger things? Just curious, I probably wouldn't coat anything too large anyway.

If you can hold an even 350°-400°F they'll work.
Needs to be held for about 20 minutes, maybe a bit more depending on the part.
 
If you can hold an even 350°-400°F they'll work.
Needs to be held for about 20 minutes, maybe a bit more depending on the part.

And as long as the heat is distributed evenly amongst the space. You don't want hot or cold areas when baking powder. IDK... it might work though, I remember seeing heat lamps used for powdercoating on the Eastwood Co's website previously. Doesn't hurt to try.
 
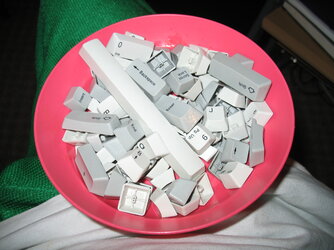
Alphabet soup anyone?

Just got done scrubbing the keys off of a Acer 6311-K mechanical keyboard made in 1996. What'd I pay for a vintage mechanical keyboard? NOTHING! I found it in a dumpster at school.

006.JPG

Going to be painting the keyboard with Metallic Green Spray-On Plasti-Dip come Thursday... the same day my PS/2-to-USB active adapter should be coming in the mail
:bday:
 
Last edited:
I'm looking forward to this.

My PS/2 keyboard may not be mechanical, but it's just as loud and the same shetty gray colour your keys are :p

Wouldn't mind seeing how they turn out. :thup:
 
I'm looking forward to this.

My PS/2 keyboard may not be mechanical, but it's just as loud and the same shetty gray colour your keys are :p

Wouldn't mind seeing how they turn out. :thup:
Not painting the keys... just the frame around the keys. Don't want to alter the functionality of the keyboard at all.
 
Oh :p

Actually, that'll look real good. Grey/white keys with green frame
I as well think it'll look good and provide a good contrast. I mainly just wanted to do something outside of a stock grey keyboard.

My little brother has been using spray-on Plasti-Dip on EVERYTHING... he painted the VW badges on his Jetta black, his rims black, his motorcycle helmet green, and who knows what else. If this stuff can stand up to a Wisconsin winter and salt on the roads after he sprayed 8 coats on his rims, I think it'll do damn good on a keyboard frame. Personally, this will be the first time I use the stuff. At least I have an expert as a sibling. :D
 
Last edited:
It has been tested and proven in temperatures from -30°F to 200°F.

Yep. It'll hold up to keyboard smashing :rofl:
Never heard of the stuff till today. I'll have to look into it eh?
 
Good to see you back man. I haven't posted on here in years either. Started lurking around a few weeks ago and just saw your thread today.
 
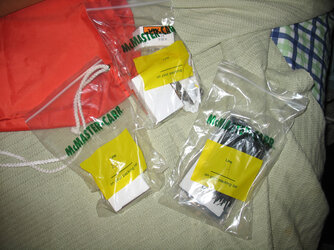
Presents from McMaster-Carr today... more hardware and some zip ties:
016_2mb.jpg


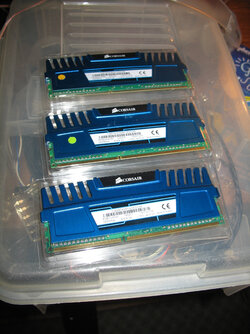
RAM from Amazon... my brother had 2x 4gb sticks already, so I only had to buy a 3rd 4gb stick to set up triple channel in the Asus Rampage III motherboard:
012_2mb.jpg


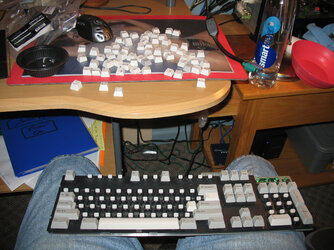
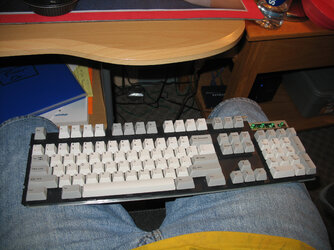
And after washing all the keys, the Acer mechanical keyboard is back together. Tomorrow I'll be painting the frame for the keyboard:
019_2mb.jpg
020_2mb.jpg
 
Last edited:
I was so happy with how the windows turned out using 6-32 flat-head socket-cap screws to attach the windows to the side panels that I decided to do the same with the rest of the MM Ext-U2-UFO body panels 028_2mb.jpg
 
Last edited:
Quick visual mock-up after I counter-sunk the holes in the Thermochill 120.1 fan grills and in the 5x 5.25" bay mounting flange as well - still VERY happy with the idea of flush-mounting flat-head socket-cap screws. Very clean, buttoned-up appearance:
002_2mb.jpg
 
Last edited:
Back