• Welcome to Overclockers Forums! Join us to reply in threads, receive reduced ads, and to customize your site experience!

Build Log: Aquatic PS3

Overclockers is supported by our readers. When you click a link to make a purchase, we may earn a commission. Learn More.

skorpien

Member
Joined
May 9, 2011
Location
Alberta, Canada
Hey all,

So I've been tossing the idea around in my noggin for a while to watercool my PS3. I have a first gen (fat) PS3 (originally 60GB, upgraded to 500GB) that screams like a banshee when I game or watch movies for any significant length of time. I figured since watercooling can greatly decrease the noise of a computer, why not do the same for my PS3?

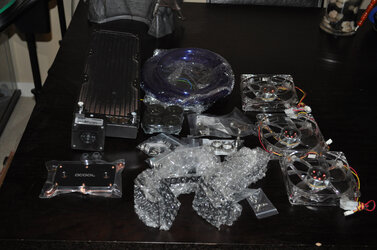
So, I got to researching and put together a parts list. Then I pulled the trigger and bought all of the parts:

1 MCR320 Drive rev 3 (360 rad, MCP35X pump and built in res)
1 Alphacool PS3 water block
1/2" ID 3/4" OD Primochill UV blue tubing
1/2" ID 3/4" OD Koolance barbs with spring clamps
3 Yate Loon low speed 120mm LED blue fans
Various braces, extensions and rubber feet for a makeshift rad stand
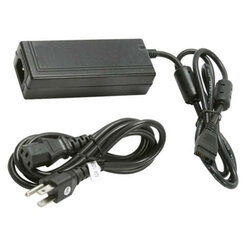
1 AC 120V to DC 12V 5A (molex) power adapter (rather than a full PSU)
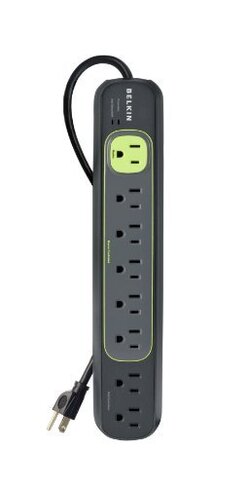
1 Belkin Conserve power bar

The power bar allows one device (Master) to control up to 5 other devices simply by turning on and off. When the device is in standby, power is shut off to the 5 Master Controlled devices automatically, and when it turns on, power is restored. This will allow me to turn on the pump and fans simply by powering on my PS3 and will hopefully avoid me having to manually turn the watercooling on and off. I can't take credit for this idea as it was posted in my parts thread by givmedew (thanks btw!).

The molex power adapter is rated for running up to 12 low speed fans simultaneously (5A) at 12V. Since each of the Yate Loons will draw 0.3A and the pump draws 1.5A, I figured this will be plenty for my needs and will eliminate the sound of a PSU fan.

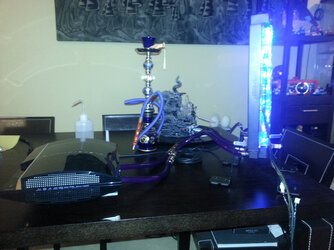
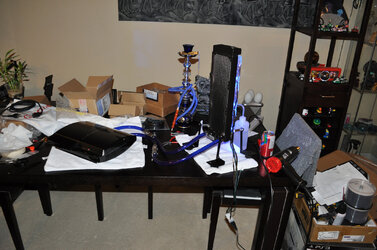
So, onto the pics:
PS3WaterFull.jpg

AC120VtoDC12V5AMolex.jpg

BelkinConservePowerBar.jpg

I'll be back with more hopefully soon :)
 
Small Update

Hi all,

Apologies to those waiting on an update. I know it's been a while but life's been a bit hectic. That said, I've managed to make a bit of progress on the build :)

As was discovered in my other thread, it seems that the Alphacool block I'd purchased wasn't compatible with the older model of PS3s. Sony's confusing naming convention threw me off when I was purchasing parts and it wasn't until after I had the part in hand that I'd realized it wasn't going to work without significant modding...

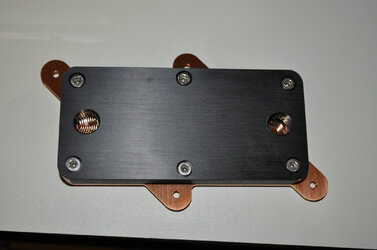
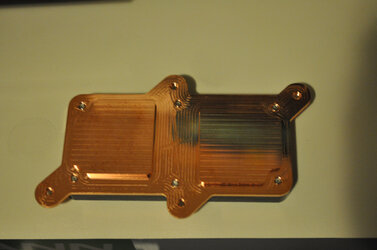
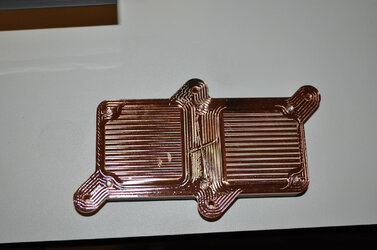
Seeing as this is my first (and only) PS3 and that I'm not quite up to par on my modding skills, I opted to purchase a block that was compatible instead. So after more research I came across the Liquid Extasy SB Playstation 3 B Waterblock:

PS3BlockTop.jpg

PS3BlockAngle.jpg

PS3BlockStraight.jpg

Now I can get to work!

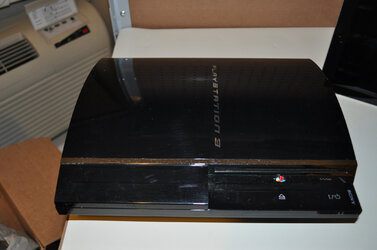
Before shot:
PS3BeforeShot.jpg

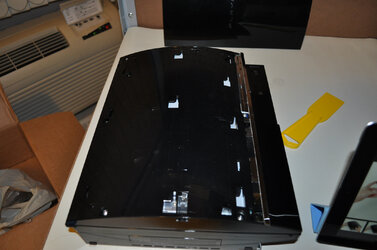
Topless...
PS3FirstIncision.jpg

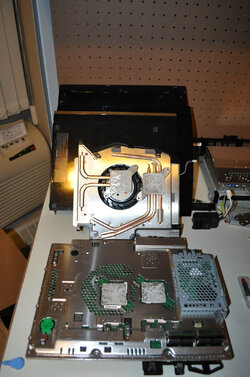
And finally, after a stripped screw and mild cursing (seriously, who needs to secure the ground wire that well???), fully disassembled:
PS3FullyDisassembled.jpg

Looks like it's a fit!
ItsGonnaFit.jpg

I'll be updating soon (hopefully) with more progress shots. Until next time!
 
Man, I can not believe we are still waiting on this.......... :rofl:

Glad life is good and you are back up on your feet. Now lets get this long waited bad boy done :)

Modz
 
So I'm finally back with another update (and my apologies for taking as long as I did).

It turned out I was a bit premature in celebrating last time. I had assumed that since the orientation and general shape of the block was the same as the old heatsink that it would work perfectly. Not so....

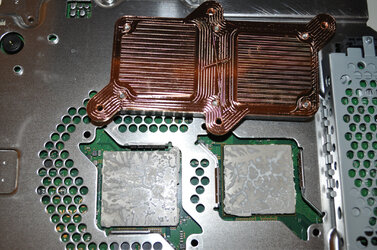
It would seem that Sony included retaining edges alongside both the CPU and GPU chips that protrude perpendicular to the board. These prevented the block from sitting flush with the processors... So it would seem I needed to mod it regardless... (crap...)

Oh well, I needed to eventually purchase a Dremel if I wanted to continue modding... I guess...

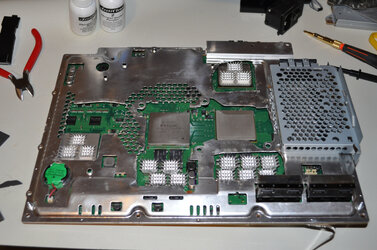
Pardon the hack job. This next picture is of the motherboard with the modified aluminum shield. I figured since I was gonna need to cut it anyway, I might as well make some cutouts around some other chips and place heatsinks on them.

PS3ShieldMod.jpg

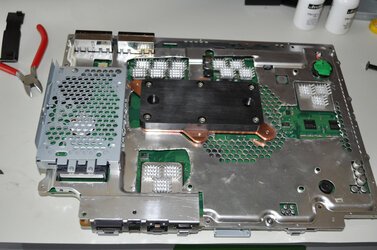
Here's a dry mount of the block. I had to increase the size of the mounting holes in the shield to get the block to mount properly, but it fit finally.

PS3DryMount.jpg

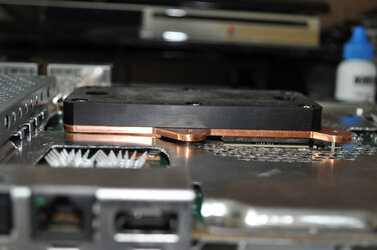
Lastly, a side shot of the block. You can see it now sits flush with the processors (or at least you hopefully can)...

PS3FlushBlock.jpg

I wanted to ask the community a question. What would be the best way to apply thermal paste in this situation? Seeing as how the processors are so large, I would assume that the traditional way of mounting a CPU block wouldn't work well? I was looking at iFixIt.com's guide to thermal paste application for the PS3 and they mentioned covering your finger in plastic and spreading the paste on the processor after applying a dab in the middle? Seems like it would work but if anyone has any other ideas, please feel free to suggest something :)

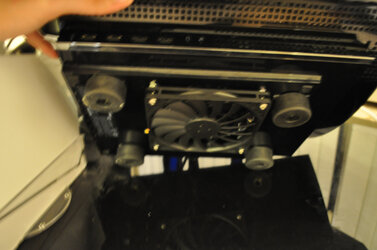
I also purchased a Scythe slim 1200 RPM fan locally. I was thinking of mounting it beneath the block somewhere in the bottom of the case to blow air at the heatsinks seeing as I've removed the stock fan.

That's it for this small update (again, sorry)... Next up is the rad dance, rinsing of the parts, mounting the block and hooking it all together. Hopefully things go a bit smoother...
 
Minor update:

I've mounted the block and flushed everything, but I ran into a bit of a snag when putting everything back together.

The 90 degree fittings I have fit perfectly (actually just barely), but they don't leave any room for a 120mm fan, even a slim one. Does anyone know if the rest of the PS3 needs to be actively cooled? Can I just get by with the heatsinks I placed on the chips and have them passively cooled?

My only options would be to see if a slim 80mm fan would fit or to mod the bottom of the PS3 housing to mount a fan on the outside.

Thanks in advance.
 
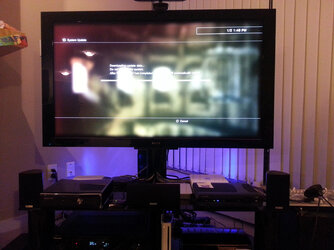
So, it's been a bit of a mixed success. I bought some Koolance QDCs to be able to move and position the PS3 better in my entertainment center and did a thorough leak test. Everything went great, but when I finally hooked it all up to my TV and turned it on, it ran for about 20 minutes before beeping, flashing red and shutting off. I think it might be an airflow issue with me removing the stock fan. I'm going to reapply the thermal paste and reseat the block. I'll also be adding a 120mm fan to the bottom to improve circulation. I'd hoped to keep the stock look as much as possible, but I don't think that's a reality with this project anymore... Oh, and I'm looking at getting a temp probe and LCD to monitor temps. Any suggestions on a blue LCD temp display with probe that runs off of the 12VDC from a PSU? All I can find are 5VDC and the external PSU I'm using only provides 12V.

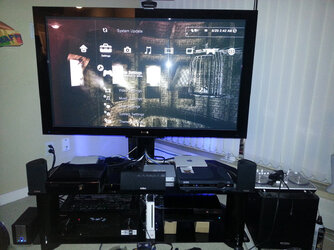
Test run:
PS3_TestRun.jpg

Koolance QDCs:
PS3_QDCs.jpg

PlayStation XMB:
PS3_XMB.jpg

Edit: Pardon the blurry phone pics.
 
Success...

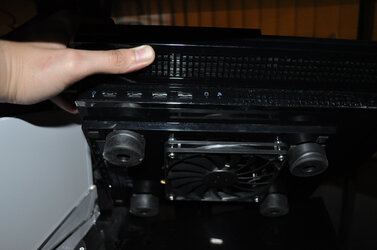
I'm not sure which it was that did the trick (or if it was a combination of the two), but I re-seated the block using Arctic Silver rather than the paste it came with and I modded a 120mm fan to the bottom to give the ramsinks active cooling. I was able to play 30 minutes of a game and left it sitting on the XMB screen for an hour afterwards to see if it would shut down due to heat. I think it's safe to assume that heat won't be an issue anymore. I've also decided against getting a digital temperature monitor for the time being.

I would like to say thank you to everyone that contributed and helped me out through this project. I know it's been a long haul, and I apologize if I've been a nuisance, but it's finally done and it's working well.

This is my first foray into watercooling and modding in general. I have to say, I think I'm hooked. Though I've definitely learned that I will need to research better for my other projects to avoid the extra cost associated with buying incorrect parts.

Since the start, I've had to purchase a different block than the Alphacool block (Liquid Extasy) that was designed for the first generation of PS3s. I've also had to mod the motherboard shield and bottom casing, buy ramsinks, case feet, quick disconnects and an additional 120mm fan.

Anyway, here are more pics of the build.

PS3LeakTest.jpg

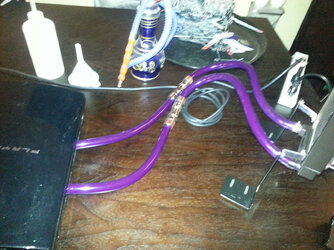
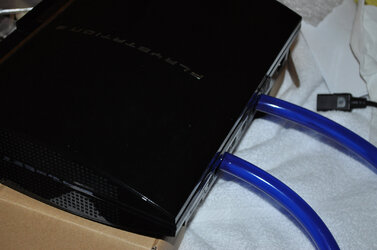
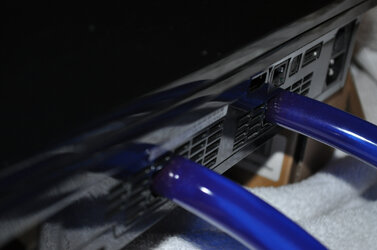
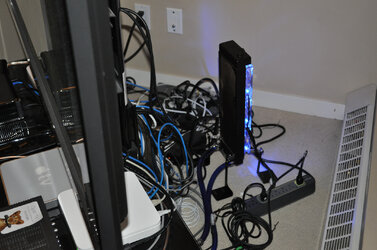
PS3Hoses.jpg

PS3HosesCloseup.jpg

PS3FanMod.jpg

PS3FanMod2.jpg

PS3RadiatorPlacement.jpg

PS3FinalShot.jpg

And finally, here's a link to my Photo Bucket album which has more pics:
http://smg.photobucket.com/albums/v202/skorpien/PS3 Watercooled Build/
 
Looks like nice work to me. I have considered water cooling mine as well, but the other half would likely kill me for doing something like that. How much of a nightmare was it to take it apart? I may just dust out the stock cooler, and probably reseat it with some AS5 or Perihelion.

By the way, that's a gorgeous hookah. :D
 
I'd also like to know how difficult it was to take apart, mine is noisy as hell when playing DVDs (upconverting) and it could probably use a good dusting out.
 
Thanks deadlysyn! It's a souvenir I brought back from Lebanon :)

It was a lot easier than I thought it would be to disassemble it. I just used ifixit's teardown guide, though looking back it probably would have been easier using their heatsink replacement guide (you don't need to tear it down completely).

I found that keeping the screws that are removed from the different steps of the guide separate really helped. I used a compartmentalized plastic tray and placed all of the screws from every step into a separate compartment.

I think doing a thermal paste replacement probably would have decreased the fan noise for me too, but I have always wanted to do this since I saw my first watercooled PS3 online :) It also helps that I have a very supportive girlfriend that actually encouraged me to do this.

If you have any questions at all, please feel free to ask and I'll try to help as best as I can. Also, I may have a question for you once you tear yours down. I have a leftover plastic piece that I can't figure out where it goes for the life of me. I tore down the heatsink completely (which isn't covered in the guides) out of curiousity and I think it may have come from that, but I can't be certain. I'll post a pic later when I get home. Hopefully it's nothing important lol

Edit: Oh, the most difficult part for me was actually trying to avoid stripping the screws. Some of them are really tight and took a considerable amount of effort to work loose.

PS - I just realized you're probably the same dealmaster from Hard Forums (hope it's not forbidden for me to mention them here), so thank you so much for helping me out there!
 
:bump: Holy:censored: ......Great job man. And what a nice GF! I would've thought you were hiding in the closet with a little light bulb on modifing it. :rofl: Great job and happy it all worked out. Btw, I remember this thread along time ago lol and finally we can say job well done. :salute:
 
Back