• Welcome to Overclockers Forums! Join us to reply in threads, receive reduced ads, and to customize your site experience!

Build Log: Loki's Enthoo Primo

Overclockers is supported by our readers. When you click a link to make a purchase, we may earn a commission. Learn More.

iLoki

Member
Joined
Dec 8, 2008
I've recently returned to the Overclockers.com forums and already, my wallet hates me for doing so!

Here's the plan: Get rid of my CM Storm Scout, move my build into an Enthoo Primo, and watercool it!

Here's where we're starting: Got rid of the CM Storm Scout, and have moved my build into the Enthoo. Still on air until all of my components come in.

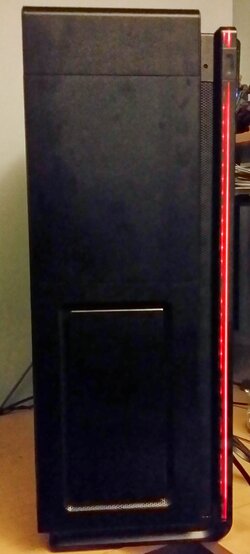
This is what she looks like now, with the air cooled setup inside:
20131231_185842.jpg


The current specs are as follows:
  • i5 3570K @4.2ghz
  • Sabertooth Z77
  • XFX HD 7970
  • 24 GB Ballistix Tracer DDR3 1600
  • Corsair HX1000 PSU (wires individually sleeved by hand. before all of the big name PSU manufacturers started doing individually sleeved cable lol)
  • 2 Sandisk SataIII SSD's in Raid 0
  • 1 TB Seagate HDD

I'll be swapping the 7970 out for an R9 290X. With luck on my side, the 290X will arrive on Friday, otherwise it will be next week.

The components I've just ordered to garner my wallets hatred:
  • XSPC Raystorm cpu block
  • FrozenQ 250mm Fusion V reservoir (taking a chance on this because they look amazing. Hopefully I get a good one and don't have to deal with RMA's/returns)
  • XSPC AX240 radiator
  • XSPC AX360 radiator
  • Heatkiller DDC top (I already have an MCP355 that I'll be re-using)
  • EK full cover GPU waterblock w/backplate
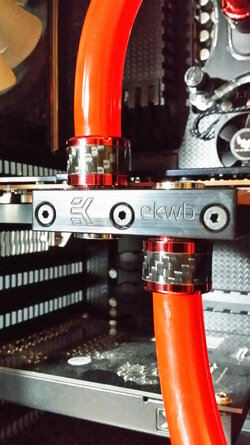
  • 12 Monsoon carbon accented compression fittings, a couple 45° rotary fittings and a 90° rotary fitting
  • 7/16"IDx5/8"OD Primochill LRT tubing
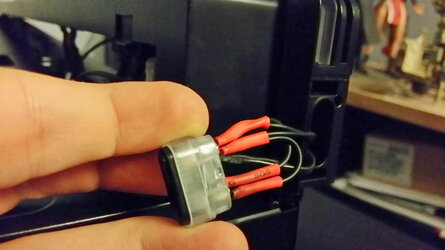
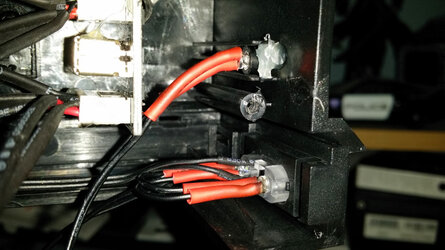
  • several 3mm LED's (should only need two, but got some extra just in case)
  • 1.5m of flexible LED strip to replace the front panel lighting on the Enthoo
  • 2 Corsair AF140 red LED fans (for the front intake)
  • 10 Corsair SP120 fans for push/pull on the radiators
  • PT Nuke

This won't be my first foray into watercooling, but it is my first in such a large case that won't require any modding towards my purposes, and will also be my first time putting a GPU under water.

I can't wait to get started on this and really see what this beast will be capable of. :)
 
Last edited:
Watch those Monsoon fittings. I'm using them for my current build and I've been running into fitting problems because of their width. They sure do look nice though. I'm using the matte black ones myself.
 
Thanks for the heads up, I tried to make sure everything had enough spacing so I think it'll work out fine. I'll have to test fit when everything comes in

Lighting, fittings, fan and GPU should all be in on Monday. The rest should be in on Tuesday hopefully
 
Actually pushed it up to 4.5 today on 1.25v
I'm running with a Prolimatech Megahalems right now

peaks at 75°C under stress testing right now, not comfortable pushing it any further until its under water :)
 
So...
Some quick updates on my planning:
I've decided I'm going to delid my cpu and change the TIM on the die, and get rid of some of that adhesive for better contact. To that end, I've ordered some Liquid Ultra, and some new 'normal' TIM as I'm running low anyway.

I've pulled all of the LED's I plan on changing out, and a word of warning: be VERY careful when removing the diffusers from the top and front of the case to get at the LED strips. They aren't terribly easy to remove, take your time, undo the tabs from the inside of the covers if you can. (This is easier on the front than the top cover.)
I snapped my top diffuser in half during removal last night. Thankfully it's a clean break and will glue back together with little or no noticeable seem. I'm going to get in touch with Phanteks about ordering a replacement.

The single LED's for power and hdd activity are 3mm LED's, the hard drive LED is hot glued into a post that is hot glued onto the front panel, the post comes free with very little effort, but the LED in the post will take some work to remove, just have some patience. The two LED's in the power switch housing are very easy to remove, just a quick tug and they broke free of the glue, and luckily for me, there's enough glue left over to hold the new LED's snug when I change those out today.

As for the rest of it, it will be a very simple soldering job to put the new LED's on, and I'll put up a more detailed write up of how to get to everything later today after I've finished the process.

Edit: LED Strips did not get delivered today like they were supposed to. I did receive my first package from FrozenCPU with my fittings, tubing and 3mm LED's, package from PerformancePC with the blocks, rads and such should be in tomorrow, hopefully the LED Strips make it in by then as well.
Also, my 290X is held up in Secaucus, NJ due to weather conditions. No tracking updates since the 3rd, so hopefully that gets moving again soon.
 
Last edited:
:) I got all of the LED's switched out yesterday, so I can finally do the write up on how to do it (it looks AWESOME with the blue swapped for red btw)

Also, the rest of my equipment, along with the 290X came in yesterday. Spent most of my night flushing and rinsing the new equipment and then let the FrozenQ reservoir run with my pump in a small loop for leak testing overnight, and all looks good there :)

Going to do some benchmarking with the 290X at stock clocks and see how it compares after going under water at stock as well, since under water it should be able to actually hold the boost clock. :thup:

In what little experimenting I did yesterday, I am impressed by the 290X, and confused as to all of the complaints about noise. It doesn't bother me at all, in fact, in most situations I found it to be fairly quiet. Not silent by any means, but not distracting at all.

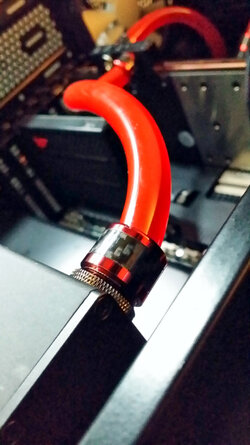
Here's a little teaser to tide you guys over for now:
20140108_001108.jpg

Sorry for the crappy picture, I'll take better ones with a real camera later :)
 
Last edited:
Here's how to change out the LED's:

What you'll need:
  • Wire Cutters/Strippers
  • Soldering Iron
  • Heatshrink
  • A plastic spudger, guitar pick, or small screwdriver
  • Patience!

To begin, remove the front and top bezels of the case and set the top aside.
Carefully pry up the plastic cover for the LED strip, use a plastic spudger or guitar pick if possible to help prevent any marring of the plastic. Pay attention to the clips and make sure each is free before you pull with any force. The clip tabs are accessible from the back of the bezel, if any get stuck.

Once the plastic is off, remove the strip of tape down the left hand side of the LED strip, then gently push the power wire through the opening to pop the LED strip up so that you can grab it. Once you're there, you can either clip the power wires, or push the LED strip through the opening.

I opted to desolder the power wires rather than cut them, to save me a little time stripping and tinning the wire. I will double check the measurements, but the front LED strip is 21" long, and the top is 22" or 23" long.

To remove the top LED strip, remove the top corner bezel. It comes up just like the front and top covers did. Be careful however, as all of the power switch, LED, USB and fp audio connectors are attached. Loosen the cable management straps on the interior of the case to give yourself a little slack.

Again, carefully pry up the plastic trim covering the LED strip, using a plastic spudger or guitar pick. The end on the back of the case is particularly tricky. You may have better luck using a thin screwdriver to undo the tabs from the underside of the cover.

Once the cover is off, again remove the thin strip of tape down the left hand side, and push the power wire out through the opening to help pop the strip up so you can grab it. Again either push the LED strip through the opening, or clip the power wires.

Next, you'll want to prep the power wires and new LED strips for soldering. Tin the power wires if you need to, or desolder them from the old LED strips. Tin the contact pads on the new LED strips, and connect the power wires to their respective pads. Use some heatshrink over the end of the LED strip to cover and protect the joints.

Next up, the power and hdd activity LEDs. The power switch has 2 3mm LED's and the hdd activity light is one 3mm LED in a small post that is hotglued to the front panel.

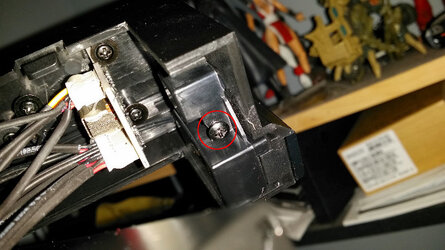
To get at these, remove this screw:
PowerHDDCover.jpg

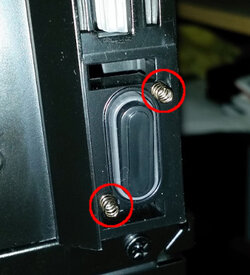
The tabs that hold the power button in are easily accessible. Pop them out, and watch for the two little springs underneath, they like to go flying.
Springs.jpg

With the button off, remove the two little springs and set them aside with the button. Push forward on the wires connected to the button to remove the button assembly. The LED's are hot glued into the top and bottom end of the housing, and you'll notice that one LED is daisy chained off the other.

Make note of which connection is which, the positive end of the LEDs are connected to eachother, and the negative are connected to eachother.

Carefully peel away the heatshrink on the LED's, desolder the wire from the legs of the LED and solder the legs of the new LED on to it. Rinse and repeat for the other LED. Remember to slip some heatshrink on before you solder! :)

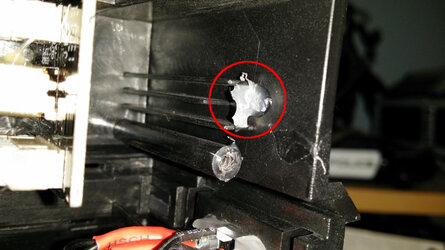
For the HDD LED, its located here:
HDD_LED Location.jpg

It's hot glued in place, but works free relatively easily. The LED itself is also glued into the post, but that is quite a bit trickier to get out. I very carefully used a razor blade to scrape away most of the glue and then was able to tug the LED out.

The finished power switch:
Installed Power LED.jpg

Both the HDD LED and Power switch installed into the panel:
Installed.jpg

With that done, replace the cover, thread any cabling back through if needed (I completely removed the HDD and Power LED cabling from the PC to make it easier to work on). You may want to cut some tape to go across the left hand sides of the LED Strips just like the ones that were removed to help prevent the LED's from bleeding through on the left and maintain a nice, clean line like the stock set up.

Now, just re-install the corner, top and front bezels and reconnect the power cables for the LED's and you're all set!

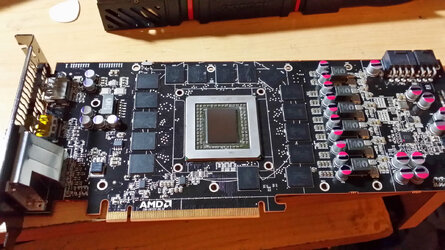
And one more teaser while the rig is leak testing :)

Naked GPU!
Naked_GPU.jpg
 
LOL, i love the random nudity at the end there! Thanks for the writeup on the led change. I'm going to change mine to white.
 
lol. She spent all last night and today while I was at work leak testing. Bleeding when surprisingly quickly, very little air was left in the loop at all after just a few minutes and a little bit of case tilting.

Decided to go for a push config on the fans, rather than push/pull. Both because I was curious at how well the system would perform with one set of fans, as well as I forgot to order enough radiator screws... >.<

Anyway, seems to be about a 5% performance boost for the GPU, simply for putting a better cooler on it!

In all of my testing so far, I have yet to see it even hit 50°C, a nice, solid 45°C drop over the stock cooler lmao.

I have yet to delid the CPU as well, the TIM I ordered hasn't come in yet, but seeing as I'm still hitting 75°C+ in LinX/IBT I am still going to delid.

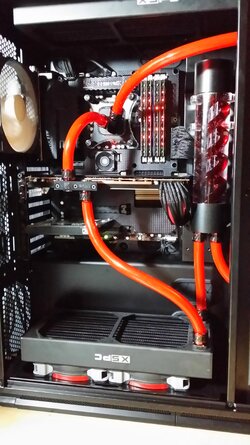
Anywho, here she is!
20140109_191930.jpg

Items still on my to-do list:
  • Delid CPU, change TIM
  • Interior lighting
  • Possibly change the rear exhaust fan for something that isn't white.
 
The Liquid Ultra I was waiting on came in today. So, Delid time!

I have to say that this was quite possibly the most frightening thing I have ever done in regards to computers and electronics. Knowing that going even a little bit too deep risked scratching the die, my heart was racing the entire time >.<

But! Once the corners were done and I was able to slowly work away at the sides and the IHS came clean off, I remembered that I was supposed to be breathing!

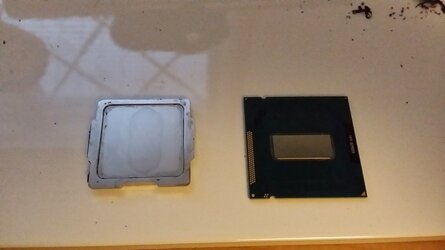
Naked Ivy Bridge!
naked cpu.jpg

After getting things all nice and cleaned up, I used the q-tip/cotton swab method of applying the Liquid Ultra to the cpu die, and then used Gelid Extreme between the IHS and waterblock.

The results are immediate, and incredible.
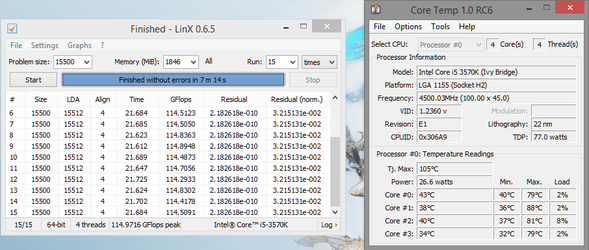
Before temps after 15 passes of LinX:
BeforeDelid.png

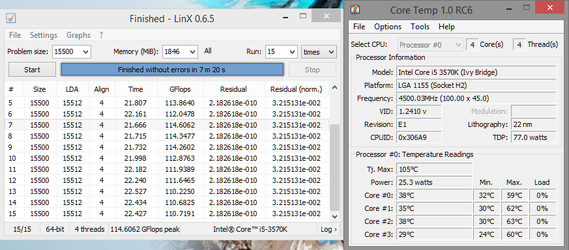
After temps after 15 passes of LinX:
AfterDelid.png

This, to me is astounding. Nothing more than ensuring better contact between the IHS and CPU die, and using good TIM, and I've got a 26°C drop on the hottest core under load, and an average drop of 20.75°C under load across all cores. Even the idle temps dropped an average of 7.25°C.

:attn::attn::attn::attn:

If you've got the stomach, the balls, or a vice, I strongly recommend delidding for IB/Haswell!
 
Wow! Amazing temps and congrats on a job well done.

I don't have the balls or the stomach to do that. I just can't. lol
 
Thanks! :)

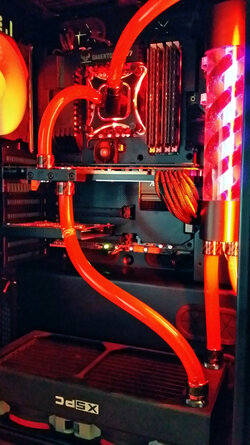
I'm beyond happy with this so far. Excellent clocking on my 290X with very little effort, and the machine is so quiet that if there is any other background noise in my room at all, its completely inaudible, and barely audible with dead silence.

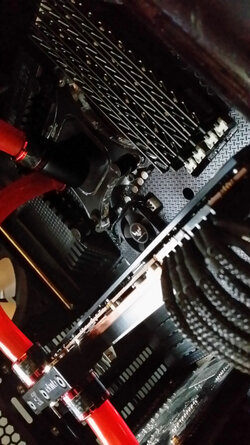
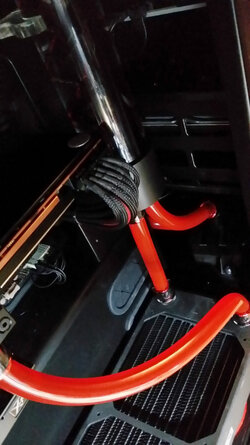
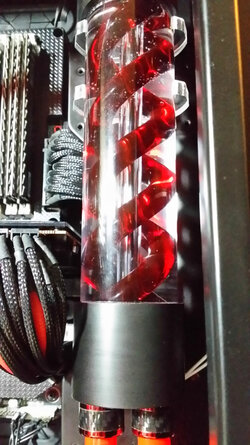
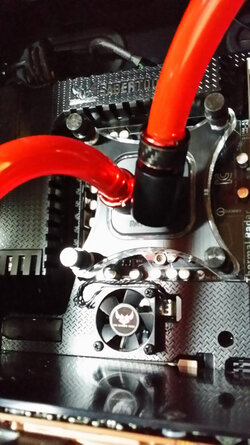
Also, I got my lighting (somewhat) situated and took a bunch more photos:
20140110_172355.jpg

20140110_172428.jpg

20140110_172520.jpg

20140110_172553.jpg

20140110_172643.jpg

20140110_172658.jpg

20140111_173302.jpg
 
Back