• Welcome to Overclockers Forums! Join us to reply in threads, receive reduced ads, and to customize your site experience!

PROJECT LOG Double Dragon Case Mod-Black(or White)/Red Cube w/ 720 Rad space

Overclockers is supported by our readers. When you click a link to make a purchase, we may earn a commission. Learn More.
Judging by your last car (Lancer, correct?), I'd assume you want a 4-door sporty car. Honda Accords are pretty affordable and similar in size and power.
 
Judging by your last car (Lancer, correct?), I'd assume you want a 4-door sporty car. Honda Accords are pretty affordable and similar in size and power.

Actually that car was my wife's old car. This will be the first vehicle we've bought that will be primarily mine. I sold my 4 runner last year, so I'm looking to get a truck this time around. Having a 4000 sq/ft house means a lot of hauling of tools and materials in the near future since just under half is unfinished. Not to mention when I eventually get my boat...... I'll have something bigger than my wife's crossover to haul it *laugh* I like the look of the Toyota Tacoma, but I'm leaning toward the Nissan Frontier because of higher safety rating and more affordable.
 
A couple of buddies at work drive Tacomas, and they swear by them. And for good reason, they just don't die.

I don't know about hauling with them though, I'd probably recommend an F-150 or Silverado. Both seem to always have body issues though (panels rust though quickly), if that matters to you.
 
You don't have to worry about the new F-150's panels any longer as they're made out of military grade aluminum.
 
Didn't know that. F-150 has my vote securely now.

I like the new body panels, but I don't think the F-150 would fit in my garage. Looks like my budget and requirements are pushing me towards the Nissan Frontier CV model. Hopefully I can negotiate a good deal in the next few days.
 
How big is your garage? My brothers fits in his and its a standard 2 car. He only has the extended cab though, not the crew cab like my SilveRAYdo.
 
Yea, the single or crew cab F-150 with a standard 8ft bed should fit in most garages. Japanese trucks are great and all, but they aren't built for hauling like the American(ish) ones.
 
How big is your garage? My brothers fits in his and its a standard 2 car. He only has the extended cab though, not the crew cab like my SilveRAYdo.

Yea, the single or crew cab F-150 with a standard 8ft bed should fit in most garages. Japanese trucks are great and all, but they aren't built for hauling like the American(ish) ones.

Yeah my garage only has about 18 inches clearance front to back after taking in the length of the nissan crew cab with the short bed.
 
Situation update:

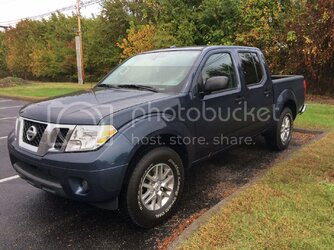
Well, losing my Lancer was definitely a hitch in my development. Good news at least now I finally have a nice looking truck(pic below). Other good news, I think I’m being hired to do several sleeving jobs by a local builder. So I might be able to build up a small reserve for when I continue this awesome build.

IMG_0394_zpsykewwyft.jpg
 
Glad to see you got yourself a new vehicle. This build looks pretty interesting, i like the idea of recycling old cases, and that custom res looks AWESOME. Subbed!
 
Glad to see you got yourself a new vehicle. This build looks pretty interesting, i like the idea of recycling old cases, and that custom res looks AWESOME. Subbed!

Welcome aboard and thanks for subscribing to the crazy channel. The build is currently on hold as I'm nearing completion of recovering mobility from my back injury. I am however in negotiations to get 1 of the 2 GTX 360 rads I want to use for this build. The res is definitely a unique part of this build, still working out the rainfall design for it. I hope to get back to the case modding after the new year, which is when the cutoff for color voting ends.

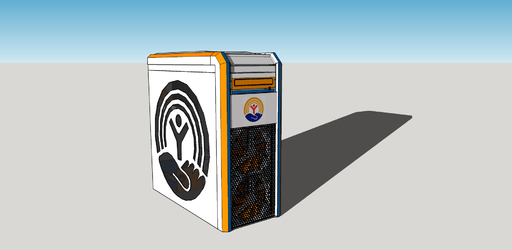
In other news, I'm in talks with the company I work for to sponsor/commission a mod/build to donate to a local non-profit that they support. I'm hoping to hear if they like my idea or not by next week sometime. Below is a picture of a rough design of what it would look like. Again thanks for tuning in.

FrontLeft.png
 
Update 12/28/2015: Voting Nearing a Close! Special Surprise Design Change.

Hey all!

My wife went to visit family and took the girls with her, so that meant the house was left to my father in law and me. Time to get some work done! :thup: I will have a couple updates after voting ends on Jan. 1st. But until I get to those updates, I thought I’d provide some new last minute motivation to vote.
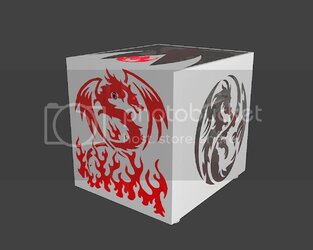
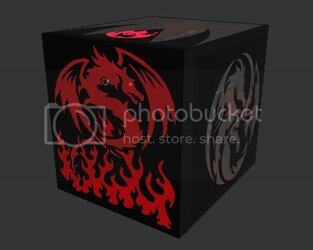
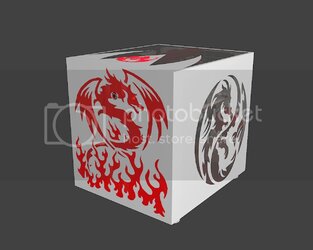
I introduce to you the finalized design for the front panel! Thanks to SonofJor-El@OCN for helping me hash out a design. Again I rendered it in both color schemes, because still a lot can change before the 1st. Hope you like the new change.

KRender_FrontRightW_zpsf1oagdum.jpg

FinalDragonFrontRight_zps758y0fin.jpg
 
SigNew_zpsab2xy88w.jpg

Update 1/3/2016: 56K WARNING!! Fabrication Work Begins and Voting Ends

Good morning everyone!

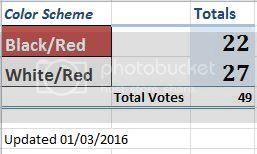
I hope everyone had great holidays and stayed safe. I fortunately took this opportunity to get some fabrication work done on Double Dragon. But first, let’s see what color scheme you all have chosen. **Drumroll**………….

And it’s White and Red by a small margin! I can now plan to buy paint and finalize designs for things like sleeving/painted fans/etc.

Voting_Totals_01032016_zps2ahot2rb.jpg
KRender_FrontRightW_zpsauhayxmr.jpg

Now onto the thing everyone has been waiting for…… some good old modding!

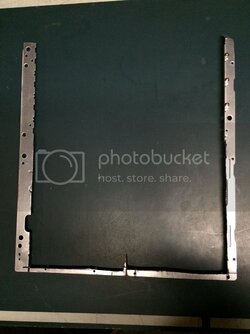
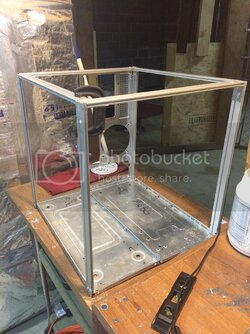
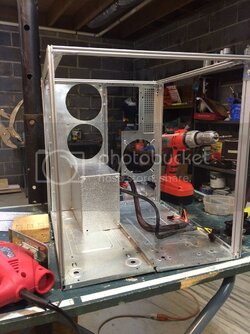
First we can get the new frame set up. If you remember the two cases I started with were different heights, this posed a small problem….. but nothing a jigsaw and some rivets couldn’t fix.
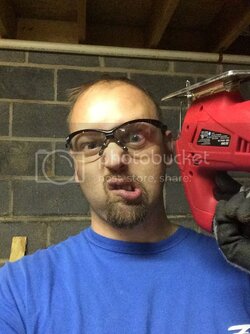
Safety First!

f2121e6e-2260-47d6-a258-3bdd924cc176_zpsjrk2l7i7.jpg

After much measuring and chopping, I came up with this…… wasn’t totally thrilled as it was a little flimsy.

IMG_0493_zpszgch0qnw.jpg

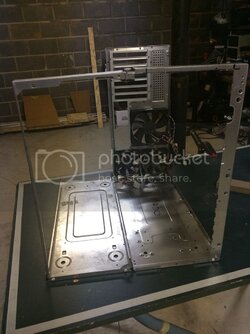
But, I installed it anyways on the new larger base.
IMG_0500_zpslnb9rfzx.jpg

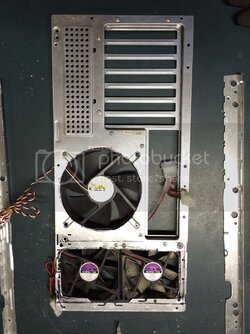
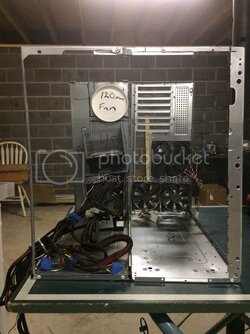
Now onto the motherboard backplate. Cut out the unsightly swiss cheese grill and figured out I can fit two 80mm side by side in the old PSU hole. I figure more fans to pull air across the VRAM heatsinks the better.
IMG_0496_zpsmpqc4dbi.jpg

After turning the old top panel of the grey panel to a new backplate, I got all the pieces attached to the base.
IMG_0503_zpsqscljzy2.jpg

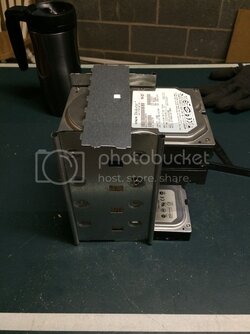
Before we start checking the fit of components, it’s time to create our shortened HDD cage. We start off by cutting it down.
IMG_0491_zps1aauv0l2.jpg

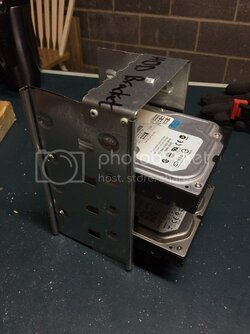
Then using an old 5 ¼ filler plate, create a brace for the top. Ta Da! Like magic we have a new sturdy HDD cage.
IMG_0494_zpsrgvl36dz.jpg
IMG_0495_zpsgfdh5sp0.jpg

Great! Now it’s time to grab a spare PSU and check the fit with new HDD cage.

IMG_0501_zpsgsahhsbr.jpg

Everything looks like it will fit well.
IMG_0502_zpsxcqabxfy.jpg

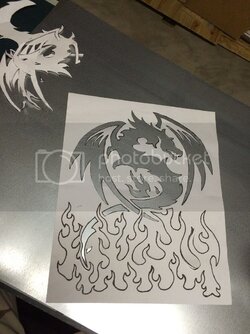
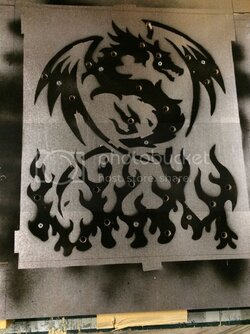
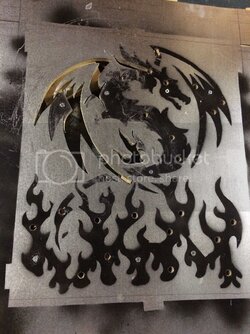
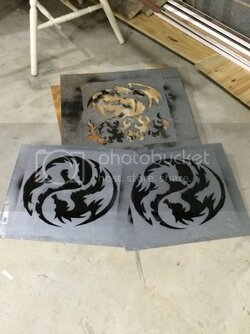
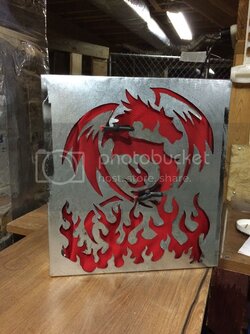
Now onto one of the main key features of this build…. The front panel! First, the tedious task of cutting out the stencil.
IMG_0490_zpshzqqzznm.jpg

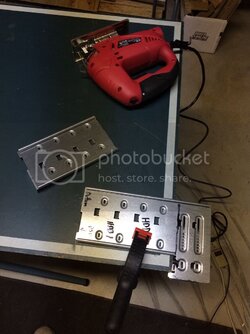
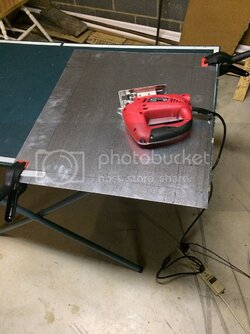
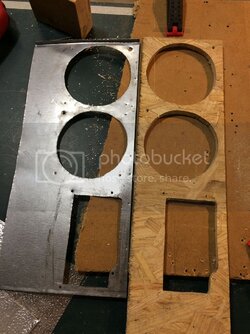
Then cutting the sheet metal to size and marking the design.
IMG_0497_zpspyxxuz2k.jpg IMG_0499_zps5vzaktxo.jpg

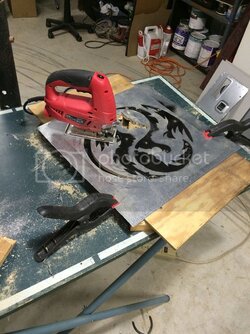
Drill pilot holes for attaching metal to plywood and for jigsaw blade start locations.
IMG_0504_zps2i1qoe8r.jpg

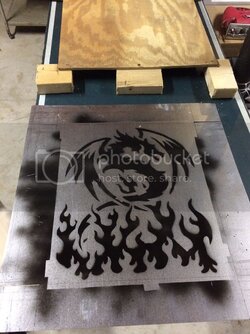
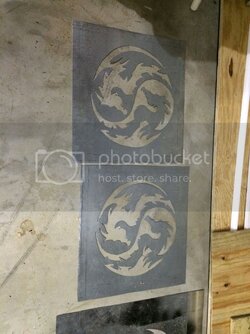
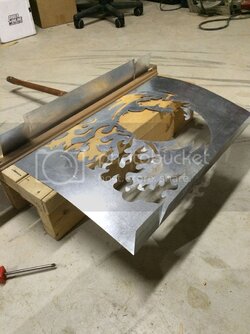
Let the cutting begin!
IMG_0505_zps8xkmmtbz.jpg

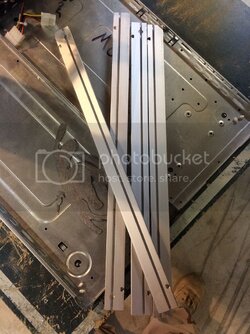
So I had mentioned earlier that I didn’t like the flimsy front panel bracket I made. Luckily, when I went to my neighbor’s house to see about buying an old vise and bench grinder off of him(which I got for only $30 for both) he gave me a box of scrap aluminum. These pieces of rigid aluminum were in the box.
IMG_0506_zpsvxltgrr2.jpg

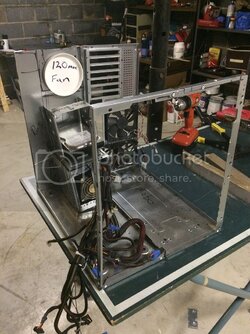
After cutting them to size and making L brackets, I give you the new and improved case frame. :thumb:
IMG_0507_zpsfaox18sb.jpg

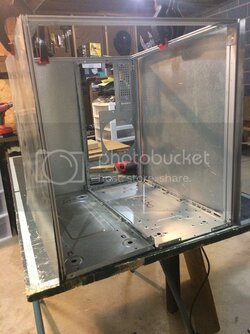
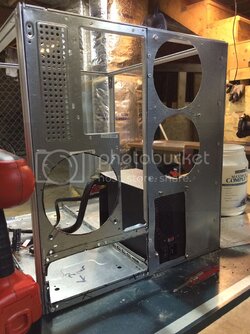
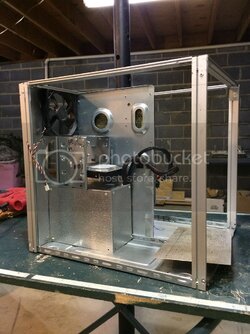
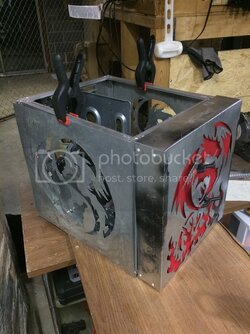
I had just enough leftover sheet metal from cutting the new side panels to make a clean new backplate. I clipped all the pieces to the frame to see how it looked.
IMG_0508_zpse4i3hkue.jpg

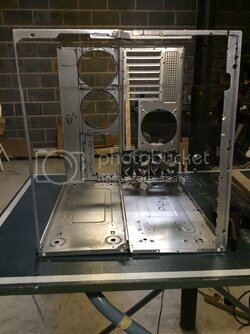
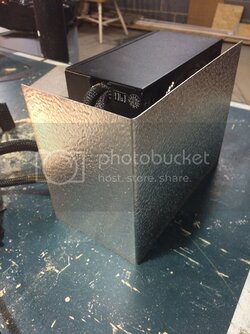
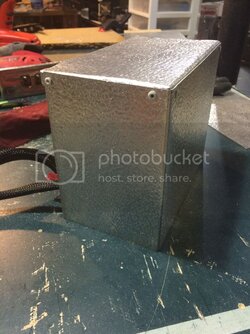
Looks good and really starting to come together! Now, we can make the PSU shroud/airflow box. I do have to say I’ve gotten pretty good at making bends in sheet metal.
IMG_0509_zpsd2a3ux1s.jpg
IMG_0510_zpsmpw3s0tm.jpg IMG_0512_zpsqmxjbxnx.jpg

Now we can make the cuts for the fans and PSU in the new backplate. Hey look, now I have a template to do it again and again.
IMG_0513_zpsv2fez95y.jpg

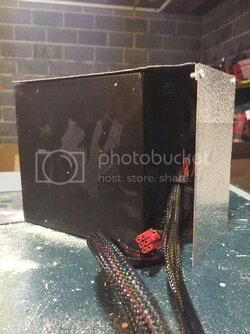
A couple shots of backplates and PSU installed.
IMG_0514_zpsqawaaiyv.jpg IMG_0515_zpstqa3sry6.jpg

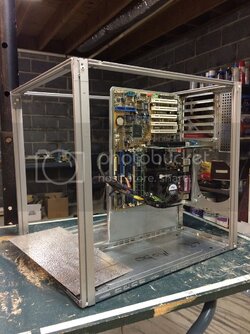
Grabbed an old ATX board to test the placement of the motherboard panel.
IMG_0517_zpsreectgul.jpg

Testing the placement of the HDD cage on the new PSU shroud.
IMG_0518_zpsqtjovroc.jpg

And then we mark the side panels so they can dry…
IMG_0521_zpschtqf3eh.jpg

Next day and it's early rising to cut out the new side panels
IMG_0523_zpszkutvteo.jpg

Both panels cut out without much trouble.
IMG_0524_zpsdqjtjbcc.jpg

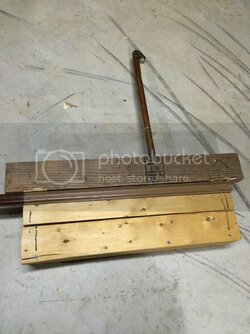
My handmade brake to bend the sheet aluminum (2x4s, a mirror bracket, and an old piece of copper pipe)
IMG_0525_zpsrynwoxdv.jpg

Bending the front panel/box to 3 inch depth, because who knows, maybe I want to put monsta rads in there....
IMG_0526_zpscf26fhls.jpg

Mocked up front and side panels with the mesh fabric I picked up for $2.50 at Hancock Fabrics in town :D
IMG_0527_zps3avhze2t.jpg IMG_0530_zpsdaylzrom.jpg

Hope you enjoyed the update. Fingers crossed I won't have to wait until my wife's out of town to do more. Let me know what you all think and any suggestions :D
 
SigNew_zpsab2xy88w.jpg

Update 01/07/2016: Reservoir design finished?

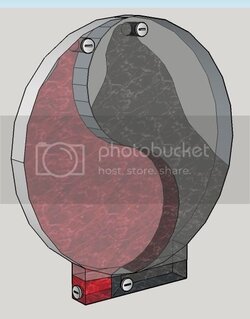
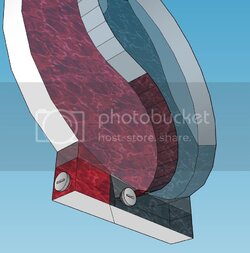
Reservoir will be ~13" in diameter(for the ying-yang portion to become the window) and 30mm thick. I figured out a design on how I can make it the dual reservoir I wanted without restricting flow in the base. Because of the PSU shroud location in conjunction with the reservoir I also had to put both outlets toward one side at the bottom.

I'm still rather new to watercooling and not sure how the effect of the inputs at the top will be. Anyone know how much splashing will happen on say an average D5 pump?

Reservoir_zpsqnohlvqq.jpg
ReservoirBottom_zpsh0vnwra0.jpg

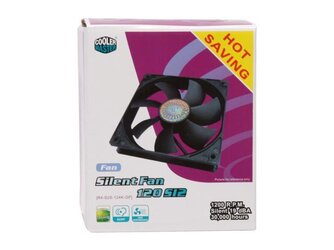
In other news I ordered these bad boys(pack of 4) *cough cough* to use as my exhaust fans. I slipped them into the transaction for the SSD to go into my main rig.... finally. Hopefully my accountant won't notice tongue.gif Welcome to the ultimate budget build ladies and gentleman. rolleyes.gif Also have an extra fan if I mess up painting one of them. For $7 for 4 fans, I thought it was a very affordable deal.

35-103-052-02.jpg
 
Those are some Hot Savings there Dalchi. LOL

I'm no water guru either but I would make the assumption that the inlets aren't as important for flow rate as the outlets. If you keep it topped off there should be no splashing, theoretically of course. Looks cool.
 
Those are some Hot Savings there Dalchi. LOL

I'm no water guru either but I would make the assumption that the inlets aren't as important for flow rate as the outlets. If you keep it topped off there should be no splashing, theoretically of course. Looks cool.

Hey Blaylock,

Was wondering how many updates I needed to post before you'd respond.... I gave you some leeway since I know you're busy with your man cave. :D

I'm actually wanting splashing... but only on the outside acrylic wall. I'm not worried about splashing at the bottom as I think it should be very little.
 
Ya definitely busy. I'm enjoying what you got goin on though. Just wish I had more time for fun. Ah well, my fun time will come soon enough.
 
Ya definitely busy. I'm enjoying what you got goin on though. Just wish I had more time for fun. Ah well, my fun time will come soon enough.

I've been watching your man cave build closely... if you noticed the pictures in my "workshop" it's actually an unfinished basement about 1100 sqft that I plan to finish eventually.
 
Update 10/16/2015

Greetings fellow modders,

I have some not so great news in regards to the build progress of Double Dragon. I had the unfortunate luck of getting in an accident last weekend. I’m currently recouping from a couple fractured vertebrae and some whiplash. Unfortunately, as you can see below my car is toast. This means the little budget I did have to put into Double Dragon will have to be redirected to my deposit for a new vehicle. So until I can get back on my feet and carve out some time and money, Double Dragon will have to be on hold. I apologize for the delay and hope that my fellow modders will not lose faith in me. Stay tuned and fingers crossed.

The unfortunate distruction…..
View attachment 169965

Sucks man, get better first then start back up. Also by a safer car next time and you will not be as bad off, just saying. Still not much you can hope for in a small car when you get hit by a truck or suv. I drive a small car my self (jag) and I'm lucky that it has more air bags around the driver then most cars have all together. Heck the seats even have bags in them so you don't heart your back when you slam back into it.
 
Back