• Welcome to Overclockers Forums! Join us to reply in threads, receive reduced ads, and to customize your site experience!

My first DICE run, setup and extra insulation.(now smaller pictures)

Overclockers is supported by our readers. When you click a link to make a purchase, we may earn a commission. Learn More.

TsunamiJuan

Member
Joined
Mar 27, 2011
Location
Soviet Mexico
Okay so I promised pictures for some new members and just in general to those hanging out in the stream. I did a few things different From the norm.

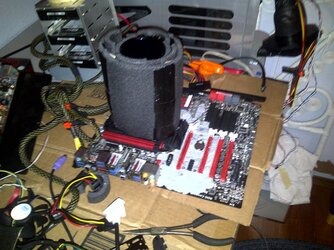
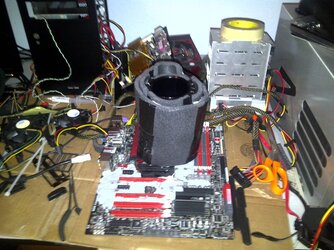
So I got my KoolanceV2 today. Pulled it out of the box and got ready to freeze some hardware. I didn't use the stock Neoprene insulation. I noticed that it tends to suck up alot of water which is No Bueno. So I took outdoor pipe insulation (which is closed cell to a point and has a much larger amount of air then material which is good). I cut the Insulation to the heights that I needed then due to limited selection of diameter locally I just duck taped them together (duck tape sticks great to this stuff).

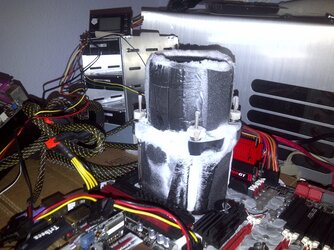
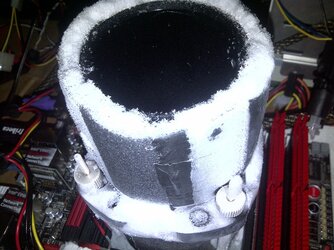
I made one small section for the top of the pot, above the tensioning backet. One for the bottom section of the pot, under the tensioning bracket down to the motherboard. Then I made a 3rd one to go over all of that. This worked great Only thing I am gonna change is to make sure that i have the ends which I have cut Sealed with either silicoln or tape. that way it doesn't suck up any water into the cells (the are large elongated cells that are one to two needle widths wide, and about 1inch or so long it seems). The tape thats in direct contact with the pot will sweat and cause frost, but the second layer of insulation around this minimized the heatloss to the sides by alot. My ghetto digitial thermometer only went as low as 14c on the outside of the outside layer of insulation, the paper towls never got wet.

I will post some more pictures tommarow and a more detailed guide on how i made the pieces. They're cheap and easy to make, just take time.
 
Last edited:
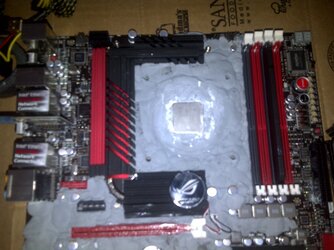
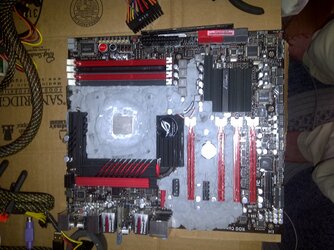
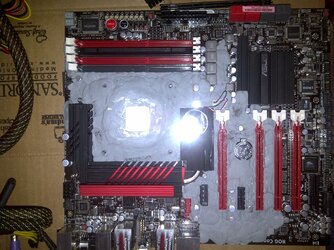
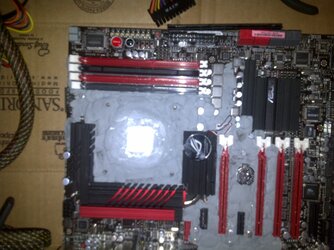
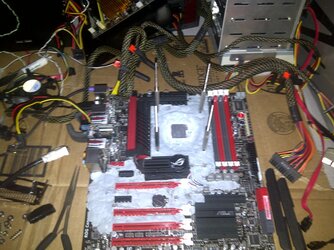
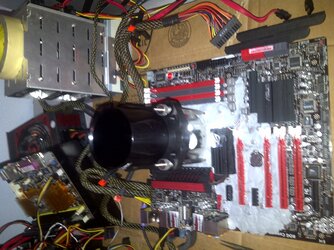
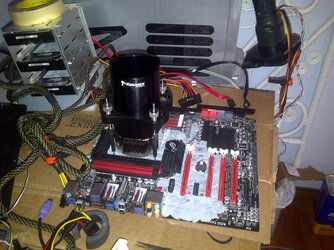
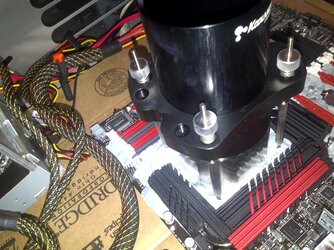
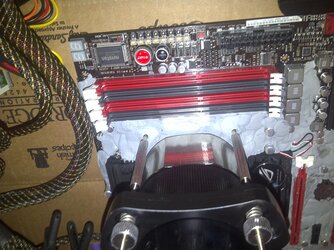
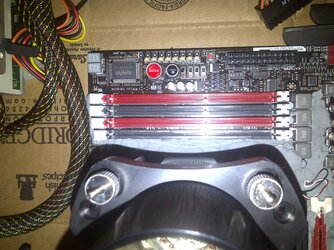
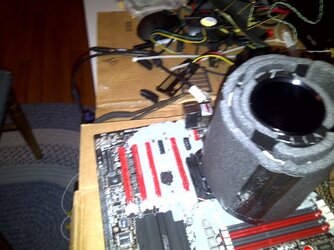
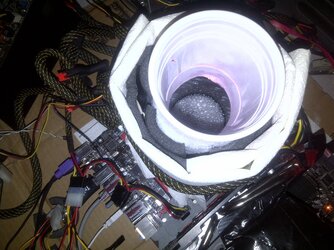
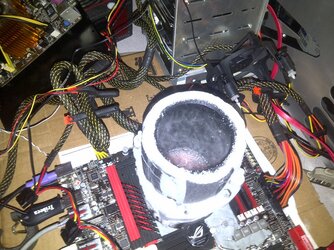
First pictures should give you an idea of my Insulation job, Its a little more aggressive, I have been using it with my phase change setup. It also gives you an idea of how high i went (probably a little to far).

The last photo shows the brackets coming through the board, so I can test fit and make sure that I don't repeat the mistake I made lastime. Which is the insulation hit the pot, and prevented good contact.

116.jpg

117.jpg

118.jpg

119.jpg

120.jpg
 
Last edited:
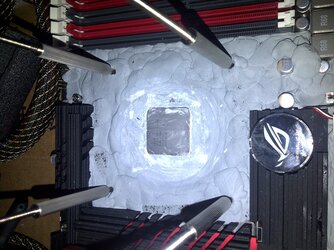
Next I test fit the pot, to make sure it would seat okay without hitting high peeks of kneaded eraser insulation.

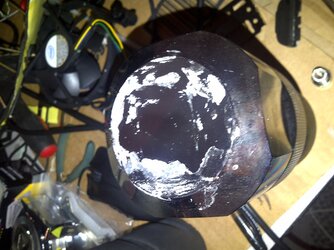
After tightening it down for a test fit, I Removed the pot, and check the underside to see what it hit if anything (it had hit some eraser). I used that as a guide to know what need to be fixed. Then wiped the bottom off and started preparing my insulation.

I will take some pictures and make a guide for this later, it took me about an hour to make the insulation.

121.jpg

122.jpg

123.jpg

124.jpg

125.jpg

126.jpg

127.jpg
 
Last edited:
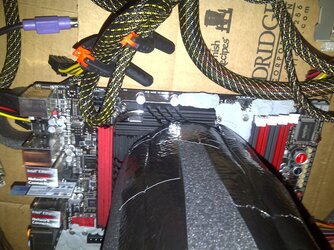
heres some pictures with the two layers of insulation around the pot. This is before I wrapped them with paper towels.

128.jpg

129.jpg

130.jpg

131.jpg
 
Last edited:
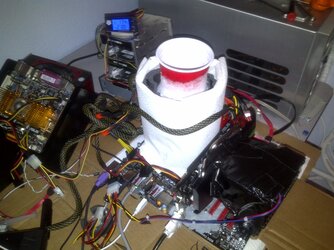
heres the Paper Towel wrapping and some run pics. But the bottom out of a Plastic cup, to use as a funnel/spalsh guard. Aswell as the unwrapping after about a 3 hour run. Very last pic is just kinda artsie, the odd pattern the co2 made as it sat ontop of the acetone.

132.jpg

133.jpg

135.jpg

136.jpg

137.jpg

138.jpg
 
Last edited:
Cool pics, but could do to be resized.

Thanks for sharing the adventure though, I hope to do mine in a week.
 
Fixed all the photos for you. In the future, after uploading them to your post, click the little paper clip again, and click a photo name to insert it into your post. That way, even if they're ginormous, the forum will resize them for you. It would still be a good idea to resize them though - anyone with a slow DSL or worse 56K is going to cry when they try to view this thread.
 
Wow, thats A LOT of coverage on that board. I have only went up to the 'NB' heatsink on LN2 and DI runs. Maybe I got lucky.

Do you bench your GPU's cold too? Is that why its all down around the PCIe slot?
 
Thanks hokiealumnus, I will try to go through and drop the sizes later. I was running out of energy last night, and didn't want to hold out on my promises to people.

@EarthDog, due to the layout of the socket on this board I felt i needed the extra coverage. Since the eraser tends to conduct it will sweat aswell so i want to make sure i really got everything covered.

I did the first pcie slot last week cause Bobnova came over and attempted a cold run with his gf6800gs uber card. I just left all the insulation there after the run. I am hoping to either borrow his tek9 phat, or get one of my own soon to run my 460 cold and pickup some higher scores.
 
Yeah thanks for the pics, I appreciate it. Looking good :) Going to be a while till I get mine set up, still need a lot of equipment, but the fact that you didn't break anything during your first DICE run is definitely reassuring.
 
Rather more then you really needed, but too much beats too little!

The idea behind the extra insulation is that by minimizing the Heat loss to the sides, you optimize the temperature at the bottom of the pot. Plus It cuts back on the condensation factor. I think the 14c measured at the outside of the 2nd layer of insulation, speaks for itself.
 
Excuse my ignorance, but how are you 'minimizing heatloss to the sides' and 'optimizing the temperature at the bottom of the pot' with that application method? How does it cut back on condensation with practically the entire board insulated and what does the 14C number tell me? Do you have another data point without that type of insulation?

Thanks for the answers. :)

Okay this is gonna be kinda of a long explanation so i apologize in advance.

In this particular pot, the base is copper, and the tube is aluminum. Aluminum has trys to even out the temperature across itself, which is why its used for heatsinks and fins on radiators and other cooling applications. Copper not so much (not sure exactly to the extend but not to the same level as aluminum does.

So basic thermal propertys and convection state that if you have cold water and hot water divided, by say a piece of glass or metal, the two will attempt to reach equalibirum. How this works for that pot is that the pot is much much colder than the enviroment around it. The hotter of the liquid in the pot will be at the top and the cooler will be at the bottom. This will create a convection current in the pot. However at the same time as say you are either heating or cooling the pot, you are also loosing a good portion of it. The aluminum is doing exactly what its suppose to do, its cooling across the tube evenly. However we aren't trying to cool anything to the sides of the pot in this case. so we are wasting energy to the sides of the.

Now lets add some insulation to the mix. If we add an insulator to the outside of the pot we minimize the loss to the sides. Which helps both the pot and the liquid inside of it remain at a cooler temperature.

As for condensation we all know pretty well how this works. A cool surface will effective change the due point and remove humidity from the air. With our extreme cooling setups this either can drip onto our boards, or turn to ice (ice as as a insulator in a way, but its not something we are gonna get into here). So by adding more insulation to the mix we are doing our best to keep the cold in the pot, and the warmer humid air on the sides of the pot from coming into contact with each other. So lets say our sides of our pot are -60c, and the ambient air temperature is 28c. By adding one layer of closed cell foam insulation thats 1/4" thick the inside againt the pot is -60c and the outside facing the air is around -10c. Now i add another layer the inside of this second layer is -10c and the outside is now 14c. This is certainly alot closer to air temperature and high enough in temperature that as the air meets the outside it does not condense and drip or turn to frost.

On topic kneaded eraser, we are really using it more as a sealant, than as insulation, Cause it doesn't really keep the cold from getting to the board. We are really only using it to keep water and air from touching our components and condensing. Kneaded eraser cause of its density actually conducts heat quite well.

Frost king and pipe insulation on the other hand are insulators, frostking which is adhesive backed also seals the surface at prevents water from getting to it(if done right). These work by have pockets of air in the form of bubbles. The more air in these types of insulations the less heat they conduct typically. Also be cause we are water proofing in the process(we dont want our insulations getting soaked in water), we want to used whats referred to as closed cell foams. These will not act like a spounge and suck water through the entire medium. They might pickup some water but not as much as an open sell foam will.

I think I covered what I was trying to say here. Been kinda up and down alot while writing this, since i am at work running between machines.
 
The eraser is what I was refering to, don't need to insulate down in the PCIe area if you aren't taking a GPU cold.

On the pot insulation, while you're right about it making a difference in pot temps the part you're missing is how much.

Consider: Going from a 30w or so idle load to a 200-300 watt wprime load changes a v2's base temps by about 6*c.
Consider part two: The thermal loss through the stock insulation might be a couple watts.
It's not necessarily a bad idea, but it's not going to make a practical difference in temps.
The plus side to doing it is not having ice buildup on the outside that you can knock down onto your board.
 
Yeah i perfer to not have to tear down all the way between runs, though i did lastnight. It was a pain in the bum bum. Might just slather a bunch of vasoline on it and say GOOD DAY.
 
ahh *sigh*, this is what happens when i dont get enough sleep, and spend time going for technical meeting to technical meeting.

yeah it was left over from last week when bobnova came over :D
 
Back