- Joined
- Jan 28, 2013
- Location
- *** end of the world! Lebanon!
Hey guys! How are you all? Hope all is well…
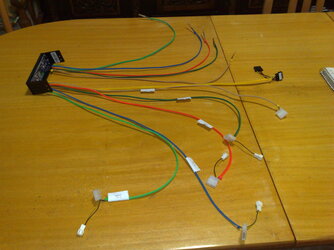
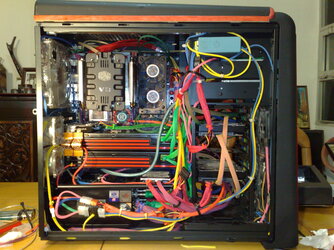
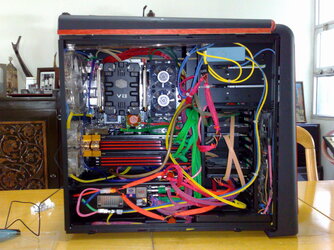
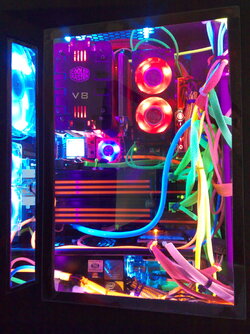
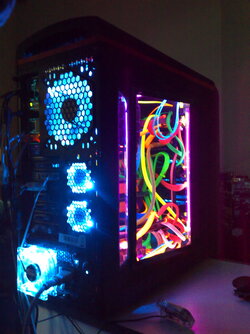
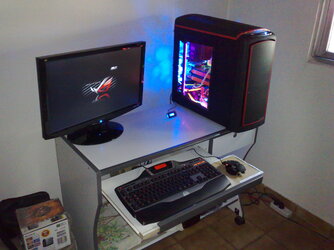
I’m brand new to this website and forum. But not to computers. I’m getting acquainted with the features here, and it would take me some times to get the hang of it. The kind moderators tell me that some if not most of my privileges are restricted being a new member to verify I’m not a spammer. That’s cool, no problem. For my first post to break the ICE, I’d like to introduce you to one of my PCs. I call it “That 80’s PC” since it is so colorful inside. Not much of a looker for most as a first impression… I’ve received more critics than praises on this one!") It was my first sleeving job, and I never encountered so many wires before in such a tight space! However, a lot of work had been put in to it. So I hope that that at least counts for something!
It was my first sleeving job, and I never encountered so many wires before in such a tight space! However, a lot of work had been put in to it. So I hope that that at least counts for something!
I do have another much more impressive project than this one,... but that's till later...
Basic System Specs:
CPU: Core i7-975
Mobo: ASUS RAMAPGE II EXTREME
RAM: CORSAIR DOMINATOR 12 GB DDR3 1600 MHz
VGA: 2x (SAPPHIRE ATI RADEON HD 6970) XFire.
HDD: 2x 1 TB WD Caviar Black
2x 320 GB WD Scorpio Black
PSU: 1200 W Kingwin Modular 80+ Bronze
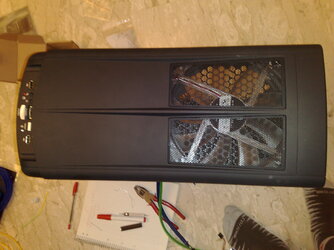
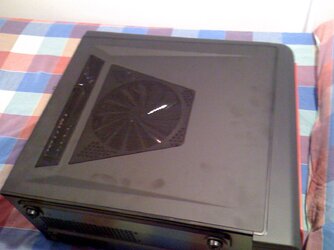
Case: Thermaltake Element S
Mods:
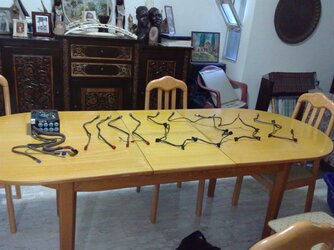
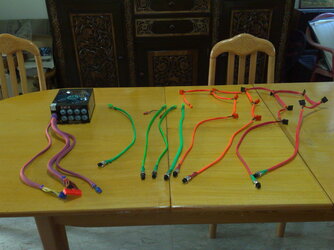
All cables sleeved in UV reactive sleeving
Most connectors replaced with UV reactive ones
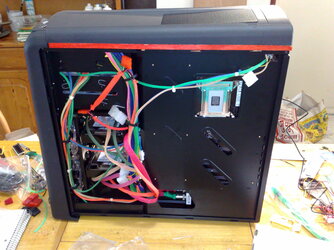
Mobo tray modified to accommodate the extended mobo
All fans replaced with stronger ones and others were added totaling 14 fans in the system, including VGA fans. (Noisy! But chilled!) Side affects do included headaches!
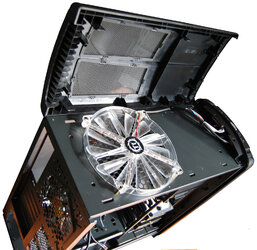
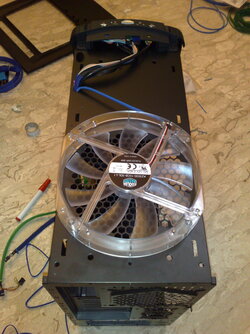
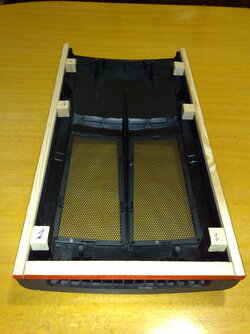
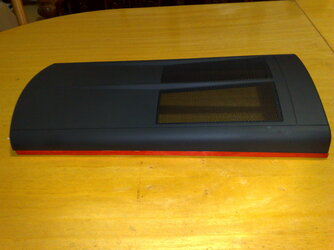
Roof Modified to accommodate larger fan
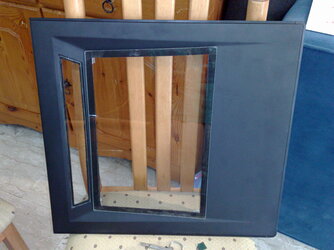
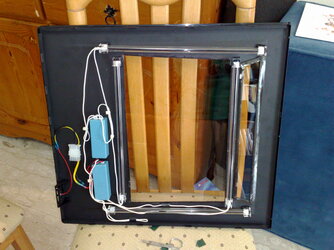
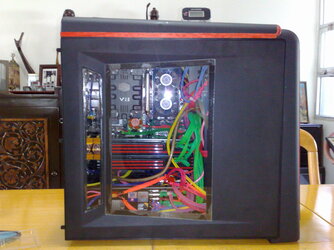
Side panel modified with a double window, and 4 x CCFL UV tubes with converters attached, which light up using an external switch. Connection to main power supply is through the contacts used to activate the original built in 200 mm fan which had been replaced with the window.
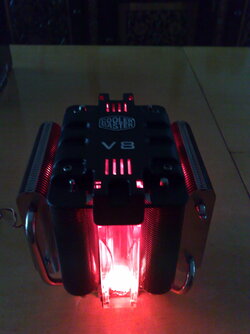
V8 CPU cooler’s fan was swapped for a stronger one, which lit blue and was modified to light red
RAM fan cooler’s fans were swapped for stronger ones which light red
You may also find a video of the completed project on youtube.
Please feel free to visit, like, dislike and/or comment.
Questions will be gladly answered!
I’m brand new to this website and forum. But not to computers. I’m getting acquainted with the features here, and it would take me some times to get the hang of it. The kind moderators tell me that some if not most of my privileges are restricted being a new member to verify I’m not a spammer. That’s cool, no problem. For my first post to break the ICE, I’d like to introduce you to one of my PCs. I call it “That 80’s PC” since it is so colorful inside. Not much of a looker for most as a first impression… I’ve received more critics than praises on this one!
It was my first sleeving job, and I never encountered so many wires before in such a tight space! However, a lot of work had been put in to it. So I hope that that at least counts for something! I do have another much more impressive project than this one,... but that's till later...
Basic System Specs:
CPU: Core i7-975
Mobo: ASUS RAMAPGE II EXTREME
RAM: CORSAIR DOMINATOR 12 GB DDR3 1600 MHz
VGA: 2x (SAPPHIRE ATI RADEON HD 6970) XFire.
HDD: 2x 1 TB WD Caviar Black
2x 320 GB WD Scorpio Black
PSU: 1200 W Kingwin Modular 80+ Bronze
Case: Thermaltake Element S
Mods:
All cables sleeved in UV reactive sleeving
Most connectors replaced with UV reactive ones
Mobo tray modified to accommodate the extended mobo
All fans replaced with stronger ones and others were added totaling 14 fans in the system, including VGA fans. (Noisy! But chilled!) Side affects do included headaches!
Roof Modified to accommodate larger fan
Side panel modified with a double window, and 4 x CCFL UV tubes with converters attached, which light up using an external switch. Connection to main power supply is through the contacts used to activate the original built in 200 mm fan which had been replaced with the window.
V8 CPU cooler’s fan was swapped for a stronger one, which lit blue and was modified to light red
RAM fan cooler’s fans were swapped for stronger ones which light red
You may also find a video of the completed project on youtube.
Please feel free to visit, like, dislike and/or comment.
Questions will be gladly answered!
Attachments
-
 01092010749.jpg922.7 KB · Views: 327
 -
 09BIG.jpg421.4 KB · Views: 278
 -
 03092010791.jpg862.6 KB · Views: 304
 -
 01092010764.jpg858.6 KB · Views: 313
 -
 02092010770.jpg724 KB · Views: 303
 -
 03092010778.jpg787.6 KB · Views: 306
 -
 03092010804.jpg529.1 KB · Views: 313
 -
 03092010790.jpg911 KB · Views: 301
 -
 03092010789.jpg747.1 KB · Views: 301
 -
 02092010775.jpg656.7 KB · Views: 297
 -
 3732195851_b5aea788d2_o.jpg284.5 KB · Views: 312
 -
 05092010828.jpg847.1 KB · Views: 294
 -
 05092010827.jpg921.6 KB · Views: 297
 -
 110520111099.jpg1,003.7 KB · Views: 313
 -
 05092010826.jpg930 KB · Views: 299
 -
 310320111036.jpg1,015.5 KB · Views: 286
 -
 310320111038.jpg896 KB · Views: 302
 -
 110520111104.jpg1,019.7 KB · Views: 299
 -
 08012011893.jpg732.9 KB · Views: 288
 -
 30092010868.jpg800.2 KB · Views: 276
Last edited:


 I blame it on all the shiny pictures