-
Welcome to Overclockers Forums! Join us to reply in threads, receive reduced ads, and to customize your site experience!
You are using an out of date browser. It may not display this or other websites correctly.
You should upgrade or use an alternative browser.
You should upgrade or use an alternative browser.
600lbs Steel I-Beam Desk/Computer Build
- Thread starter JLambeth87
- Start date
- Joined
- Feb 5, 2016
- Thread Starter
- #42
Thanks. Me too.I like that mobo mount much better than using the tray.
- Joined
- Jan 12, 2012
You only used 3/4" steel tubing for the motherboard tray? Christ man you're slacking! You sure that's strong enough to hold the motherboard? 

Love it so far!
Love it so far!
- Joined
- Feb 5, 2016
- Thread Starter
- #44
Wanted to go 2" but ran out of room.You only used 3/4" steel tubing for the motherboard tray? Christ man you're slacking! You sure that's strong enough to hold the motherboard?

Love it so far!
- Joined
- Feb 5, 2016
- Thread Starter
- #45
Another update!
I was able to get a lot done over the last few days. I was hoping to be able to get the desk to my house by this last weekend but there was a lot more custom work that needed to be done that I didn't count on.
Images are attached but here is a list of things I was able to compete:
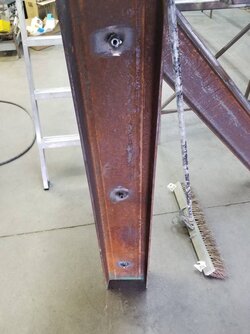
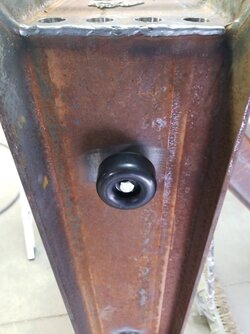
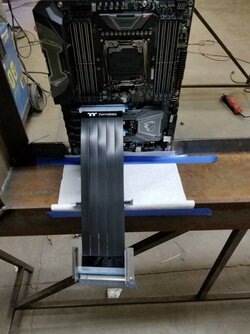
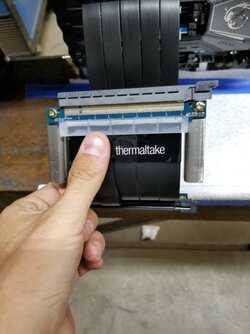
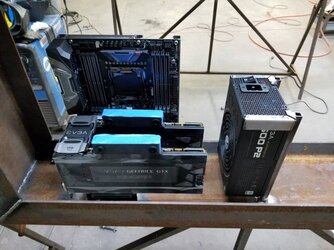
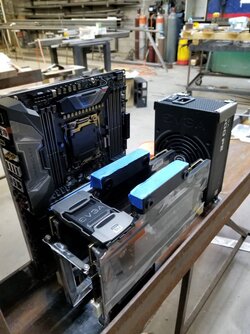
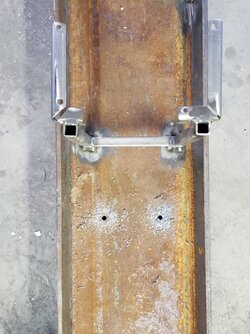
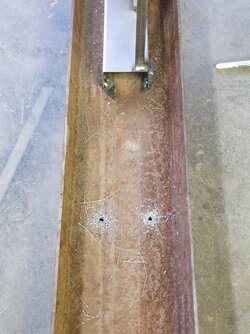
1. Received my 2 Thermaltake Premium PCI-E 16x Risers to relocate the GPUs. They are 300mm in length. I tried putting the GPUs on the motherboard but the tops overhang the outside edge of the leg by a good 2". Once I got those I built mounts for them. The mounts are 1.75" tall steel L brackets that I made. I then drilled and tapped the holes to screw the risers onto them. These got welded into place.
2. After the initial lower GPU mounts were in I needed to build the upper GPU mount to hold them firmly in place. This bracket started as a single straight 1/2" steel tube. After a lot of cutting, welding, and grinding I got it finished and welded to the inside lower GPU mount. I then drilled and tapped the holes to attach the GPUs.
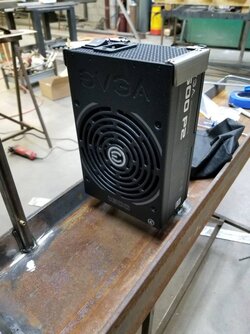
3. Next it was time to position and weld the PSU mount. I found it I could turn the PSU sideways and get it out in a smaller space that originally thought so I was able to move everything closer together. The gap under the PSU is about 1.5" which should be enough for cables and the coolant pipes top pass through. If not I'll weld some additional tube to the height to solve the issue. I was also a toug8h worried that these two 1/2" tubes were not going to be strong enough to hold the PSU. After welding it I can't bend it. It's plenty strong. Ha
4. Mount everything!
5. Remove everything again
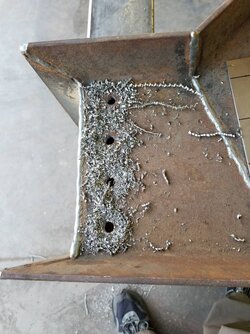
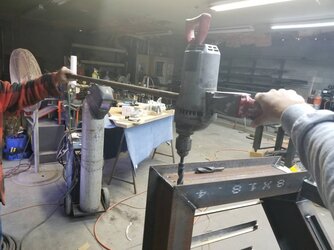
6. Do math to determine the correct spacing of the coolant lines. I then created a template our of thin steel plate to make sure all the holes being drilled would be in the exact same spot. There are a total of 16 holes drilled in the desk for coolant pass through lines. Each took roughly 5 minutes to drill with 3 different sized bits with the final being 5/8ths in size. For that we needed a HUGE drill and 2 people. One pushing it through and the other to help hold it so it didn't break a wrist if it got caught.
7. Test fit some tube then realize I'm 4 valves short for drains. Since this desk won't be able to be tipped over, draining each loop requires 6 valves/drain points. 3 on each side of the desk. I need them at the lowest point and each loop has 6 low points which require a drain at that point or coolant will always sit there. I'll be ordering 4 more valves tonight.
8. I built the second pump/res board. (No pictures but looks the same as the other.
9. Drilled the holes for mounting the pump/res boards. I then test fitted one of them. I think it will work out well. (No picture off it mounted yet).
I have to work out of town the next two days but will get back to it on Thursday.
List of stuff to do before it comes home:
1. Mount second pump/res block
2. Determine exit points for the 4 extra drains and then drill them if need be
3. Drill holes for running wires out from the desk to the wall (power, HDMI for tv, and network).
4. Powerwash the desk with a pressure washer.
5. Paint all silver metal parts.
6. Clear coat the desk with sealer to prevent more rust.
7. Load it to a truck and take home.
It's getting there slowly but I am getting more and more excited as it gets closer to being finished!
Josh
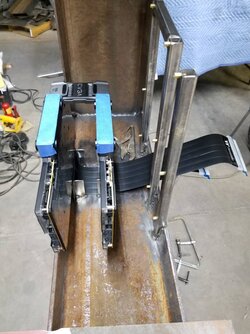
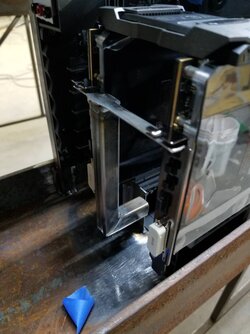
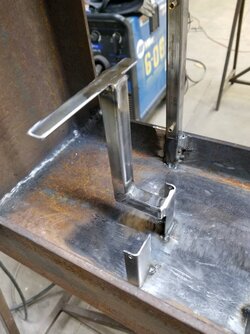
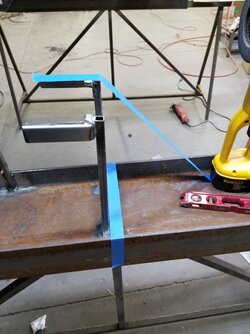
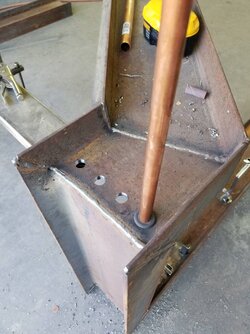
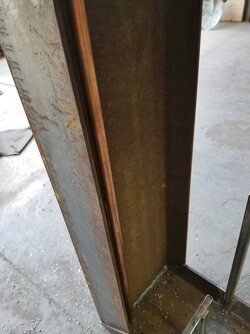
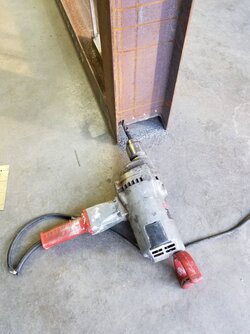
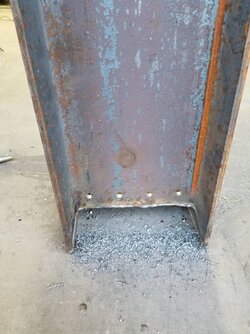
- Joined
- Feb 5, 2016
- Thread Starter
- #47
I'll have to attach the cables to the PSU before installing it.It's coming along very nicely. I do have a question for you though. How do you get to the PSU cables once everything is installed? Will you need to remove the GPU's to remove/access the PSU ports?
- Joined
- Jul 24, 2013
This is a heavy thread im telling you
- Joined
- Jan 12, 2012
JLambeth87 natural disaster proof computer desk? Just sayin  I only ask $.02 in royalties per desk!
 I only ask $.02 in royalties per desk!
 - Joined
- Feb 5, 2016
- Thread Starter
- #50
Haha sounds good to me.JLambeth87 natural disaster proof computer desk? Just sayinI only ask $.02 in royalties per desk!

Should have some time to work on the desk tomorrow then again next week. Nothing over the weekend however due to having to film NASCAR all weekend.
- Joined
- Feb 5, 2016
- Thread Starter
- #51
Was able to get a couple things done this morning before having to go to my shoot.
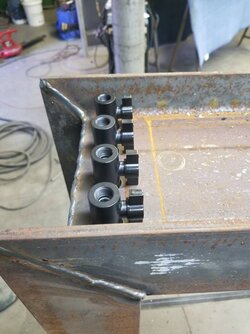
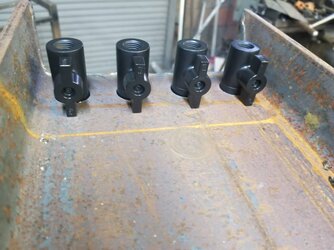
Drilled out the 8 drain holes from a 7/8" hole to a 1" hole so the EK compression fittings would fit through. These will be attached to the 8 EK Ball Valves that will drain the different parts of the system. Since the desk can't be moved/flipped it will be easier this way. There will be 4 more valves plumbed into the system and run to these locations. Basically all the low points of the loop will have a drain. It's probably a bit overkill but I think it will work well.
More work will be done on Monday.
- Joined
- Jan 12, 2012
JLambeth87,
This build is utterly ridiculous but I absolutely love it.
The whole thing is overkill!It's probably a bit overkill but I think it will work well.
This build is utterly ridiculous but I absolutely love it.
- Joined
- Oct 29, 2005
- Location
- Oregon
What is your editing software of choice? Anime?, film? Are 2 cards required for speed?
Like the beam me up scotty effect.
Like the beam me up scotty effect.
- Joined
- Feb 5, 2016
- Thread Starter
- #54
Lol thanks.JLambeth87,
The whole thing is overkill!
This build is utterly ridiculous but I absolutely love it.
- Joined
- Feb 5, 2016
- Thread Starter
- #55
Adobe Suite is my editor. Dual cards for games and helps a little on renders.What is your editing software of choice? Anime?, film? Are 2 cards required for speed?
Like the beam me up scotty effect.
- Joined
- Feb 5, 2016
- Thread Starter
- #56
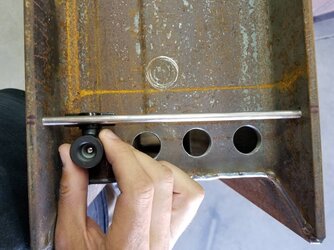
Today I got the two drain valve lockouts drilled. I drilled 2x 1/4" holes across the top of where the valves will go. This will allow me to slide a 1/4" rod which will hinder the opening of the valves. I will also drill 2 small holes in each rod to put small pins to lock the rod in-place.
I also drilled the holes to secure the wood desktop to the frame.
Tomorrow I will weld the feet to the bottom.
I also drilled the holes to secure the wood desktop to the frame.
Tomorrow I will weld the feet to the bottom.
- Joined
- Feb 5, 2016
- Thread Starter
- #57
Alaric
New Member
- Joined
- Dec 4, 2011
- Location
- Satan's Colon, US
Sweating copper pipe isn't too hard. Considering the skill demonstrated by your welding so far, I predict a happy outcome. I've done it with silver stick solder and a propane torch and found it pretty easy.
- Joined
- Oct 28, 2017
Should be done by Friday?
View attachment 197355
Anyways, I got your back, man! Let me know what time
View attachment 197355
Anyways, I got your back, man! Let me know what time
- Joined
- Feb 5, 2016
- Thread Starter
- #60
Haha that's funny. Yeah come on over! I'll need the help! 
