• Welcome to Overclockers Forums! Join us to reply in threads, receive reduced ads, and to customize your site experience!

Thermalright HR-03 - x1k Owners Rejoice!

Overclockers is supported by our readers. When you click a link to make a purchase, we may earn a commission. Learn More.
100% a duplicate of XS, sorry...I'm lazy. Here, have a smiley. :beer:

Insert blade...saw.
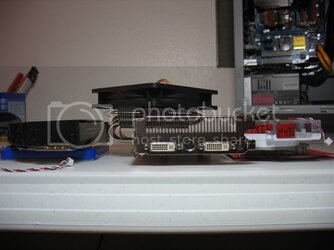
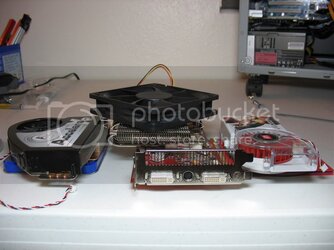
IMG_1289.jpg
IMG_1287.jpg

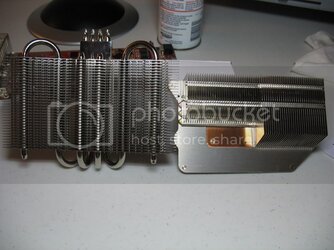
So this pretty much explains the cooling differences.
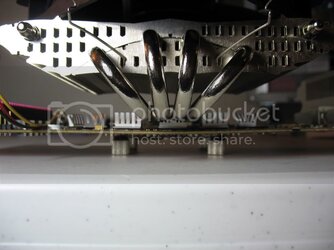
IMG_1291.jpg

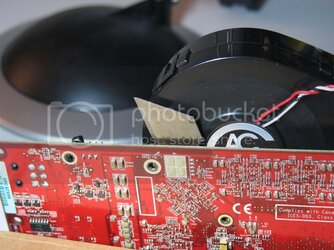
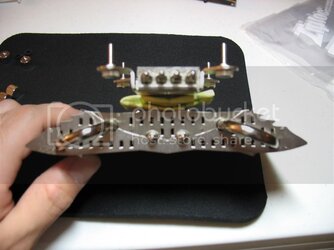
The bracket's screws do not stick up enough to get through the card. So I stuck a piece of paper in there to bring them to the top. Def helped to guide the card onto the 4 screws without painting the core with a bunch of paste.
IMG_1292.jpg

I stuck some "lifters" under the other 2 so as to give an accurate idea of the overall heights of these sinks.
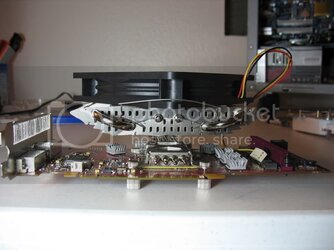
IMG_1294.jpg
IMG_1295.jpg

Only one RAM chip had to be gimped!
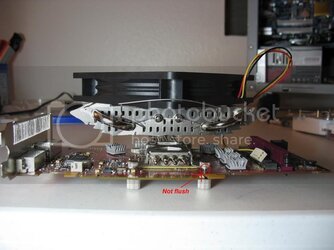
IMG_1298.jpg
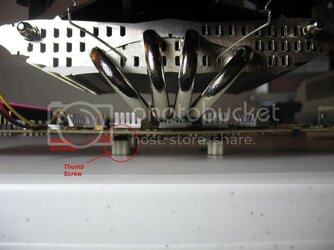
IMG_1299.jpg
 
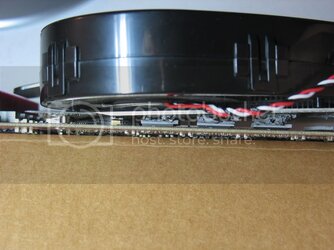
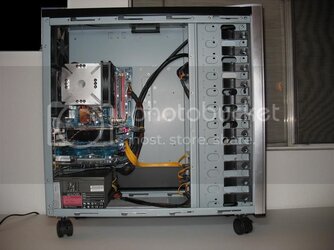
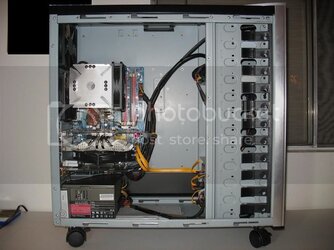
And finally, here's a couple case shots.
new1.jpg
new2.jpg

Room temp: 24C
Game: 10 minutes of Battlefield 2142 Demo w/ 40+ players
Settings: 1680x1050, high detail, 2xAAA, HQAS
Clocks: 698/792 in CCC

HR-03Temps.jpg

The Vantec card cooler can be heard over the 5 Scythes. Adding a 6th Scythe's still a decent amount quieter than the Vantec and it cools a bit better. I didn't check for contact and wasn't 100% sure on install method. Also TIM had over a month to settle on the Accelero. The surface of the Thermalright had grooves and will be lapped and checked for contact tomorrow. Hopefully that'll bring my temps in closer to what the 2-3 of you have gotten so far.

About the install method. I stuck the rubber grommetts between the thumb nuts and backplate. How tight did you guys hug those on? Mine will still turn and I can see some threads on the other side of the card, but the sink wouldn't move. Wonder if I need to tighten more...
 
Jod said:
About the install method. I stuck the rubber grommetts between the thumb nuts and backplate. How tight did you guys hug those on? Mine will still turn and I can see some threads on the other side of the card, but the sink wouldn't move. Wonder if I need to tighten more...

I tightened mine all the way down until it felt very tight and the rubber washer looked squashed. Look at the gap between the heatsink and the metal rim around the GPU. I made sure mine had hardly any gap at all.
 
Sneaky:
Did you use the rubber grommets? Also, I stuck the thumb screws on the bottom of the card whereas yours are on top. I thought the manual said thumbscrews on bottom with grommetts between them and backplate. Here's a couple pics.

(issues with pictures tonight...will upload later)

EDIT: Here they are.

IMG_1299_edit.jpg
IMG_1298_edit-1.jpg
 
Last edited:
TTP said:
The graphics card takes up 2 slots. Even if you take off the stock cooler it's still 2 slots because of the bracket. In either configuration, GPU side or sandwiched, you will take up an additional slot next to the card. Add a fan and you'll need 4 slots.
Ok, gotchya. I knew the card's bracket took up two slots, I guess I wasn't clear enough when I said "in addition to the card". I meant the one slot the physical card takes up, not the card and it's bracket. But no matter, I catch your drift now :thup: :)
 
i got to get this heatsink im trying to get money lol :) its just awesome looking and im going to run it passive
 
Jod said:


Room temp: 24C
Game: 10 minutes of Battlefield 2142 Demo w/ 40+ players
Settings: 1680x1050, high detail, 2xAAA, HQAS
Clocks: 698/792 in CCC

HR-03Temps.jpg


Hey, would you mind stress testing in atitool for 3 minutes? I want to see how much better it is than the v1 ultra for comparison purposes (and if I actually want to buy one).

I'm running the exact same clocks in atitool at 1.45 or 1.47 volts (can't remember). I idle at ~45, loads at ~63-68 (after 3 minutes). Room temp is about the same. I'll have to recheck my load temps (as5 not broken in).
 
Well, the last time I tried to use ATI Tool, it foobed my screen. I used a profile with default 3D volts and same speeds as CCC. :(

I've got a weird work schedule + company this week, but come weekend, I'll give it another go.

So folks that have installed this thing:

1. Did you use the Grommets?
2. Where did you put them?
3. How bout the thumb screws and reg screws?

I followed the instructions as best I understood...we'll see on Sat.
 
I mounted my new heatsink on my x1800xt last night. I used the method where it stands on top on the GPU instead of wrapping around the backside of the card.

My rubber grommets are on the backside of the card, in between the screw on caps and the X bracket. If you are having problems mounting this, make sure the screws that are in the heatsink holder are staying still while you screw down the tops on the back. Once almost tightened they were spinning while I tried to tighten down the ones on the back. Once I held them, everything worked okay and it seated good enough for me.
 
I have 2 cards set in GPU-side config and sandwiched config. There are shots of the 2 setup in the previous posts.

The small screws are under the fins. The larger thumbscrews are always the opposite side with the rubber washers/grommets.
 
here his mine sitting on top of a 7900 GTO:

ttarmor026yf4.jpg


ttarmor022it5.jpg
 
Oooh...pretty. So it seems you've all got the grommets between the card and the bigger thumbscrews, eh? So the space in between my longer screws and the board's ok?
 
Jod said:
Oooh...pretty. So it seems you've all got the grommets between the card and the bigger thumbscrews, eh? So the space in between my longer screws and the board's ok?

Yep. That's my configuration as well. Someone mentioned earlier in the thread and it bears reminding here, regarding the smaller screws turning as you tighten down on the larger thumbscrews. Use a needle nose plier and hold the small screws tight when you tighten down on the larger thumbscrews.
 
Yeah, the little ones screwed into the base and stayed there...or so I thought...I'll have to check this weekend.
 
I got my new OCZ PSU back from RMA last night and had a chance to install it and my new heatsink for my x1800xt.

WHAT A DIFFERENCE!!!!

Before with the stock cooler and custom fan speeds programmed in ati tool, my card would idle around 52-55c depending on how hot it was in my apartment.

Now, it idles at a chilly 39c. I played a bit of counter-strike and alt-tabbed to desktop to check temps, and it wasnt even above 50.

I have a yate loon 48cfm fan on it and I cant hear it at all, unlike the turbine motor that used to be attached to it ;)

Best upgrade ive added to my computer for awhile, very nice product and great results.
 
EternalX said:
I got my new OCZ PSU back from RMA last night and had a chance to install it and my new heatsink for my x1800xt.

WHAT A DIFFERENCE!!!!

Before with the stock cooler and custom fan speeds programmed in ati tool, my card would idle around 52-55c depending on how hot it was in my apartment.

Now, it idles at a chilly 39c. I played a bit of counter-strike and alt-tabbed to desktop to check temps, and it wasnt even above 50.

I have a yate loon 48cfm fan on it and I cant hear it at all, unlike the turbine motor that used to be attached to it ;)

Best upgrade ive added to my computer for awhile, very nice product and great results.


use riva tuner to monitor your temps an fps while you are playing.

with this cooler my temps on the GTO never go above 50ºC with a case

temperature of 25ºC
 
This brings up a good point. How are you guys monitoring temps? I use max temp in ATI Tool.
 
Back