-
Welcome to Overclockers Forums! Join us to reply in threads, receive reduced ads, and to customize your site experience!
You are using an out of date browser. It may not display this or other websites correctly.
You should upgrade or use an alternative browser.
You should upgrade or use an alternative browser.
FEATURED Brass Tacks: One Day Scratch Build
- Thread starter Navig
- Start date
- Joined
- Dec 10, 2011
- Location
- Cádiz (Spain)
I almost feel ashamed to ask, but, is that trapeze really safe? You surely wouldn't want the PSU to fall on your RAMs...
- Joined
- Jan 24, 2012
- Location
- Charleston, SC
im jelly
Hi, I'm Peanut Butter. Wanna get together and make a sandwhich
I almost feel ashamed to ask, but, is that trapeze really safe? You surely wouldn't want the PSU to fall on your RAMs...
Dont want it to fall on anything, why is it secluded to only the RAM lol
- Joined
- Dec 10, 2011
- Location
- Cádiz (Spain)
Hi, I'm Peanut Butter. Wanna get together and make a sandwhich
Dont want it to fall on anything, why is it secluded to only the RAM lol
It was just an example. But, it has it's point. If it falls on a CPU heatsink, it will only damage the heatsink a little, no worries. If it falls on a GPU, probably the GPU will be able to resist the impact because of the plastic shell, and the bigger surface than the RAM.
On the other hand, if it falls on the RAM, the RAM will surely move a little bit, causing an instant BSOD, rendering the system's possible overclock unstable for sure, and, at worst, killing something, whether it's the CPU's IMC, the mobo, or the RAM itself.
BTW: I find that previous commentary about the Peanut Butter rather... childish... and inappropiate
- Joined
- Jan 24, 2012
- Location
- Charleston, SC
Pretty sure the psu being so heavy will damage more than the heatsink, possibly bending the board damaging components of the pcb. Either way, I got what you meant.
I am a child.
I am a child.
- Joined
- Nov 12, 2002
- Location
- Rootstown, OH
More importantly, how is the PSU secured in the trapeze? If its tight, its not coming out... I don't think its just balanced there.
- Joined
- Jan 24, 2012
- Location
- Charleston, SC
More importantly, how is the PSU secured in the trapeze? If its tight, its not coming out... I don't think its just balanced there.
My thought exactly
- Joined
- Dec 7, 2003
- Thread Starter
- #48
I have started up again. Hopefully I can finish today altho I've got some other things to do.
10) Finish work for Front Panel (#1)
Cute 5.25 bays hole
Mount 5.25 bay
Mount brass momentary switches
? Figure out LED indicators and mount
Cut holes and mount USB front panel

Front panel is mounted, on to the details.
Day#2, PST 1227
10) Finish work for Front Panel (#1)
Cute 5.25 bays hole
Mount 5.25 bay
Mount brass momentary switches
? Figure out LED indicators and mount
Cut holes and mount USB front panel
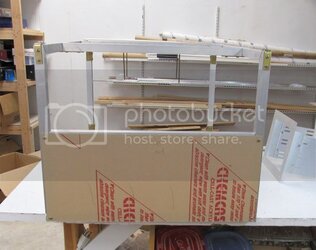
Front panel is mounted, on to the details.
Day#2, PST 1227
- Joined
- Dec 7, 2003
- Thread Starter
- #49
Planning the front panel:

Cutting the holes:

Making sure everything fits:

And mounting the completed front panel:

I threw in some fans so you could see how this heading.
It's funny because doing this portion of a project used to be like a half to whole day procedure, now its like can I do it during a lunch break.
Day#2 PST 1340
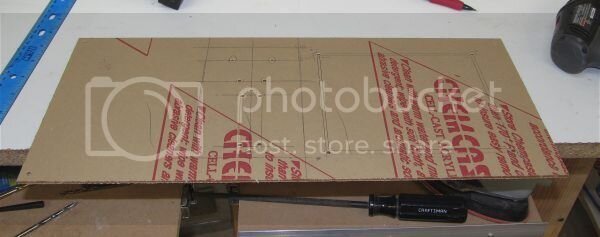
Cutting the holes:
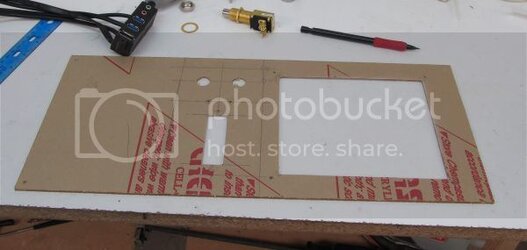
Making sure everything fits:
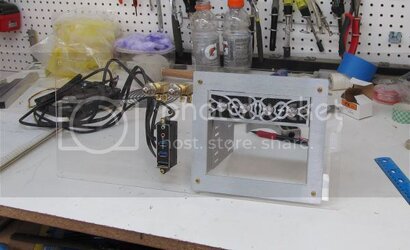
And mounting the completed front panel:
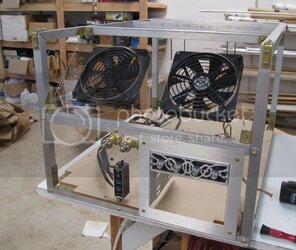
I threw in some fans so you could see how this heading.
It's funny because doing this portion of a project used to be like a half to whole day procedure, now its like can I do it during a lunch break.
Day#2 PST 1340
- Joined
- Oct 14, 2007
The fan controller matches beautifully too. This is coming together amazingly fast. Anyone without your experience would have already taken a week. 
- Joined
- Dec 7, 2003
- Thread Starter
- #51
Oops sorry didn't see all the trapeze discussion.
The vertical components are 4 pieces of 6-32 threaded brass rod. The brackets are 3/4" x 1/16" thick brass angle with some cushion rubber. The threaded rods are threaded directly into cross bars, then secured under the angle brass with washers and thumb screws. The thumb screws tighten up strapping the PSU in as tightly as you want it.
I would say the weak point would be stripping 6-32 brass rod. With 4 anchor points it can without a doubt hold any psu.
- Joined
- Dec 10, 2011
- Location
- Cádiz (Spain)
Oops sorry didn't see all the trapeze discussion.
The vertical components are 4 pieces of 6-32 threaded brass rod. The brackets are 3/4" x 1/16" thick brass angle with some cushion rubber. The threaded rods are threaded directly into cross bars, then secured under the angle brass with washers and thumb screws. The thumb screws tighten up strapping the PSU in as tightly as you want it.
I would say the weak point would be stripping 6-32 brass rod. With 4 anchor points it can without a doubt hold any psu.
Gotcha, thought it was just staying there with no safety.
BTW, this is getting pretty nice now, are you going to leave those tube corners in the final case?
- Joined
- Dec 7, 2003
- Thread Starter
- #53
Which tube corners? Probably, this one is meant to be raw junk look--even planning on leaving the label print on the square tube.
11) Mount Hard Drive Rack to Bottom Panel (#5)

Done.
Create some double length switch cables:

Tidy the cables:

Add some feet:

And I call it done!
Day #2 1745 PST.
That's what about 33 hours? Of course I only put in about 4 hours of work today.
And I guess its not totally done. I have a some small things left to do:
1) Tidy fan cables.
2) Run data and power cables.
3) Install PC hardware.
But I would classify these things more as installation of hardware rather than mod fabrication.


Of course more pics to come as I finalize this thing, but I am headed to the pool.
11) Mount Hard Drive Rack to Bottom Panel (#5)
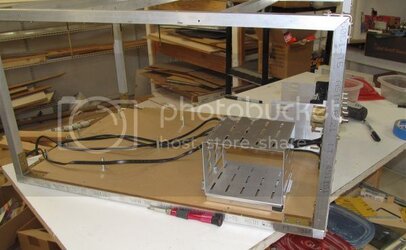
Done.
Create some double length switch cables:
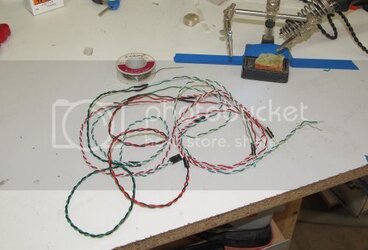
Tidy the cables:
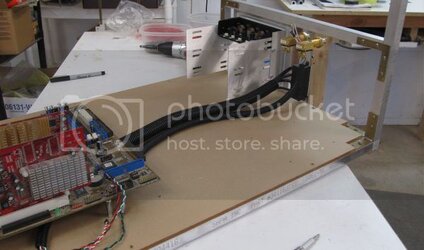
Add some feet:
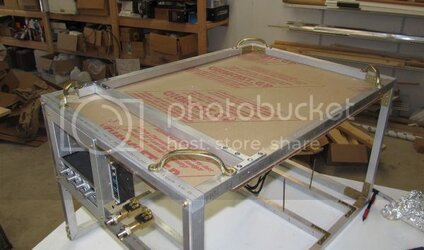
And I call it done!
Day #2 1745 PST.
That's what about 33 hours? Of course I only put in about 4 hours of work today.
And I guess its not totally done. I have a some small things left to do:
1) Tidy fan cables.
2) Run data and power cables.
3) Install PC hardware.
But I would classify these things more as installation of hardware rather than mod fabrication.
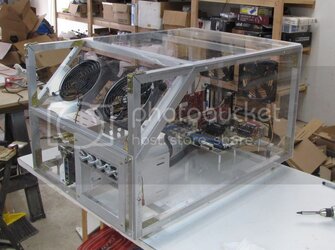
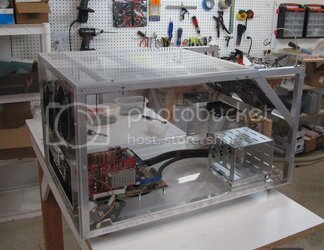
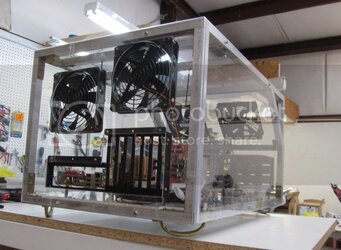
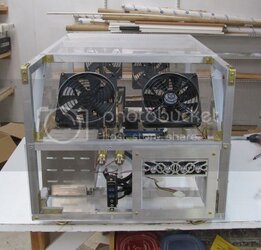
Of course more pics to come as I finalize this thing, but I am headed to the pool.
- Joined
- Oct 14, 2007
Well done Navig, looks great!
- Joined
- Jan 24, 2012
- Location
- Charleston, SC
Impressed. Nice going. Whenever you're done and have a min, can you let me know where you get some of your accessories like the usb mic heaphone jacks, hdd racks and such..
- Joined
- Dec 7, 2003
- Thread Starter
- #57
Yes, those are cabinet pulls used for feet ($1.99 Home Depot I believe). They are sturdy, easy to mount, cheap. I will add a little bit of hockey stick tape wrap so they won't scrape as much.
This whole project is about cheap and simple. I'll get around to tallying the cost, but I doubt it exceeds $150.
I get a lot of my stuff from Hank at Performance-PCs.com (for many many years).
Lian Li replacement USB panels.
Poke around the website for hard drive racks--they vary in stock and price.
I don't think this particular one has been in stock for a while, but it is a Lian Li also.:
Lian Li replacement racks.
I have a few of these, which I think are the best function to cost ratio:
Corsair drive rack.
But I need more than 3 drives, and while there is enough room to like mount 4 of them, I felt it would add too much black.
- Joined
- Jan 24, 2012
- Location
- Charleston, SC
Thanks man. I was on the site looking around the other day, just I didnt go to the right section because I didnt see any of these lol.
- Joined
- Jul 29, 2011
- Location
- Buenos Aires, Argentina
That's such an impressive amount of work done in the tightest time frame...
Major props for pulling this out successfully!
You Sir, have got my respect (and also inspired me to pursue a similar affair in the near future. Most likely it'll take me a month or two to finish a case like that though)
Major props for pulling this out successfully!
You Sir, have got my respect (and also inspired me to pursue a similar affair in the near future. Most likely it'll take me a month or two to finish a case like that though)
- Joined
- Nov 12, 2002
- Location
- Rootstown, OH
Pretty awesome final product. I like the look.
Does it have a home yet?
Does it have a home yet?
Similar threads
- Replies
- 2
- Views
- 633
PROJECT LOG
Project Invicta - Build Log
- Replies
- 17
- Views
- 1K
- Replies
- 26
- Views
- 5K
- Replies
- 36
- Views
- 2K