• Welcome to Overclockers Forums! Join us to reply in threads, receive reduced ads, and to customize your site experience!

New cooling system.

Overclockers is supported by our readers. When you click a link to make a purchase, we may earn a commission. Learn More.
Good for you. Glad you figured it out. Your pics kinds umm coulda been better. You didn't expect me to decode what block you had and scroll up to who knows where, it's a long thread dude.

Are you young? Save using those real nuts till you want kids. And no superglue!

Amerikan Ingenuity and preserverance. You prolly had it 20 minutes after you PMed me. And you will like that 3rd arm.
 
xD I actually just figured the switching the nut thing around, maybe.. A half hour ago. I am kind of young - 24 years old. And yes, my pictures do kind of suck.. I'm by no means a photographer with a cell phone.
 
Me neither. Some guys just have the knack. Err girls. Shazza is one that amazed me. She's out of the scene long ago, be very fun to talk to her and just chat up her wonderful rigs.

http://www.overclockers.com/forums/showthread.php?t=601925

I didn't get my first C64 till I was 27 or so, now I'm a old 54. So you can see why I'm a grumpy 'do your homework' kinda guy. My son is doing well on his own, he's 25 now. And boy did he get his homework done. Kudos to my wife mostly, she's great we's been married longer than you'z been breathing.

Keep at it, a first build is a long slogging process, but worth every penny. In two years you'll be an old timer and know all this stuff.
 
We really don't like the 200mm rads much. Fans just can't deal with the load much. But, good for you!

Tell us how it works out. When all done post a build log and proper temp results please.
 
Radiator, fan controller, and fans came in! Woo. the radiators at the top of the case there, can barely see it.. I had to take my DVD drive out to make room for it. But, all things considered.. I'm not really that upset about the loss of the drive. It was ugly, anyways. ^.^

tubes are measured and cut. I'm thinking for my rad fans, I'm going to use one as an intake, and two as exhausts.. We'll see how that works.

Now, I've gotta run to the store and pick up a few jugs of distilled water, do a final rinse, and start my first leaktest on a towel on the table. That ones mainly to check and make sure I didn't over/under tighten any of my fittings. I'll let that run for an hour or two, and then stick it in the case and let it run all night, and while I'm at work tomorrow.

Would it be better to run the second leaktest upright, or can I do it with the case on its side? My only worry would be air bubbles and stuff, on its side it seems more likely that my res levels could drop to low and run my pump dry. Thoughts?
 

Attachments

  • IMG_0820.JPG
    IMG_0820.JPG
    931.9 KB · Views: 99
Put paper towels around each fitting. Your just running the pump first and then for the 24 leak test your adding the fans to your test PSU?

Upright is normal config, best way.

Dunno why any tests would be done on the side or filling the loop.

BE CAREFUL, REMEMBER DON'T LET THE PUMP RUN DRY. Fill res, bump pump till res is almost empty, shut down immediately. Fill res do again.. Again. Again. CYA in a few HOURS AFTER filling and bleeding. CYA in 5-7 hours with a stable bleeded loop and THEN you can do your long term leak test.
 
Running the pump first to get everything bleeded/filled, then once it goes in the case I'll add the rad-fans to make sure it doesn't get to warm. You'd mentioned having seen warm loops bursting, during a leaktest.. As well as that the water will warm up with the heat from the pump. Off to class/buy distilled water.

One last question, before I go.. Not entirely related to the water cooling thing, though.

My rad fans are PWM controlled. Will those also work on a regular 3-pin voltage controller?
 
Put paper towels around each fitting. Your just running the pump first and then for the 24 leak test your adding the fans to your test PSU?

Upright is normal config, best way.

Dunno why any tests would be done on the side or filling the loop.

BE CAREFUL, REMEMBER DON'T LET THE PUMP RUN DRY. Fill res, bump pump till res is almost empty, shut down immediately. Fill res do again.. Again. Again. CYA in a few HOURS AFTER filling and bleeding. CYA in 5-7 hours with a stable bleeded loop and THEN you can do your long term leak test.


fill it tilted on it's back. just by looking at your loop, the only way you'll fill it is with the res on "top", which means you need to tilt the whole thing backwards... you'll also need to do the bubble bleeding in the same position. part of the cost of having the res lower then the rad in the loop.

course my knowledge of this is based purely on trial and error, and some physics classes in college. Might be knowledge about this laying around i'm not aware of... but last i knew air was lighter then water... and as a result it would end up in the highest thing in your loop (the rad), which means to properly bleed the system you'd have to tip the system on it's back.

Was thinking about that. That's why I'm going to perform a brief (Couple hour) leaktest out of the case. I'll mark the hoses so I know how to arrange them, and hook it up on the table, bare. That way, I can position each peice as needed. Once I'm satisfied with that, I'll unplug it from the power and start moving it all into the case.

I think my biggest problem will be getting it in the case, in one peice... But, I'll cross that bridge when I come to it.

On a side note, tilting it on its back won't help much with the bubbles, because the tubing is at the back of the case - The bottom, if the case is tipped backwards. Air would be on the opposite side of the rad...


I could maybe mount everything like it's supposed be, but leave the rad for last. Lean it against the back of the case or something maybe, while I bleed it. I'll have to take a look, when I get back from class.

Edit: Another thought. I could bleed it with the case on its side.. Then all I'd have to do is 'roll' it back and forth. Air would migrate to the highest points - The tubing - and be pushed through.
 
Na, i can see that fat thing quite well actually lol.

I realized that, when I went back and looked at the picture. XD

And now begins the bumping and bleeding and filling. Went ahead and assembled it all in the case, so I don't have to worry about getting the tubes going the right direction and whatnot.
 
IMG_0822_zps42d616c7.jpg

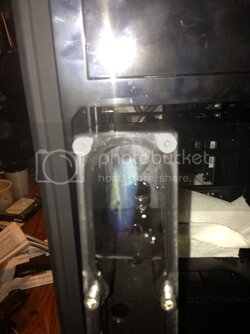
So next up, we have my reservoir, partially full. The tube that you can see there is an input to the res, coming from the VGA block. My question now, is should it pushing water harder than that?

I'm trying to get a guage for how many more times I need to roll the case around.. What I'm doing to work the bubbles is standing it from upright, onto its back, upside down, and then back the other way to work the bubbles through the cycle. Each time, I knock on all the blocks and the rad, and it's resulted in me refilling the res three times. Maybe four.

Should I let it sit upright and run now, to work the air out on its own, or roll it more? My last rolling attempt didn't give me but a small bit of bubbles, compared to the times before.
 
Yes face it up right if you saw barely any bubble now. Assuming the major ones have been bleeded already but eventually it will bleed them out. It just takes time. Keep filling it until it needs none.

Can't tell how much water is flowing from a picture. You'll either need a video or flow meter. Is it barely coming out? Whats your pump settings at?

Also I'am not familiar with this Apogee Drive. Which side is in and out from the pictures? Is the right side in which is coming from the reservoir than kicked up to the radiator than down to the GPU and back to the reservoir?

Becareful tiltling it as your pump is not where it usually is for us all. Its on the CPU which moving it around could make it run dry. Did you ever hear funny sounds from the pump?
 
Last edited:
I never move it, while running because I know if I set the case on its face, it'll run dry. And yes, my flow runs res -> pump/CPU block -> Rad -> VGA - Res.

As for the flow, that question answered itself just before I came back. Water level dropped, filled it up,a nd dropped again all on its own.. That time, there's a noticable increase in water pressure. You cana ctually see it stirring the water in the res, now.

As for sounds, all I hear is what I would describe as the sound of water trickling - It's loudest at the pump, though.
 
So far, no leaks either. That makes me slightly happy, but we'll see how it does over night.

All the Apogee Drive is, is a 35x pump attached to the Swiftech APogee CPU block.. You can actually buy the two seperate and mount them yourself, but it costs an extra 20 or so bucks to do it that way.
 
Awesome. This is music to the ears. You should be up and running tomorrow.
 
S'what I'm expecting. I've been checking the res every half hourfor te past two hours, and it hasn't changed. So I tipped the res back and forth, got it as full as I can possibly get it, and I'm gonna leave it alone for the night, except for one last check before I go to bed. Tomorrow is work from 10-630, so I'll wake up at about 8 or so and check it.. If it's good, let it run while I'm at work, and while I clean up its area after I'm at home. ^.^

Again. Thank you, everyone that's offered advice and helped.. It's greatly appreciated.
 
Back