• Welcome to Overclockers Forums! Join us to reply in threads, receive reduced ads, and to customize your site experience!

Project: RED Glare Build Log

Overclockers is supported by our readers. When you click a link to make a purchase, we may earn a commission. Learn More.

MNMadman

Member
Joined
Dec 13, 2015
***NOTICE: I decided to use this thread as my Project: RED Glare thread, as it didn't receive very many replies. I will not be modding the case unless absolutely necessary. This will be a build log for a new water-cooled overclocking/gaming system. Pics will be included once I actually take them.***

***Pics start in post #7 below***


Hello all!

I'm building a new system very soon (ordering this coming week), and I'm looking to water cool the major components.

Case will be a Thermaltake Core X2 mATX
Mainboard will be an ASUS Maximus VIII Gene mATX
CPU will be a Skylake-K (haven't decided which)
GPU will be an EVGA 980 Ti Hydro Copper

Was thinking about these loop components:
EK-BAY RES D5 Vario
EK-FB ASUS M8G Monoblock
EK-CoolStream 360 radiators (2)
PrimoChill PrimoFlex Advanced LRT 3/8" x 5/8" tubing
Compression fittings all around
Distilled water + anti-corrosive + KillCoil

Looking for maximum overclocking (within the limits of water cooling, of course) and maximum gaming performance. Cost isn't an issue.

Do I actually need two 360 radiators?
Should I get 25mm, 38mm, or 60mm radiator(s)?
Is that reservoir enough? Any benefit to two reservoirs?
Any clear LED fans come highly recommended? I'll need at least eight 120s plus a 140 for the rear.

Thanks in advance for the help!
 
Last edited:
Do I actually need two 360 radiators?
Should I get 25mm, 38mm, or 60mm radiator(s)?
Is that reservoir enough? Any benefit to two reservoirs?
Any clear LED fans come highly recommended? I'll need at least eight 120s plus a 140 for the rear.

Thanks in advance for the help!

First and foremost, :welcome: to OCFs!

To answer your questions, no you don't need 2 360 radiators. I would only say you would do if you were to go SLI. If you went 2-way + high OCs on CPU and GPUs, you would then need the two and allow you to run a quieter build as a single 360 would for your setup now. Its really up to you if you are truly thinking of going SLI in the future.

The thickness of the radiator is up to your case. Most standard rads are anywhere from 50-60mm.

I'm sure there are some clear LED fans but there are also these new RGB LED TT fans that are eye popping that has caught my interest as of recent. I don't know how well they'll be as rad fans compared to the premium competitors in the market but if you're looking for some bling, check those new Riing fans out. Will be waiting on data to see how they do against the kings of the rad fan space.

As for the reservoir, all you need is one. Keep the loop short and simple as you can, all in a single loop.
 
***NOTICE: I decided to go all-out with the Project: RED Glare theme. To this end I have also ordered new peripherals as well.***
***Stuff that I have already received is Green. Stuff that has shipped is Blue. Stuff not yet shipped is Pink.***


That's very good advice. Unfortunately, I'm not good at following good advice. :D :p

Performance-PCs is supplying me with:
EK-FB ASUS M8G Monoblock - Nickel + Acetal w/ EK-ACF 3/8"x5/8" Black Nickel fittings
Extra EK-ACF 3/8"x5/8" Black Nickel fittings for Hydro Copper GPU block
XSPC EX360 Crossflow Series Copper Triple-Fan Radiator (2) w/ XSPC 3/8"x5/8" Black Chrome compression fittings
XSPC DDC Photon 170 Reservoir/Pump Combo (Red LED) w/ XSPC 3/8"x5/8" Black Chrome compression fittings and red sleeve and black heat shrink
Yate Loon CLEAR 120mm Low Speed Silent Case Fan with Red LED - D12SL-124R w/ red sleeve and black heat shrink (6)
Yate Loon 140x140x25mm Clear Medium Speed Fan with Quad Red LED D14SM-124R w/ red sleeve and black heat shrink (3)
Yate Loon CLEAR 120mm Medium Speed Silent Case Fan with Red LED - D12SM-124R w/ red sleeve and black heat shrink (3)
EK-Ekoolant EVO Liquid Coolant - CLEAR (premix 1 Liter) (2)
XSPC Heavy Duty Hose Cutter (0-25mm)


Amazon is supplying me with:
EVGA GTX 980 Ti Hydro Copper GPU
Thermaltake Core X2 mATX case
Samsung 950 Pro NVMe 512GB M.2 SSD
PrimoChill PrimoFlex Advanced LRT 3/8"x5/8" Bloodshed Red tubing 10ft (2)
Corsair Power Cable Kit with red sleeve and black heat shrink
Corsair 24-pin Power Cable with red sleeve and black heat shrink
Western Digital Black 5TB 7,200 RPM HD
Corsair Gaming STRAFE RGB Mechanical keyboard w/ Cherry MX Brown switches
Corsair Gaming VOID RGB USB headset


Newegg is supplying me with:
Corsair HX750i power supply
G.Skill Ripjaws V DDR4-3000 15-15-15-35 2x8GB kit


My local Micro Center is supplying me with:
Intel i5-6600K CPU
ASUS Z170 Maximus VIII Gene mATX
Acer XB270HU 2560x1440 144Hz IPS G-Sync monitor
Corsair Gaming SABRE Laser RGB mouse
Corsair Gaming MM400 Compact High-Speed mouse mat
NZXT Grid Multi Fan Port


Overkill? Most certainly, in every way. But it'll be a great performer and look awesome with a black and red theme. I went with the Yate Loon fans because they served me well in my CPU-only loop (an EK 240 kit -- my first and only WC setup) four years ago.

Stuff should start arriving tomorrow, and I should have everything by Friday night. Looking forward to the build.
 
Last edited:
I plan on doing a build log for it. Is there a specific forum area I should post that up in?
 
Woohoo! Everything has finally arrived!

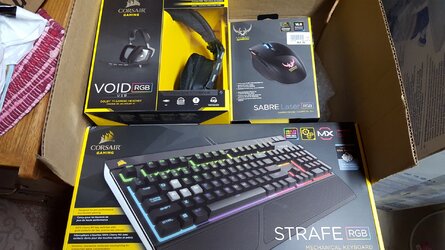
The obligatory pics of the boxes at the start of the project...

I decided to give Corsair Gaming stuff a try, as they can do the full RGB gamut. I'll be setting those to red for this project, of course.
20151218_160941.jpg

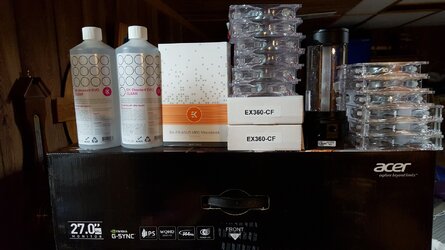
Most of the water cooling stuff and the new monitor. Performance-PCs did a really good job sleeving and heat shrinking all of the fan cables and the pump cable.
20151218_161045.jpg

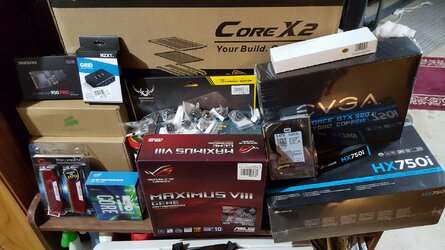
The rest of the hardware.
20151218_161157.jpg
 
Assembly of Project: RED Glare has been proceeding slowly but surely.

Not sure what happened to the case (could be bad shipping as the box had a pretty big dent; or just bad QC) but it's nowhere near level. I haven't actually measured, but I'd estimate that it's torqued about 1/4" to 1/2". Only three legs are in contact with the desk at any time. The mainboard tray is also nowhere near straight when it's out of the case. It doesn't contact anything it's not supposed to, so it's not really a problem. I'll just have to use a spacer to get the fourth leg in contact with the desk.

The case appeared to be downright cavernous when it was empty, but once I started putting hardware in it, there really isn't all that much space. There is a lot of wasted space in the lower chamber for me, because I only have one drive (the M.2 SSD obviously doesn't need a bay). And I'm really glad I went with standard-depth (38mm) radiators instead of the 60mm ones I was originally planning on. Still, even as cramped as it is I think it's going to look good.

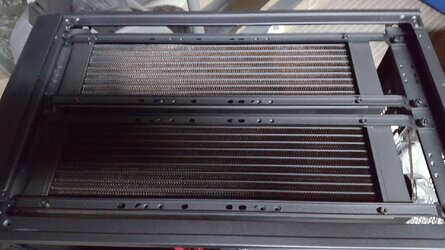
The top fan/radiator mounts are great -- you have full access to your fans/radiators and can remove them completely with just some thumbscrews.

I decided to use an EK-Supremacy EVO Copper/Acetal CPU block instead of the EK-FB ASUS M8G Monoblock. I didn't like the look without the VRM heat sinks. I'm weird that way.

I've done the radiator dance with both of the EX360s, and I think I've got a good planned loop order -- so far it's reservoir/pump > rad1 > CPU > rad2 > GPU > reservoir/pump. I know it doesn't need to alternate like that, but I think it will work best for the tubing as well.

Also have to decide what I want to do about the reservoir/pump as the mounting holes don't line up with the case's crossbars. I also don't want to block the front fans. I might end up drilling some holes in the front of the case to the side of the fan mounts, or trying to jury rig something with the crossbars and some zip ties. We'll see...

I likely won't tube it up until after Christmas. I might do that and the leak-testing on the 26th.

***UPDATED WITH PICS***

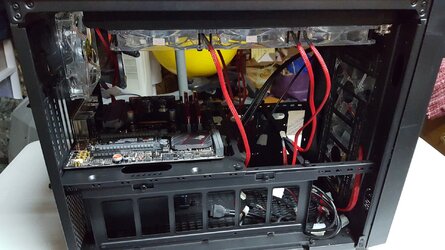
The front case IO/power is swappable on this case. I have already switched it over to the "wrong" side. This is also the side where the window is going to be, as the side panels are interchangeable too. I'm probably going to remove the three SSD mounts in the lower section.
20151225_230159.jpg

The two EX360 radiators as seen from the top (after removing the top panel). Very easy mounting and access, with just the two thumbscrews per radiator mount.
20151225_230219.jpg

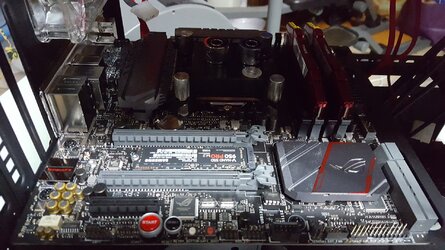
The EK-Supremacy EVO Copper/Acetal block, G.Skill Ripjaws V RAM, and "upside down" Samsung 950 Pro M.2 SSD.
20151225_230307.jpg

Two medium speed 140s in the front, one medium speed 140 in the rear, and six low speed 120s on the radiators. I haven't decided whether I'm going to keep that mount for three extra medium speed 120s in the lower section, as there isn't really anything to cool down there -- just the Western Digital Black 5TB drive and the power supply, which doesn't need it. This will be the side with the mesh-covered side panel holes.
20151225_230443.jpg

Whee!
 
Last edited:
Finally got Project: RED Glare all tubed up and ready to go. It's one hour into leak testing with no incidents.

I wanted to see what the LED fans would look like, so I wired 'em up and fired 'em up. I also discovered the only flaw in the Black+Redder world domination plan -- Performance PCs sent me a white LED for the Photon reservoir instead of the red LED I ordered. Will have to order up a red one and hope I actually receive the right color. And no, this isn't the final wiring job...
20151227_235641.jpg

The XSPC compression fitting rings are much harder to fit over the tubing and that makes tightening them a real pain in the ***. EK-ACF fittings are much better in this regard.
20151227_235741.jpg

A pic from farther away, showing the cool under-lighting effect from the front fans.
20151228_000216.jpg
 
Last edited:
Think I need some new sunglasses with all the RED glare...lol

Should look really good when you tidy up the wiring.....:thup:
 
RED glare
Thank you! Black+Redder was just a bit off as a project name. RED Glare fits better.

It hadn't leaked when I checked it before work this morning, so assuming it remains sealed when I get home from work, the full system will get fired up today. Really looking forward to seeing my first multi-block multi-rad build in action.
 
Last edited:
IT'S ALIVE! :clap: :rock:

It survived the leak test period with no incidents, so I wired up the rest of the components. Double-checked everything, crossed my fingers, and pressed Power. I was rewarded with the signature red glare and some on-screen action, and I let out a breath I didn't realize I was holding. Success!

Updated the BIOS and then tweaked all of the settings the way I like them. The RAM works perfectly in XMP mode at 3000 15-15-15-35 1.35v. Installed Windows 10 Pro and all of the updates and drivers, and then tweaked those settings the way I like them. I was disappointed that I couldn't put EVGA Precision on it, as their servers are down for migration. But I can wait until they come back up I suppose. I installed a few games and programs for basic testing -- HWMon, TS3, some FPSes and others. Everything works great. I'll install the rest later.

Now comes the bad part though -- I have to unplug everything and figure out what to do with the rat's nest of cables. I didn't want to do it up neat at first, since I didn't know yet that all of the hardware worked. I suppose I'll be glad I did it in the end, but it's still a pain in the *** now. That's what I'll be doing when I get home from work tonight. More pics to come, once I have the wiring under control.

OK , now I'm subbed for another build. I'm a sucker for red. LOL Looking nice so far. That's a lot of radiator!
Thanks! And yes, for only two blocks the six radiator fan spots I have is very much overkill. But I am going to overclock this thing until it screams for mercy, and I think it looks cool (pun intended).
 
Last edited:
I love those EK rads. I was going to get one but I chose to get the RX360 v2 instead.

Love the red glare, please do post final wiring pics!!! Looks great otherwise! :thup:
 
IT'S ALIVE! :clap: :rock:

It survived the leak test period with no incidents, so I wired up the rest of the components. Double-checked everything, crossed my fingers, and pressed Power. I was rewarded with the signature red glare and some on-screen action, and I let out a breath I didn't realize I was holding. Success!

Great stuff....!
 
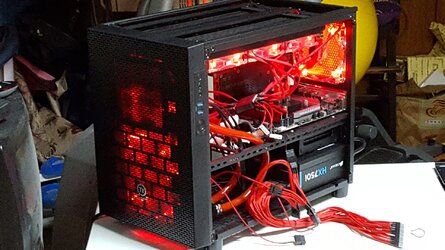
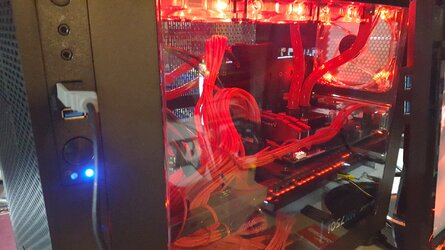
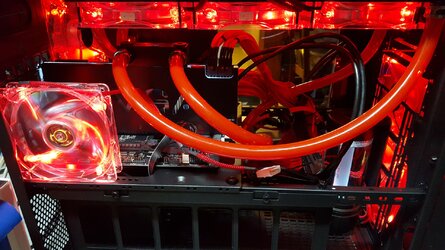
Some pics of the final config...

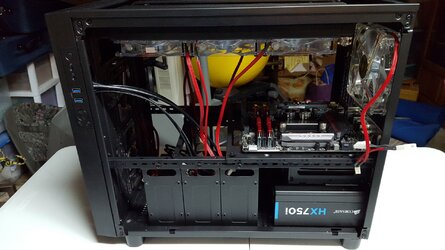
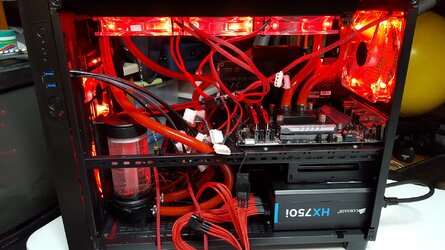
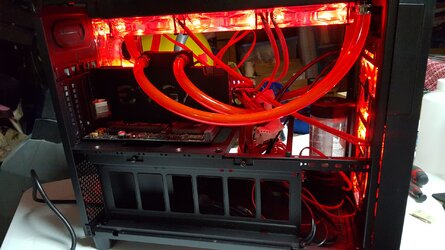
Nice bright shot of the internals. The fan wires went up between the radiators and the top case panel. The rest of the wires were organized and zip-tied. Could it be better? Yes. But I spent as much time as I had patience for, and this is by far my cleanest system wiring.
20151230_194320.jpg

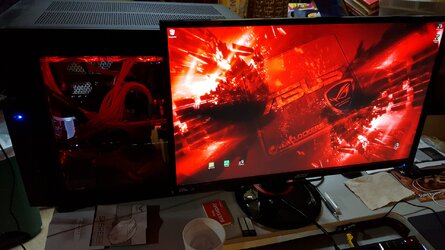
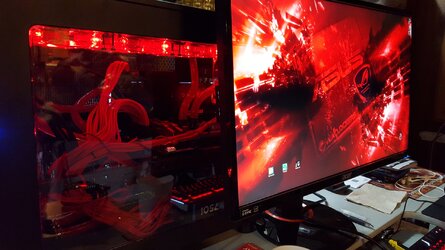
A couple of pics of the new system and new monitor with desktop background.
20151230_194259.jpg
20151230_194420.jpg

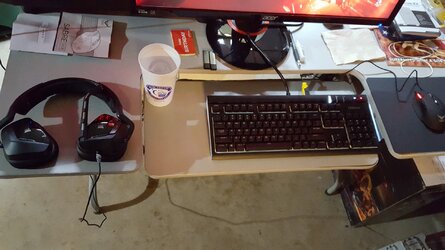
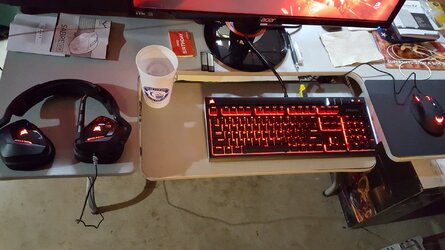
The Corsair Gaming peripherals controlled by the CUE software, "breathing" together -- going from this...
20151230_194617.jpg

...to this.
20151230_194614.jpg
 
Love it! Cable management is much better than before so I can't see anyone complaining about that :)
 
Had these in another thread, figured I'd add them here...

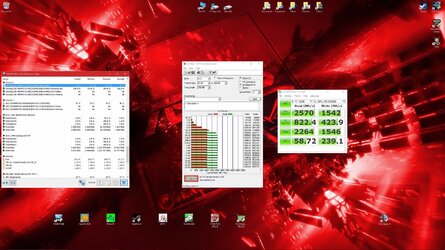
I added a fan to cool the 950 Pro SSD, which is prone to overheating when stressed/benchmarked. You can also see I removed the sticker from the SSD. I bought some small heatsinks for it originally, but there wasn't enough clearance under the graphics card water block.
20160105_020735.jpg

Without the fan, it was reaching 75°C and then thermal throttling. With the fan, it peaks at 61°C with no throttling.
20160105_021035.jpg
 
Those speeds are blistering!! :burn:
Never thought and SSD would get that hot.

Hottest I ever got my HDD's was in my old ITX case with a 550ti in it running full bore. Hit 63C on the one drive!
 
A typical SSD doesn't get that hot, because they have metal enclosures that act as a heat sink. M.2 drives don't have that. And the Samsung doesn't get that hot under normal gaming and file copying and such -- it takes benchmarks to get there.
 
Back