- Joined
- Nov 23, 2011
So i had a laptop that the entire lid including screen were pretty much destroyed.
Started it's life as a Samsung NP350 and the motherboard part number is QCLA4 LA-8862P Rev 2.0 2012-05-21
Internally it has an i7 ivy bridge and 8gb of ram.
I have already done a few custom mods to it.
This includes taking my desktops stock i7-3770k heatsink (has copper plug) shaving it from 90mm to 80mm.
I shaved down the heatsink in order to fit a 80mm to 120mm fan shroud.
From there i've installed a SP120 high static fan in the opposite direction of the stock cooler fan. It pulls air up from the bottom of the fins of the heatsink.
Yesterday Tues, March 29th 2017, I actually live streamed some of the modding on http://twitch.tv/united_streamers and plan to continue doing the same till it's finished.
Now this might not be the prettiest build, as I'm typically broke, but it will be very creative.
Not sure we could call this sponsored but some of the tools used were given to me for free from Amazon sellers.
The freebies in this list include 3x 3D printer pens and a bag of PLA
[oldtable]
[tr]
[th]The Case: [/th]
[th]3D Printer Pens: [/th]
[th]Bag of PLA: [/th]
[/tr]
[tr]
[td][/td]
[td][/td]
[td][/td]
[/tr]
[/table]
[oldtable]
[tr]
[th]Fan and Controller: [/th]
[th]Fan Shroud:[/th]
[th]Sata Cables:[/th]
[/tr]
[tr]
[td][/td]
[td][/td]
[td]
[/tr]
[/table]
[oldtable]
[tr]
[th]Heatsinks:[/th]
[th]SSDs:[/th]
[th]Fan Filter:[/th]
[/tr]
[tr]
[td]
[td][/td]
[td][/td]
[/tr]
[/table]
*** I do NOT recommend Silicon Power, 3-4 of the SSDs i've bought from them failed right between 300-450hrs of being powered on, out of 5-6 total, both with the S55 and S60 models.
When I actually have money i want to move to Samsung SSDs. I've lost about 1tb worth of data with Silicon Power. My first ever Samsung 830 64gb still works and is installed in a friends laptop! Don't remember when i bought it, but i remember that it was around $128 on newegg when i got it. maybe 2011 or 2012, then like 10 days later went on sale for $64.
Picture of the start of the work. Sorry for the quality, took them on a tablet that had a pretty badly scratched lens. pictures after this point are much better quality.


First Stream to twitch has me to this point


The 3D printing on the bottom around the Dust Filter Intake was to create a pool to pour the epoxy. This way i would have a level area to adhere the magnetic filter part.
Printing by hand isn't super clean so i beveled the inner layer by the Motherboard with a lithium handheld Dremel. This way if the filter gets pushed on, the bumps in my 3D printing wouldn't have the ability to mess up the filter.
The round areas where I went around in a full circle and the other that's about 1/4 a circle were to make feet that are the same height as the standoffs on the box. where the cables are meant to go in the original box is a lower footprint than the back, for some reason.
Lot more to come.
If you have ideas, thoughts, comments, quibbles, or queries, please share them with me
- - - Updated - - -
Additional streams to come, likely will be doing one today so i'll post futher progress once that's completed
Started it's life as a Samsung NP350 and the motherboard part number is QCLA4 LA-8862P Rev 2.0 2012-05-21
Internally it has an i7 ivy bridge and 8gb of ram.
I have already done a few custom mods to it.
This includes taking my desktops stock i7-3770k heatsink (has copper plug) shaving it from 90mm to 80mm.
I shaved down the heatsink in order to fit a 80mm to 120mm fan shroud.
From there i've installed a SP120 high static fan in the opposite direction of the stock cooler fan. It pulls air up from the bottom of the fins of the heatsink.
Yesterday Tues, March 29th 2017, I actually live streamed some of the modding on http://twitch.tv/united_streamers and plan to continue doing the same till it's finished.
Now this might not be the prettiest build, as I'm typically broke, but it will be very creative.
Not sure we could call this sponsored but some of the tools used were given to me for free from Amazon sellers.
The freebies in this list include 3x 3D printer pens and a bag of PLA
[oldtable]
[tr]
[th]The Case: [/th]
[th]3D Printer Pens: [/th]
[th]Bag of PLA: [/th]
[/tr]
[tr]
[td][/td]
[td][/td]
[td][/td]
[/tr]
[/table]
[oldtable]
[tr]
[th]Fan and Controller: [/th]
[th]Fan Shroud:[/th]
[th]Sata Cables:[/th]
[/tr]
[tr]
[td][/td]
[td][/td]
[td]
- SATA 22 Pin Male to SATA 7 Pin and 2 X 15 Pin SATA Female Connectors
- Slimline 13 Pin SATA Male to 22 Pin SATA Female Cable Adapter
[/tr]
[/table]
[oldtable]
[tr]
[th]Heatsinks:[/th]
[th]SSDs:[/th]
[th]Fan Filter:[/th]
[/tr]
[tr]
[td]
- Mudder Black Aluminum Heatsink Cooler Cooling Kit for Raspberry Pi 3, Pi 2, Pi Model B+, 10 Pieces
- ENZOTECH Memory Ramsink BMR-C1 (Forged Copper Heatsink)
- Intel Genuine Copper Core Heatsink for i7-3770K
[td][/td]
[td][/td]
[/tr]
[/table]
*** I do NOT recommend Silicon Power, 3-4 of the SSDs i've bought from them failed right between 300-450hrs of being powered on, out of 5-6 total, both with the S55 and S60 models.
When I actually have money i want to move to Samsung SSDs. I've lost about 1tb worth of data with Silicon Power. My first ever Samsung 830 64gb still works and is installed in a friends laptop! Don't remember when i bought it, but i remember that it was around $128 on newegg when i got it. maybe 2011 or 2012, then like 10 days later went on sale for $64.
Picture of the start of the work. Sorry for the quality, took them on a tablet that had a pretty badly scratched lens. pictures after this point are much better quality.
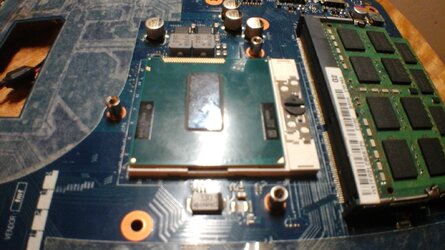
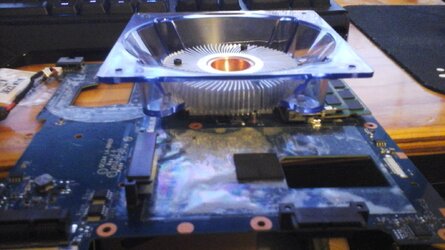
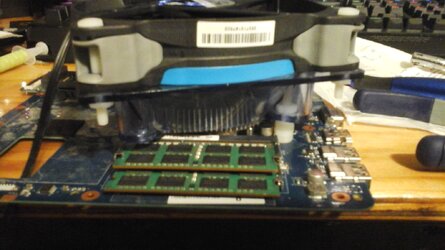
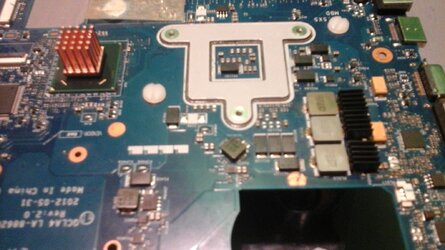
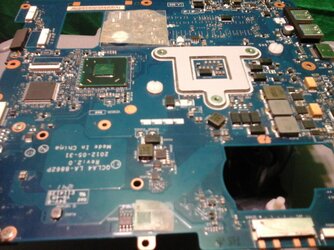
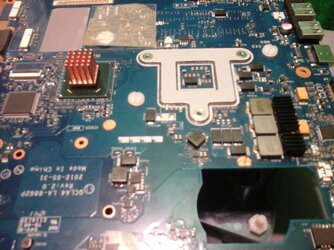
First Stream to twitch has me to this point
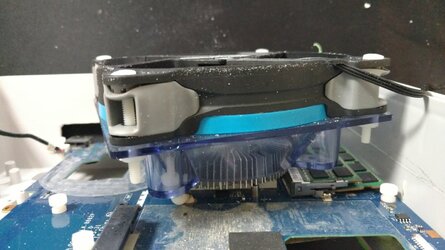
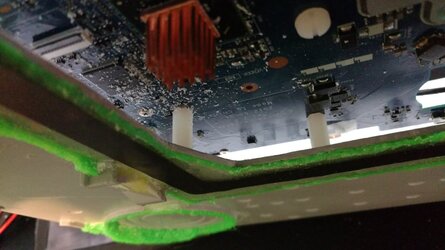
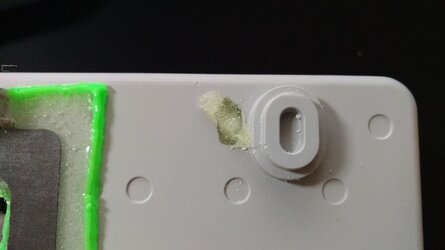
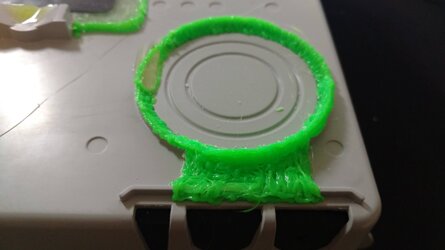
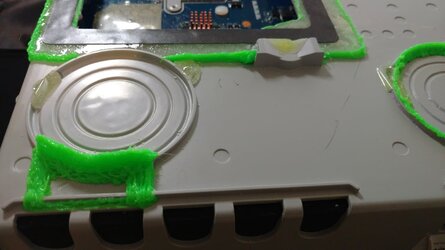
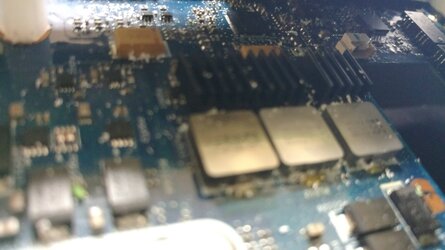
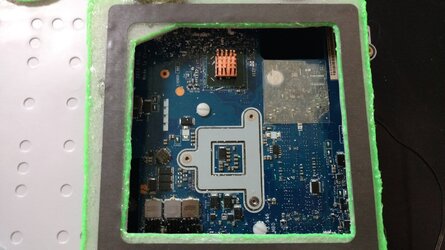
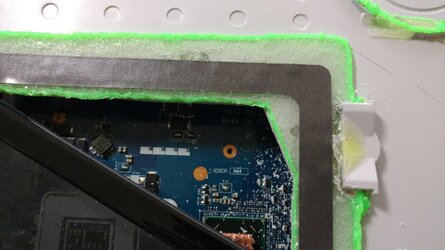
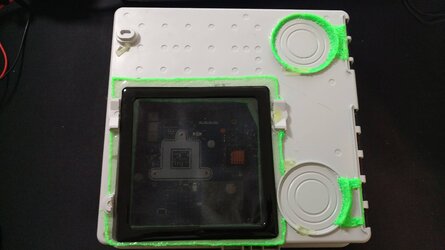
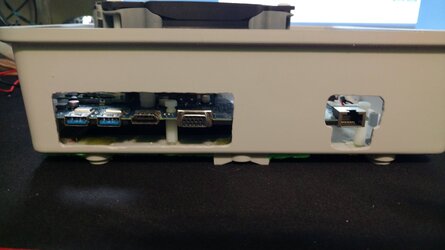
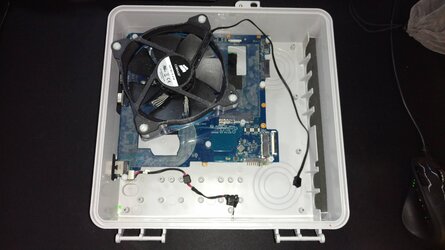
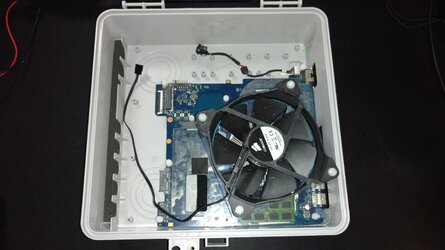
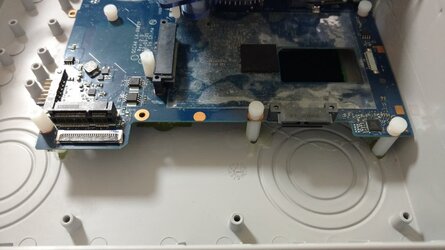
The 3D printing on the bottom around the Dust Filter Intake was to create a pool to pour the epoxy. This way i would have a level area to adhere the magnetic filter part.
Printing by hand isn't super clean so i beveled the inner layer by the Motherboard with a lithium handheld Dremel. This way if the filter gets pushed on, the bumps in my 3D printing wouldn't have the ability to mess up the filter.
The round areas where I went around in a full circle and the other that's about 1/4 a circle were to make feet that are the same height as the standoffs on the box. where the cables are meant to go in the original box is a lower footprint than the back, for some reason.
Lot more to come.
- The SSDs are removed from their housing with heat sinks put onto them.
- Power Brick Mounting
- I/O Panel 3D Pen Printing
- Would like to shove a small dedicated gpu into it
- Exhaust Port for the Fan
- Additional customization
If you have ideas, thoughts, comments, quibbles, or queries, please share them with me
- - - Updated - - -
Additional streams to come, likely will be doing one today so i'll post futher progress once that's completed