-
Welcome to Overclockers Forums! Join us to reply in threads, receive reduced ads, and to customize your site experience!
You are using an out of date browser. It may not display this or other websites correctly.
You should upgrade or use an alternative browser.
You should upgrade or use an alternative browser.
FEATURED Build Log: Water & Wood
- Thread starter MIAHALLEN
- Start date
- Joined
- Oct 14, 2007
Re: Parallel - makes perfect sense now miah. I missed the text on the side of your GPU link saying it was parallel. Hopefully the restriction is similar enough to make it work without issue. It sure is clean looking that way. 

- Joined
- May 30, 2007
- Location
- Austin, Texas
Am I the only one who is a little concerned about the pump hanging suspended only by tubing? Maybe I am overreacting, but that's not something I'd want in one of my builds.
- Joined
- Oct 14, 2007
I wouldn't do it myself, but am admittedly curious to see how it will hold up. If it were mine, something would be fashioned in some manner to hold it up. Water isn't light, and that pump/res assembly is only 'plastic'. It's strong plastic, but plastic nonetheless.
QuietIce
Disabled
- Joined
- May 7, 2006
- Location
- Anywhere but there
I had a build with an MCP-355 supported by tubing running for just over a year, no problems, and my latest build is the same way. Now I admit, I didn't (and don't) have a res on top of mine - I have a big copper 'T' instead.Am I the only one who is a little concerned about the pump hanging suspended only by tubing? Maybe I am overreacting, but that's not something I'd want in one of my builds.
One other (minor) difference, I also use automotive grade screw claps instead of compression fittings.
- Joined
- May 15, 2011
- Location
- Montana, US
very interesting build. cant wait to see the finished product
- Joined
- Mar 5, 2006
- Location
- Canberra, Australia
...
One other (minor) difference, I also use automotive grade screw claps instead of compression fittings.
Me too. Cheaper and leak proof! (but look crap)
- Joined
- Aug 29, 2007
- Thread Starter
- #69
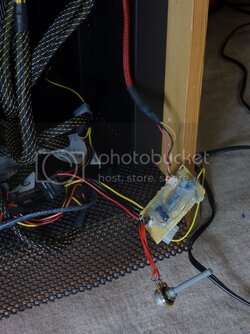
OK, I've got another brief update.....I'm very happy to report that the PWM controller that Bobnova and xXSebasXx built for me is working perfectly, and all the fans seem to be in sync and running exactly how I'd hoped 
I wired them all together with three common PWM lines, a single 12V connection, and a single ground. Then I terminated all the monitor lines except one, which I will plug into one of the fan headers on the mobo to keep track of the RPM of the fans on the wall.

Then I hooked up the PWM controller and tested....works great

Next (based on dengyong's advice) I disassembled all the blocks to see if then filtered out anything from the rads during the 1st flush.
Top tip: if flushing from the tap like I did, put your blocks before your rads

The CPU block was a mess, but the GPU block came out clean.


All disassembled

I have three eVGA backplates, and my intention was to use them in this build. But I didn't want the logos.

So with some acetone and a Q-tip, they were taken care of

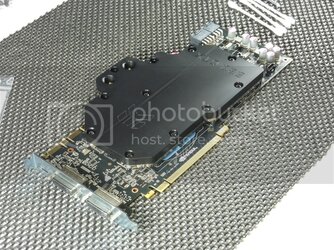
GPU block mounting (self explanatory)


Now the time came for the backplate mounting, but it seems the eVGA backplates are not compatible with the EK block. The mounting screw heads are too big for the backplate mounting screw receptacle. So I drilled them out (except for the four corners of the GPU, which are big enough), and touched up the holes with a permanent marker (picture taken prior to black touch-ups)....but even still the backplate would not go one due to interference with the water block inlets/outlets

Any opinions? Should I modify the backplates again to make room for the water block, or should I abandon them?
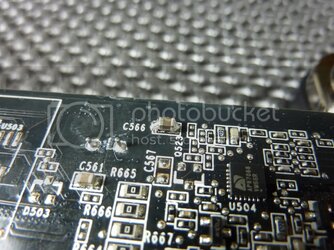
Next, I flipped over the card and heard something hit the table....it was this:

Uh oh, I thought....where did that come from. After scouring the card for a couple minutes, I found the resistor's home

...and promptly soldered it back

So, two cards are now done, and I'll have the third finished shortly....I'll post another update later today

I wired them all together with three common PWM lines, a single 12V connection, and a single ground. Then I terminated all the monitor lines except one, which I will plug into one of the fan headers on the mobo to keep track of the RPM of the fans on the wall.
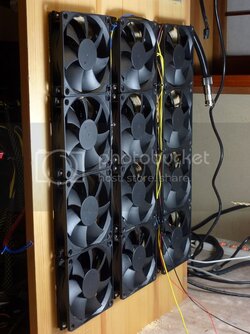
Then I hooked up the PWM controller and tested....works great
Next (based on dengyong's advice) I disassembled all the blocks to see if then filtered out anything from the rads during the 1st flush.
Top tip: if flushing from the tap like I did, put your blocks before your rads
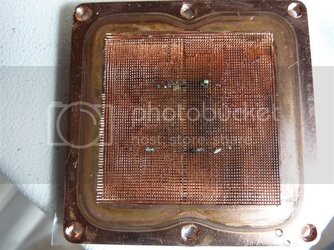
The CPU block was a mess, but the GPU block came out clean.
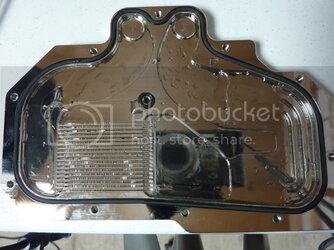
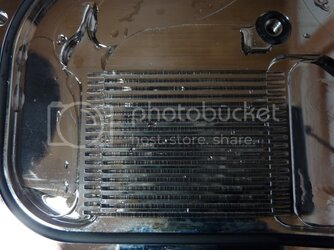
All disassembled
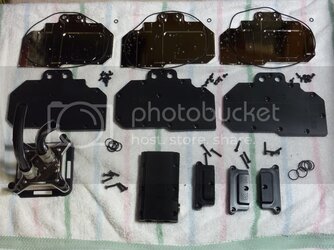
I have three eVGA backplates, and my intention was to use them in this build. But I didn't want the logos.
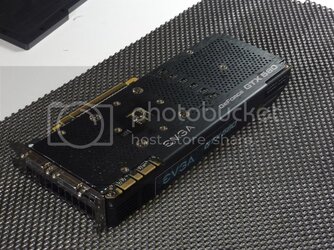
So with some acetone and a Q-tip, they were taken care of
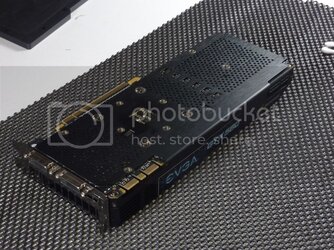
GPU block mounting (self explanatory)
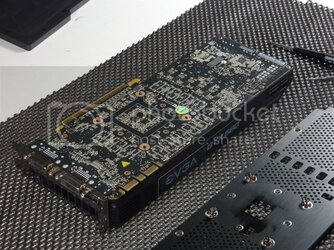
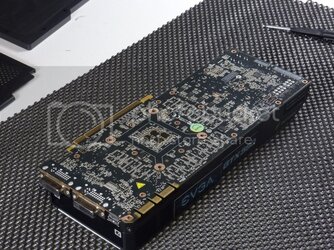
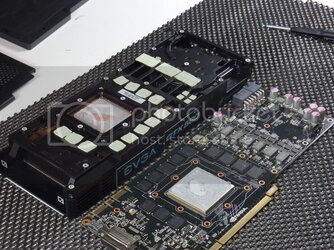
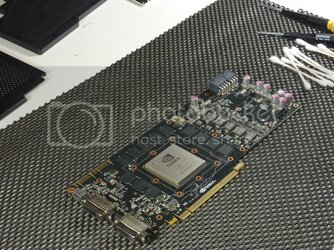
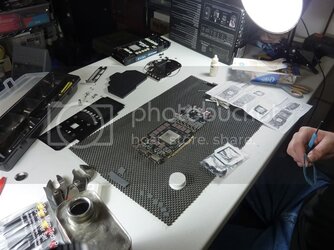
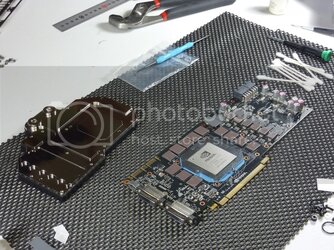
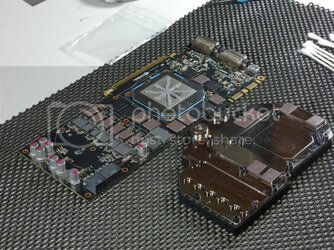
Now the time came for the backplate mounting, but it seems the eVGA backplates are not compatible with the EK block. The mounting screw heads are too big for the backplate mounting screw receptacle. So I drilled them out (except for the four corners of the GPU, which are big enough), and touched up the holes with a permanent marker (picture taken prior to black touch-ups)....but even still the backplate would not go one due to interference with the water block inlets/outlets
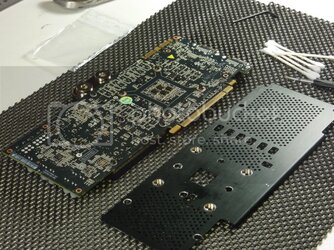
Any opinions? Should I modify the backplates again to make room for the water block, or should I abandon them?
Next, I flipped over the card and heard something hit the table....it was this:
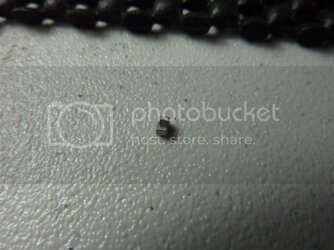
Uh oh, I thought....where did that come from. After scouring the card for a couple minutes, I found the resistor's home
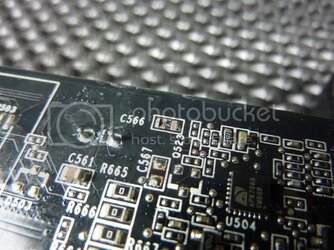
...and promptly soldered it back
So, two cards are now done, and I'll have the third finished shortly....I'll post another update later today
- Joined
- May 10, 2009
Very cool! Good to hear the PWM controller is working correctly, too.
I don't think you'll have an issue with parallel blocks as long as the pump is chunky enough, given that you were buying a pump for 3x580+cpu I'm guessing you bought a chunky one!
I'd definitely cut out the areas Bing pointed out, you get more radiator surface area that way, and surface area is your friend
Lastly, nice soldering job, and congratulations on finding the dinky little thing that fell off! Those can be a real pain.
- Joined
- Oct 14, 2007
I'd definitely cut out the areas Bing pointed out, you get more radiator surface area that way, and surface area is your friend
+1 to that, if you feel like it before you complete the loop. It would be much more of a pain later on. Since it's not fully assembled I'd pop those rads / fans off and go to town on the extra wood. That way the whole desk will act like a shroud. Having no dead space between your four fans and the quad rad will be awesome for temps!!
- Joined
- Apr 29, 2011
- Location
- Anchorage, Alaska
Wow, everything looks amazing
- Joined
- Aug 29, 2007
- Thread Starter
- #74
It's already been reassembled  But I may do it in the future anyway.....my biggest concern and reason to not cut out the fan holes as bing showed is due to the hit structural rigidity would take in the process....this particle board is cruddy enough as is
Thanks for the comments guys.....it's time to make the decision....I've gotta figure out if I should mod those backplates or not (hummmmm.....).
Thanks for the comments guys.....it's time to make the decision....I've gotta figure out if I should mod those backplates or not (hummmmm.....).
- Joined
- Oct 14, 2007
Hmm....to mod, or not to mod; is that a question?
See what I did there? Yes, I can be corny at times.
See what I did there? Yes, I can be corny at times.

Was holding my breath to hear the outcome of that controller, apparently it turned out to be working as you expected ! 
Glad to see it working fine, was worry those pwm fans will load the 3 channels too much, but its now proven to be ok, thanks for the update Miah !
Edit : Asking permission to steal some of your pics there to be posted at the pwm controller thread, hope you don't mind Miah !

Glad to see it working fine, was worry those pwm fans will load the 3 channels too much, but its now proven to be ok, thanks for the update Miah !

Edit : Asking permission to steal some of your pics there to be posted at the pwm controller thread, hope you don't mind Miah !
Last edited:
- Joined
- Aug 29, 2007
- Thread Starter
- #78
No problem bing, feel free 
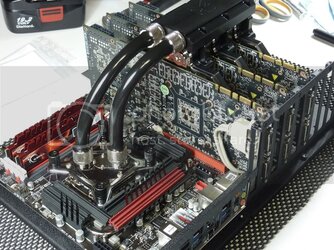
The rig is up and running
The CPU is stress testing right now about 20C cooler than on air (mid 50s at 4.6GHz). This seems to support my theory that the CPU block would get plenty of flow....but I have more testing to know for sure.
Here are a few more pics to bring you all up to speed.
I did these modifications to the backplate:

But these four screws were still in the way and making the backplate bulge....

so I could have looked for some with smaller heads to use instead (but I didn't find any in my shop), or I could cut the backplate to try to allow them space...this is the route I went, but the backplate got a bit chewed up in the process. Oh well, it wasn't meant to be
So, the GPU block now looks like this:


And my 1st assembly of the system with water cooling gear looked like this.


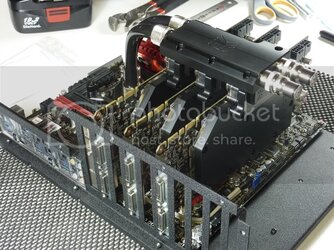
I had been planning to use an X-Fi soundcard for this build....


But apparently, the EK SLI bridge prevents the use of normal height PCI/PCIe cards
I may remove the bridge later and use normal SLI fitting instead, but for now, I'll just use onboard audio.


As I mentioned earlier, the fans are all working well, and I'm getting a reading of 400RPM at minimum (and virtually silent), and 2600RPM at full tilt


The rig is up and running
The CPU is stress testing right now about 20C cooler than on air (mid 50s at 4.6GHz). This seems to support my theory that the CPU block would get plenty of flow....but I have more testing to know for sure.
Here are a few more pics to bring you all up to speed.
I did these modifications to the backplate:
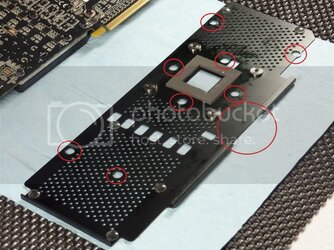
But these four screws were still in the way and making the backplate bulge....
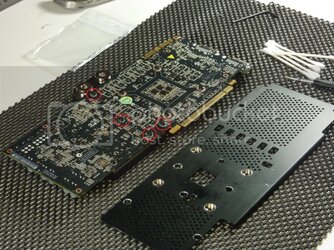
so I could have looked for some with smaller heads to use instead (but I didn't find any in my shop), or I could cut the backplate to try to allow them space...this is the route I went, but the backplate got a bit chewed up in the process. Oh well, it wasn't meant to be
So, the GPU block now looks like this:
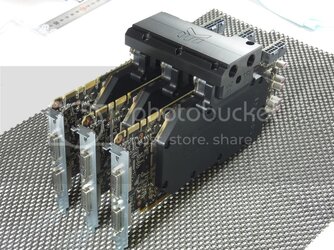
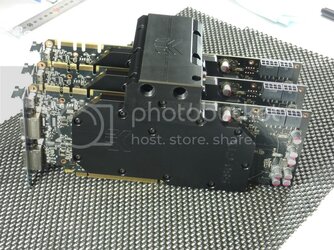
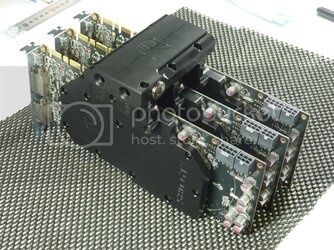
And my 1st assembly of the system with water cooling gear looked like this.
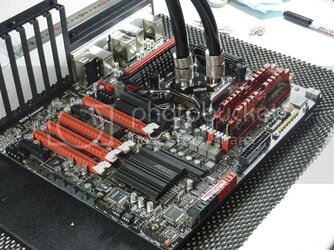
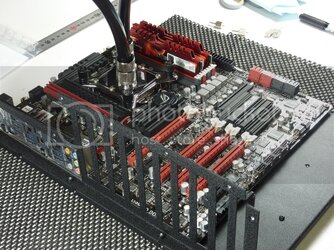
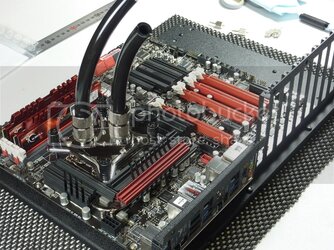
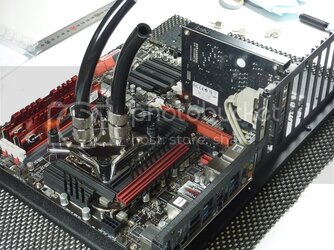
I had been planning to use an X-Fi soundcard for this build....
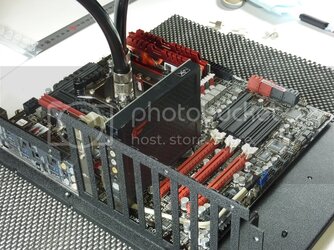
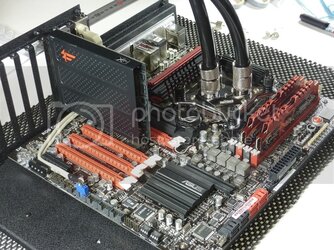
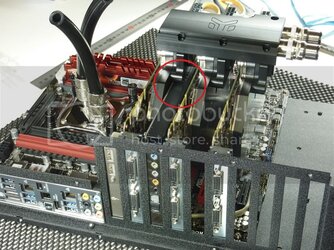
But apparently, the EK SLI bridge prevents the use of normal height PCI/PCIe cards
I may remove the bridge later and use normal SLI fitting instead, but for now, I'll just use onboard audio.
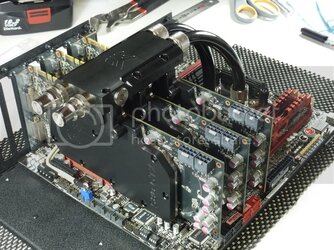
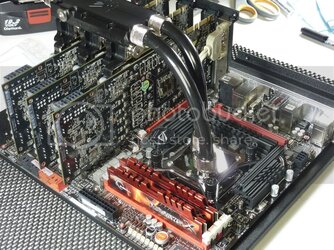
As I mentioned earlier, the fans are all working well, and I'm getting a reading of 400RPM at minimum (and virtually silent), and 2600RPM at full tilt
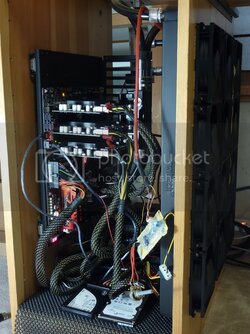
Last edited:
Thanks. 
About your concern on the board rigidity, I think with those 12 fans secured & installed, they will actually enhance the whole board stiffness, cause fan's frames is quite rigid/stiff and will prevent that particle board from deforming like twisting and etc.
Also its well known that particle board weakness is when exposed to relatively high humidity through those cuts, sometimes they will deform quite badly, usually the will twist a bit if its not secured properly.
Yeah, it will be quite troublesome if they've been assembled, may be in the future when you're going to clean them.

It's already been reassembledBut I may do it in the future anyway.....my biggest conceern and reason to not cut out the fan holes as bing showed is due to the hit structural rigidity would take in the process....this particle board is cruddy enough as is

About your concern on the board rigidity, I think with those 12 fans secured & installed, they will actually enhance the whole board stiffness, cause fan's frames is quite rigid/stiff and will prevent that particle board from deforming like twisting and etc.
Also its well known that particle board weakness is when exposed to relatively high humidity through those cuts, sometimes they will deform quite badly, usually the will twist a bit if its not secured properly.

Yeah, it will be quite troublesome if they've been assembled, may be in the future when you're going to clean them.
Last edited:
- Joined
- Mar 27, 2011
- Location
- Soviet Mexico
Is the top of the desk solid? or particle board aswell?
personally I would probably just go at it and cut the stuff out and see how it does. If it really weakens the side some rip two pieces of wood about the width of your radiators. Length from the top to the bottom of the compartment, minus about the thickness of a third board of standard cabinetry furniture size (usually about 3/4" in size 11/16" sanded grade). Cut a third board that would go to the front of the compartment to the back. The third board screws into the top of the other two and provides a solid point to screw into. The other two boards would go vertical, one in the front of the compartment one in the back along the radiators. Probably want to throw a few nails or screw in as they meet the side with the holes just to keep it clean and from bowing. But that should be more than enough to take some real serious abuse.
If you want me to draw it up for yah tell me.
Finally all the finish carpentry and cabinetrys paying off again
Similar threads
- Replies
- 2
- Views
- 1K
- Replies
- 108
- Views
- 6K
