• Welcome to Overclockers Forums! Join us to reply in threads, receive reduced ads, and to customize your site experience!

New build for a water chiller! 1/3Ton (1/2Ton TXV)

Overclockers is supported by our readers. When you click a link to make a purchase, we may earn a commission. Learn More.
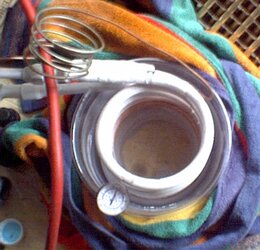
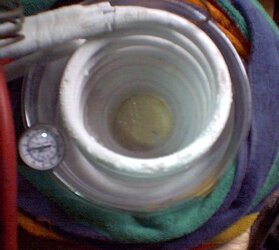
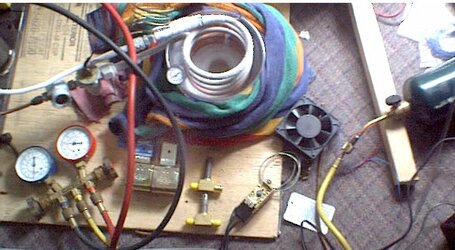
Todays record on a test set up chiller -34C loaded with warm water (Which was then very frozen water) Pics to follow when the dammed batteries are charged!

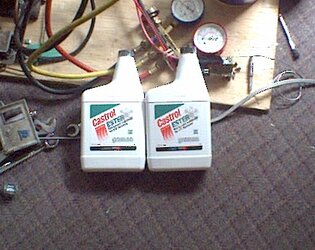
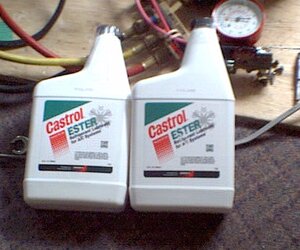
As to the main project I have ordered two units of POE oil so 2 quarts total. I have been talking with an engineer and I may be ably to safely use Methanol Alcohol to flush and clean the compressor! Just must be sure to vacuum it good and long. The test coil/TXV pair that has reached -34 on the test rig well be put to use on some thing ells as the coil did not come out the way I wanted it but performs very well.
 
Well so far the trend of good fortune hath provided me with a thermostat :) and some future building materials. I bought the oil and just awaiting its arrival along with some other parts.

So fare my second rig I built out of desperation to see frost has been holding -1 temps during the night when off and going down to -40C when running with only some water as a load, pull down is stupidly fast :D I charged the batteries on my cam so I can give pics of the thermostat but due to the time I can't run the test plant, but will get some money shots of it for you all tomorrow.


June 13th 2006
As to the main project I have ordered two units of POE oil, so 2 quarts total. I have been talking with an engineer and I may be ably to safely use Methanol Alcohol to flush and clean the compressor! Just must be sure to vacuum it good and long. The test coil/TXV pair that has reached -34 on the test rig well be put to use on some thing ells as the coil did not come out the way I wanted it but performs very well. I have ordered another solenoid valve for the 24V coil & I am sure I can put the 3/8th Valve to good use or resell it I have all so acquired a Lot of CR-032 Sporlan filter/dryers so this will help with a great many builds and to pre-dry R-290 when charging new systems. I found a disposed water cooler and grabbed it in hopes it was functioning, how ever there seems to be a problem with it, at best it is just a plugged cap tube so I can salvage the compressor, at worst I got some good insulation and a thermostat which to drive the solenoid valve with, along with a nice new Ranco LP Switch.

So far this whole thing has cost me $433.34 Canadian and that is excluding consumables such as copper tubing and lost refrigerants & Solder!

Wrapped in quotes is a snippet from my work log, when the main project is don I'll create a new clean thread with just the work log.
 

Attachments

  • Thermastat.jpg
    Thermastat.jpg
    42.4 KB · Views: 174
  • Compressor unit.jpg
    Compressor unit.jpg
    79 KB · Views: 175
Last edited:
Now how about some overheads of the test rig?
having trouble getting batteries up there ;) :p
 
lol, nope I'm saving every penny for the project (That and I had a meet and greet to go to for some serious LANing for three days, any case later tomorrow ye shall see thy frost!

Here is a schematic don in Photo studio 2k for the control set up of the main project
 

Attachments

  • Electrical.jpg
    Electrical.jpg
    58 KB · Views: 380
Last edited:
As promised, I recharged the unit fired it up and snapped some pictures for you all :D
 

Attachments

  • Plant with frosty coil.jpg
    Plant with frosty coil.jpg
    97.3 KB · Views: 185
  • Frosted TXV.jpg
    Frosted TXV.jpg
    66.1 KB · Views: 179
  • Starting to pull down.jpg
    Starting to pull down.jpg
    71.8 KB · Views: 192
  • Frosted Coil.jpg
    Frosted Coil.jpg
    74 KB · Views: 180
Here are some slightly better pics of the coil and my new 24V valve :)
 

Attachments

  • Frosted coil + New 24V Valve.jpg
    Frosted coil + New 24V Valve.jpg
    79.3 KB · Views: 175
  • Close up of valve & Coil.jpg
    Close up of valve & Coil.jpg
    82.8 KB · Views: 172
FING Rights! Oil just arrived and my new control wiring worked flawlessly first go! (Thats why it pays to take your time to do things)

So here are the latest picies

I'm still waiting for a shipment of filter dryers that I won on Ebay, but at least now I can get the compressor cleaned out and loaded with oil and seal it up and start with the actual cooling end of it, in the mean time I'll keep playing with this mini Unit.
 

Attachments

  • New electrical control setup.jpg
    New electrical control setup.jpg
    100.1 KB · Views: 177
  • Controls close up.jpg
    Controls close up.jpg
    65.9 KB · Views: 167
  • Solenoid hooked up and working.jpg
    Solenoid hooked up and working.jpg
    79.1 KB · Views: 171
  • Oil 1.jpg
    Oil 1.jpg
    54 KB · Views: 169
  • Oil-2.jpg
    Oil-2.jpg
    51.9 KB · Views: 171
XeonStrikeForce said:
FING Rights! Oil just arrived and my new control wiring worked flawlessly first go! (Thats why it pays to take your time to do things)

So here are the latest picies

I'm still waiting for a shipment of filter dryers that I won on Ebay, but at least now I can get the compressor cleaned out and loaded with oil and seal it up and start with the actual cooling end of it, in the mean time I'll keep playing with this mini Unit.

Think first time I saw PoE oil with plastic.... How are things going with temps?
 
System got to -40 in an Alcohol Water mix with a warm propane bottle as a pull down load, took 10 Minutes to pull down the small test cell @ 2Cups water @ 1/4cup Alcohol with thermal load (20C)

I'm putting in my Air evap to see how the system handles that, then use it was a dehumidifier! way to bloody muggy last couple days!!!!!!!!
 
hehe, no no no! That is for the "real" project :D Now that I have the oil, I vacuumed out the whole compressor assembly while heating it to ensure it was dry, now to flush it with alcohol and redo a deep vac to make sure it is a very happy system :)
 
well I used IsoPropel as a flush and dam was that ever nasty looking when it came out, milky and dirty!, took 4 vac breaks and an all nighter to get all of it out ((4 times with heating the system with a blow drier) and all night at ambient temp) Now it comes to making the Cold side heat exchanger! and I must say I am some what perplexed as to the rout to go to make it.
 

Attachments

  • Flushed Oil 1.jpg
    Flushed Oil 1.jpg
    58.8 KB · Views: 241
  • Flushed Oil 2.jpg
    Flushed Oil 2.jpg
    57 KB · Views: 227
Last edited:
IT LIVES!


Loaded the oil charged with some propane to get it into all the needed parts, crossed my fingers n threw the switch, and bang Frost! ran a bit ruff while the oil worked its way into all the bits but now fires up in a snap nice n smooth :D
 
DOE! nasty oil :(

Seems that the compressor faired well enough :D

Off you go changing things up again :rolleyes: :p J/K

(psst. you can take temps on testing stages ;) )
 
well the oil was thick and I drained and dried that sucker to the max, so I was afraid it wouldn't survive while the new oil worked its way in but it just keeps getting smoother smoother so here's to hoping!

as for the coil I'll be doing it for ever if I try and calculate out every little detail so I'll just do a standard spiral HX!

It will be 4inch OD and 9inches long

as for testing this coil isn't even a test coil, just a load coil to get every thing mixed inside and to enable me to run the condensing plant to get the oil well distributed. Now I need to buy either an MCP650 or 655 as a circulater pump.
 
Coil:
Size 3/8th Inch ( 6.985mm)
Length 9 Inch ( 228.6mm)
Inside Diameter of coil 3 Inch ( 76.2mm)
Loops 22
Loop spacing 1/4 Inch ( 6.35mm)

Shell:
Inside Diameter 5 Inches ( 127mm)
Length 11 Inches ( 279.4mm)
Liquid In/Out ports 1/2 Inch ( 12.7mm)

Theres the coil I shall make for it.
 
Go figure, on the razors edge of finnishing and what happens? You guessed it, life screwes me over!!!!!!!!!! :( they have jacked the rent so this month I have to pack every thing and find some where mor affordable to live.

There are no words to how F**king ****ed I am about this.
 
Well I started to build the coil despite the pending move so close I'm going to Finnish it no matter what.

The coil is a simple spiral type within a shell but I'm adding a liquid line sub cooler right on the coil assembly so that it is highly compact. Be for I try to make any future coils I'm going to have a form made so it doesn't end up as messy looking, how ever the current disarray works to my advantage as to cause lots of turbulence within the shell
 
Back